
Gardening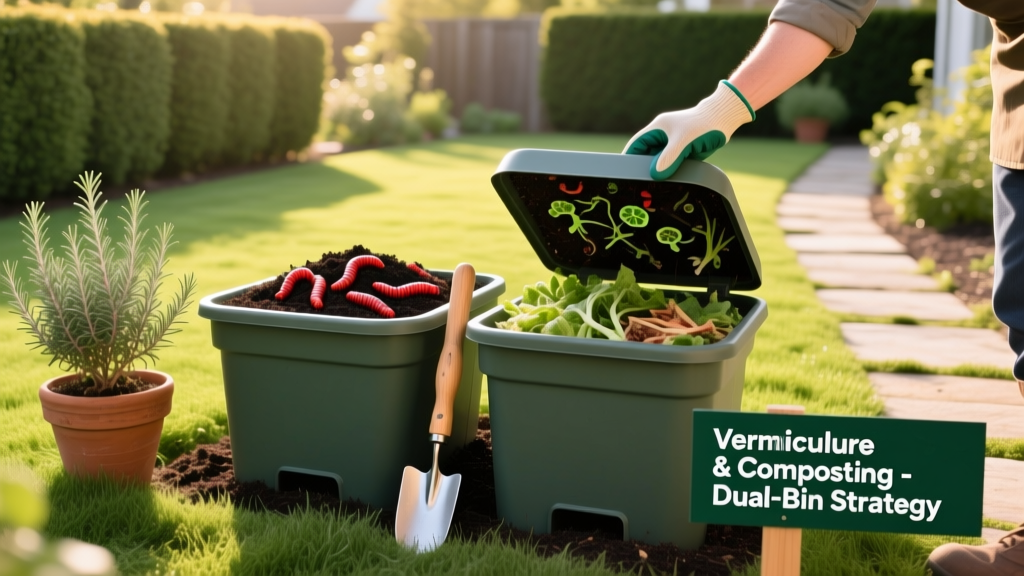
Vermiculture and Composting: The Dual-Bin Soil Amendment Strategy
The Synergy of Two Biological Systems
Relying solely on traditional backyard piles limits the biological complexity of your soil amendments. By integrating vermiculture and composting into a unified dual-bin strategy, homeowners can produce two distinct but complementary soil conditioners: thermophilic compost for bulk organic matter and pathogen reduction, and vermicompost for concentrated microbial inoculants and plant-available nutrients. Thermophilic composting utilizes heat-generating bacteria to break down high-carbon yard waste, while vermiculture leverages the digestive tracts of specific earthworm species to cold-process nitrogen-rich kitchen scraps. Understanding the distinct biological mechanics of each system is the prerequisite for producing premium, garden-ready amendments.
The Biological Distinction
Thermophilic Composting: Driven by mesophilic and thermophilic bacteria. Requires a critical mass to generate internal temperatures of 135°F to 160°F. Ideal for breaking down tough lignins, weed seeds, and bulk yard debris.
Vermiculture: Driven by the gut microbiome of epigeic earthworms. Operates at ambient temperatures (55°F to 77°F). Ideal for processing soft food waste, coffee grounds, and producing castings rich in humic acids and plant growth hormones.
Designing the Dual-Bin Infrastructure
To execute this strategy effectively, you must construct two separate containment systems tailored to their specific biological requirements. Do not attempt to combine worms and hot compost in the same vessel; the thermal mass required for hot composting will be lethal to earthworms.
The Thermophilic Hot Bin
For hot composting to achieve the thermal mass necessary to kill weed seeds and pathogens, the pile must be at least one cubic yard (3 feet wide by 3 feet long by 3 feet high). Construct a three-sided bay using untreated, rough-sawn cedar lumber. Avoid pressure-treated wood entirely, as the copper and arsenic compounds can leach into the compost and harm soil biology. Expect to spend between $80 and $120 on cedar boards and galvanized hardware. Ensure the front of the bay features removable slats to facilitate turning the pile with a pitchfork. The base should sit directly on bare soil to allow drainage and access for native soil microbes.
The Vermiculture Tote
For the worm bin, opacity and surface area are more critical than depth. Worms are photophobic and feed primarily in the top 6 to 8 inches of the bedding. Purchase an 18-gallon opaque plastic storage tote (approximately $12 to $15). Drill 20 to 30 1/8-inch ventilation holes near the top rim for airflow, and six 1/4-inch drainage holes in the bottom. Place the tote on a plastic tray to catch leachate, elevating the bin slightly with wooden blocks to ensure the drainage holes remain unblocked.
Thermophilic Composting: The Hot Pile Protocol
The success of your hot compost hinges on maintaining a Carbon-to-Nitrogen (C:N) ratio between 25:1 and 30:1. If the ratio is too high (excess carbon), microbial activity stalls and the pile remains cold. If the ratio is too low (excess nitrogen), the pile goes anaerobic and off-gasses ammonia.
- Browns (Carbon): Dry autumn leaves, shredded corrugated cardboard, straw, and small woody prunings. (C:N ratios range from 50:1 to 400:1).
- Greens (Nitrogen): Fresh grass clippings, coffee grounds, vegetable scraps, and herbivore manure. (C:N ratios range from 10:1 to 25:1).
Build the pile in a single batch rather than adding materials incrementally. Layer 4 inches of browns, followed by 2 inches of greens, watering each layer until it reaches the consistency of a wrung-out sponge (roughly 50% to 60% moisture by weight). Within 48 to 72 hours, the internal temperature should spike above 130°F. Turn the pile with a pitchfork every 5 to 7 days to introduce oxygen and move the cooler outer materials into the hot center. According to the Environmental Protection Agency, maintaining these elevated temperatures for a minimum of three consecutive days is required to successfully neutralize common plant pathogens and weed seeds.
Vermiculture: Cultivating Eisenia fetida for Black Gold
Not all earthworms are suited for bin cultivation. Never use native nightcrawlers (Lumbricus terrestris), which are deep-burrowing anecic worms that will quickly die in the shallow, confined environment of a tote. You must purchase epigeic (surface-dwelling) composting worms, specifically the Red Wiggler (Eisenia fetida) or the European Nightcrawler (Eisenia hortensis). Sourcing 1 pound of Eisenia fetida (approximately 1,000 worms) typically costs between $40 and $55 from specialized online breeders.
Bedding and Inoculation
Shred unbleached corrugated cardboard or unprinted newsprint into 1-inch strips. Soak the bedding in dechlorinated water (let tap water sit for 24 hours to off-gas chlorine) until fully saturated, then squeeze out the excess moisture. The ideal moisture content for vermiculture is 70% to 80%. Fluff the damp bedding into the tote, filling it to a depth of 6 inches. Add two handfuls of finished thermophilic compost or native garden soil to introduce grit, which the worms require in their gizzards to grind food.
Feeding Rates and Mechanics
Red wigglers can consume roughly half their body weight in organic matter per day under optimal conditions. One pound of worms can process approximately 0.5 pounds of kitchen scraps daily. Bury the food scraps in a different quadrant of the bin each feeding session, covering them completely with 2 inches of bedding to deter fruit flies. As noted by Penn State Extension, avoiding high-acid foods like citrus and alliums (onions, garlic) prevents drastic pH drops that can cause worm die-offs.
Feedstock Compatibility Matrix
Routing the correct organic waste to the correct biological system prevents system failure. Use the following decision matrix to sort your household and yard waste.
| Feedstock Material | Hot Compost Bin | Vermiculture Bin | Processing Notes |
|---|---|---|---|
| Woody Prunings & Twigs | ✔ | ✘ | Chip to <1 inch for hot bin. Worms cannot process lignin. |
| Meat, Dairy & Fats | ✔* | ✘ | *Only in hot bins if core temp exceeds 140°F to kill pathogens. |
| Coffee Grounds & Filters | ✔ | ✔ | Excellent nitrogen source. Rinse filters to reduce acidity for worms. |
| Citrus Peels & Alliums | ✔ | ✘ | D-limonene in citrus and sulfur in alliums are toxic to worms. |
| Weeds with Mature Seeds | ✔ | ✘ | Hot compost kills seeds. Cold vermiculture will sprout them. |
Harvesting, Curing, and Blending
Thermophilic compost typically requires 3 to 6 months to break down, followed by a 1-month curing period where microbial populations stabilize. Vermicompost can be harvested every 4 to 6 months using the light-migration method: dump the bin contents onto a tarp under a bright light, scrape off the top layers of castings as the worms burrow downward to escape the light.
The true power of the dual-bin strategy is revealed during blending. Pure vermicompost is incredibly potent and can overwhelm delicate seedlings if used at 100% concentration. Create a master soil amendment by mixing 2 parts cured thermophilic compost (for bulk structure and moisture retention) with 1 part vermicompost (for microbial density and nutrient availability). Apply this blended amendment as a 1-inch top-dressing to established garden beds in early spring, or incorporate it into potting mixes at a 15% to 20% volume ratio.
Troubleshooting Common Failure Modes
Even meticulously managed systems encounter biological imbalances. Identify and correct these specific failure modes immediately to prevent total system collapse.
Symptom: Hot Bin Smells Like Ammonia
Cause: The C:N ratio has dropped below 20:1. There is an excess of nitrogen-rich greens, and the bacteria are off-gassing the surplus nitrogen as ammonia gas.
Fix: Immediately turn the pile and incorporate 3 to 4 inches of high-carbon browns, such as dry shredded leaves or sawdust. Do not add water until the smell dissipates.
Symptom: Worm Bin is Swarming with Fruit Flies
Cause: Food scraps are exposed to the air, or the bin is overfed, causing food to rot before the worms can process it.
Fix: Bury all new food scraps under at least 2 inches of moist bedding. Reduce feeding rates by 50% for two weeks. Place a layer of damp burlap or a thick sheet of wet newspaper directly on top of the bedding to create a physical barrier against egg-laying flies.
Symptom: Worms are Attempting to Escape the Bin
Cause: The bedding has become too acidic (pH below 6.0) or anaerobic, often due to overfeeding or poor drainage causing the bottom layers to sour.
Fix: Sprinkle 2 tablespoons of pulverized agricultural limestone (calcium carbonate) over the surface to buffer the pH. Gently turn the top 3 inches of bedding to introduce oxygen, and withhold food for 7 days.
Expert Insight: Never discard the liquid leachate that drains from the bottom of your worm bin. Often called 'worm tea,' this liquid is rich in soluble nutrients and beneficial microbes. Dilute it at a 1:10 ratio with dechlorinated water and use it as an immediate foliar spray or soil drench for heavy-feeding crops like tomatoes and peppers.
By maintaining both a thermophilic hot pile and a mesophilic worm bin, you create a closed-loop waste management system that yields structurally diverse, biologically active soil amendments. The hot bin handles the heavy, bulky yard waste and sanitizes the material, while the worm bin refines the delicate kitchen scraps into concentrated biological catalysts. Together, they provide everything your garden soil requires to sustain high-yield, resilient plant growth.

