
Gardening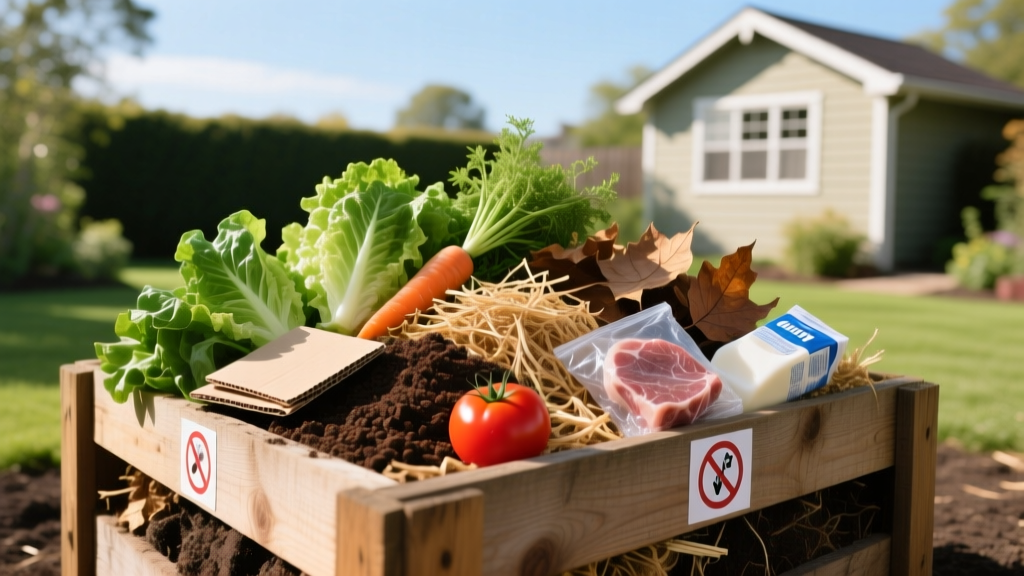
What Goes in a Compost Pile: The Exact Greens, Browns, and Bans Guide
The Biological Engine: Carbon-to-Nitrogen (C:N) Ratios
Understanding what goes in a compost pile requires moving beyond simple 'kitchen scraps and leaves' advice. Composting is a managed aerobic biological process driven by bacteria, fungi, and actinomycetes. These microorganisms require two primary elemental inputs to thrive: carbon (C) for cellular structure and energy, and nitrogen (N) for protein synthesis and reproduction.
The ideal C:N ratio for a rapid, odorless, thermophilic compost pile is between 25:1 and 30:1 by weight. If the ratio is too high (excess carbon), decomposition stalls. If the ratio is too low (excess nitrogen), the pile goes anaerobic, releasing ammonia gas and creating a foul odor. According to Cornell University's Waste Management Institute, balancing these inputs by volume rather than weight is the most practical method for homeowners, generally requiring a 2:1 or 3:1 ratio of browns to greens.
| Material Category | Specific Ingredient | Approximate C:N Ratio (by weight) | Decomposition Speed |
|---|---|---|---|
| Green (Nitrogen) | Fresh grass clippings | 17:1 | Fast (1-3 weeks) |
| Green (Nitrogen) | Vegetable kitchen scraps | 11:1 to 25:1 | Fast (2-4 weeks) |
| Green (Nitrogen) | Coffee grounds (spent) | 20:1 | Moderate (3-5 weeks) |
| Brown (Carbon) | Dry autumn leaves | 40:1 to 80:1 | Moderate (2-6 months) |
| Brown (Carbon) | Wheat straw | 50:1 to 80:1 | Slow (3-6 months) |
| Brown (Carbon) | Pine sawdust | 200:1 to 500:1 | Very Slow (6+ months) |
| Brown (Carbon) | Shredded newspaper | 120:1 to 170:1 | Moderate (2-4 months) |
The 'Yes' List: Identifying Greens and Browns
Nitrogen-Rich Greens (The Accelerators)
Greens are typically moist, fresh, and biologically active. They provide the nitrogen spike needed to ignite microbial reproduction. However, adding too many greens at once creates a compacted, waterlogged mass that restricts oxygen flow.
- Fruit and vegetable peels: Chop melon rinds and squash skins into 1-inch pieces. Whole rinds can take months to break down and may harbor fruit fly larvae.
- Coffee grounds and tea leaves: Despite their brown color, spent coffee grounds are a 'green' input with a C:N ratio of roughly 20:1. Remove tea bags unless they are explicitly certified plastic-free, as many commercial tea bags contain polypropylene sealing threads that will not decompose.
- Fresh grass clippings: Never add thick, wet mats of fresh grass. Spread them on a tarp to dry for 24 hours before adding them to the pile to prevent anaerobic clumping and putrefaction.
Carbon-Rich Browns (The Bulk and Energy)
Browns provide the caloric energy for microbes and the physical structure to maintain air pockets (porosity) within the pile. Without adequate browns, the pile collapses and suffocates.
- Dry leaves: The ultimate brown. Shred them with a lawnmower before adding. Whole leaves mat together, creating a waterproof barrier that blocks oxygen and moisture.
- Cardboard and paper: Use only plain, uncoated corrugated cardboard or brown paper bags. Remove all plastic tape and shipping labels. Shred into 2-inch strips and moisten before layering.
- Wood chips and twigs: Limit wood chips to 10% of the total pile volume. Their high lignin content takes over a year to break down. Use them primarily as a base layer at the bottom of the bin to promote drainage and airflow.
⚠️ The 'Never' List: Toxins, Pathogens, and Pests
Adding the wrong materials can introduce persistent pathogens, attract rodents, or chemically poison your finished soil amendment. Never add the following to a backyard compost pile:
- Meat, dairy, and bones: These attract scavengers (rats, raccoons) and harbor putrefactive bacteria that produce hydrogen sulfide (rotten egg gas).
- Pet waste (dog/cat feces): Contains dangerous zoonotic parasites like Toxocara canis (roundworm) and Toxoplasma gondii. Backyard piles rarely sustain the 145°F required for three consecutive days to neutralize these pathogens.
- Treated lumber and sawdust: Pressure-treated wood contains copper, chromium, and arsenic (CCA) or alkaline copper quaternary (ACQ). These heavy metals will persist in your compost and stunt plant growth.
- Pernicious weeds and diseased plants: Bindweed, creeping charlie, and plants infected with powdery mildew or blight should be bagged and trashed. Most home piles fail to reach the 131°F to 160°F thermophilic range required to kill weed seeds and fungal spores.
The 'It Depends' Zone: Edge Cases and Myths
Many composting guides offer blanket bans on specific items that are actually safe under the right conditions. Here is the scientific reality behind common composting myths:
Citrus Peels and Onions
The Myth: Citrus and onions will kill your compost pile.
The Reality: Citrus peels contain d-limonene, a natural insecticide that can harm earthworms in vermicomposting (worm bin) systems. However, in a standard outdoor thermophilic pile, soil bacteria easily break down d-limonene. The real issue is physical: thick orange peels and whole onions decompose very slowly. The Fix: Chop citrus peels and onion skins into half-inch pieces before adding.
'Compostable' Bioplastics and PLA Cutlery
The Myth: If it says 'compostable,' it goes in the backyard bin.
The Reality: Most bioplastics are made from Polylactic Acid (PLA). PLA requires sustained industrial composting temperatures of 140°F to 160°F and specific microbial strains to hydrolyze. A backyard pile will not break down PLA cups or forks; they will simply fragment into microplastics over several years. The Fix: Only compost items certified 'Home Compostable' (e.g., certain untreated wood-pulp items or specific PHA-based bioplastics), and send PLA to municipal facilities.
Step-by-Step Assembly: Building a Thermophilic 3x3 Pile
To achieve the hot composting phase (131°F+), which rapidly breaks down materials and kills weed seeds, your pile must meet critical mass requirements. According to the EPA's composting basics guidelines, a minimum volume of 27 cubic feet (3 feet wide x 3 feet long x 3 feet high) is required to retain internal heat.
- The Base Layer (Aeration): Lay down a 4-inch layer of coarse twigs, stalks, or wood chips. This prevents the bottom of the pile from becoming waterlogged and allows ambient air to be drawn upward.
- The Brown Layer (Carbon): Add a 6-inch layer of shredded dry leaves or straw.
- The Green Layer (Nitrogen): Add a 2-to-3-inch layer of kitchen scraps and fresh grass clippings. Sprinkle a thin dusting of garden soil or finished compost over this layer to inoculate it with native microbes.
- The Moisture Check: Water the layers lightly as you build. The pile should feel like a wrung-out sponge.
- Repeat and Cap: Alternate 6-inch brown and 3-inch green layers until you reach 3 feet in height. Always cap the top of the pile with a final 4-inch layer of browns to insulate the heat, deter fruit flies, and absorb odors.
💡 The Moisture Squeeze Test
Microbes require 40% to 60% moisture content. Put on a gardening glove, grab a handful of compost from the center of the pile, and squeeze it tightly. If no water appears, the pile is too dry (add water while turning). If water streams out, it is too wet (add dry shredded cardboard or leaves). If one or two drops emerge between your fingers, the moisture level is perfect.
Troubleshooting Matrix: Diagnosing Pile Failures
Even with the correct ingredients, environmental variables can disrupt the biological process. Use this diagnostic matrix to correct common pile failures.
| Symptom | Probable Cause | Corrective Action |
|---|---|---|
| Pile smells like ammonia or rotten eggs | Too much nitrogen (low C:N ratio) or lack of oxygen (anaerobic conditions). | Turn the pile immediately to introduce oxygen. Mix in 3 parts dry shredded leaves or cardboard to absorb excess moisture and balance carbon. |
| Pile is cool and decomposition has stalled | Too much carbon (high C:N ratio), insufficient moisture, or pile volume is too small. | Check moisture with the squeeze test. If dry, water the pile while turning. If moisture is fine, mix in nitrogen-rich inputs like blood meal, alfalfa pellets, or fresh grass clippings. |
| Center of the pile is dry and gray/ashy | Actinomycetes (beneficial bacteria) have taken over due to severe moisture deficiency. | Break apart the dry clumps with a pitchfork. Soak the core with a hose while turning, ensuring water penetrates the center. Cap with browns to retain moisture. |
| Pile is swarming with black soldier flies or houseflies | Kitchen scraps are exposed on the surface, or the pile is too wet and acidic. | Bury all fresh food scraps at least 8 inches deep into the center of the pile. Always cover the top with a thick layer of dry browns. Add crushed eggshells to buffer acidity. |
Mastering what goes in a compost pile is ultimately about managing a microscopic ecosystem. By strictly monitoring your C:N inputs, maintaining physical porosity through proper particle sizing, and actively managing moisture and temperature, you transform household waste into a pathogen-free, nutrient-dense soil amendment that drastically improves garden vitality and water retention.

