
Gardening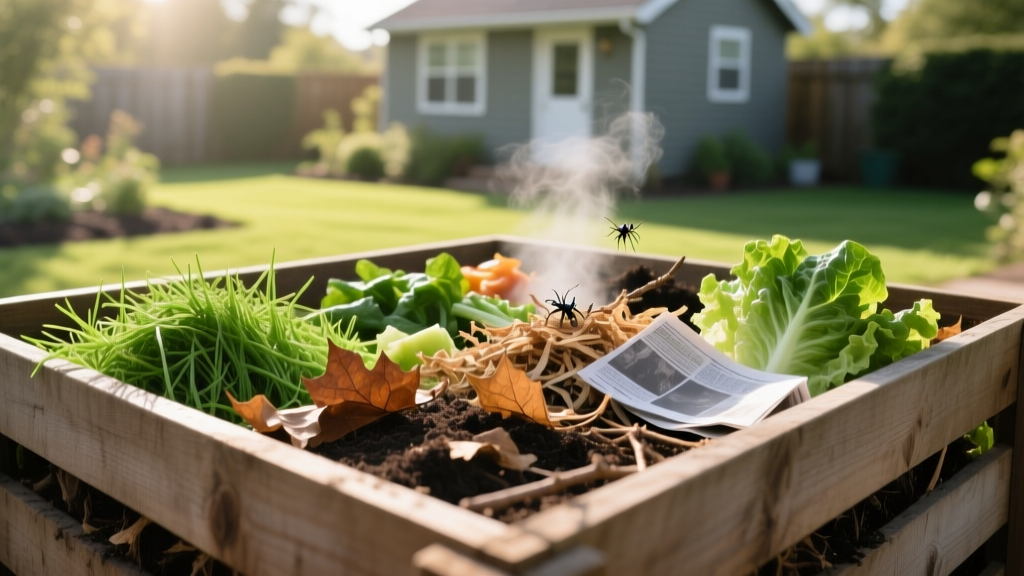
What Goes in a Compost Bin: The Ultimate Greens & Browns Guide
The Core Rule: Balancing Greens and Browns
Determining what goes in a compost bin comes down to a simple biological equation: microorganisms require a precise balance of carbon for energy and nitrogen for protein synthesis. When you build a compost pile, you are essentially managing a microscopic livestock herd. If you feed them the wrong diet, the system stalls, smells, or attracts pests.
According to the EPA's composting guidelines, the ideal Carbon-to-Nitrogen (C:N) ratio for active decomposition is between 25:1 and 30:1 by weight. Materials high in carbon are categorized as "browns," while materials high in nitrogen are "greens." Understanding these categories is the first step to producing dark, crumbly humus in 3 to 6 months rather than waiting years.
💧 The Moisture Check: Before adjusting your greens and browns, check your moisture. The ideal compost pile should contain 40% to 60% moisture. Grab a handful of compost (wearing gloves) and squeeze it. It should feel like a wrung-out sponge, yielding only one or two drops of water. If water streams out, it is too wet (add dry browns). If it crumbles and falls apart, it is too dry (add water or wet greens).
Exactly What Goes in a Compost Bin: The Master List
Not all organic matter decomposes at the same rate. The Cornell Waste Management Institute provides extensive data on the specific C:N ratios of common household and yard wastes. Use this matrix to balance your bin accurately.
| Material Category | Specific Items | Approx. C:N Ratio | Preparation Tip |
|---|---|---|---|
| Greens (Nitrogen) | Fruit and vegetable scraps, coffee grounds, tea bags (staple removed) | 15:1 to 25:1 | Chop into 1-inch pieces to accelerate breakdown. |
| Greens (Nitrogen) | Fresh grass clippings, fresh weeds (without seeds) | 15:1 to 20:1 | Let grass clippings dry for 24 hours before adding to prevent anaerobic matting. |
| Browns (Carbon) | Dry autumn leaves, pine needles, straw, hay | 50:1 to 80:1 | Run over dry leaves with a lawnmower to shred them before binning. |
| Browns (Carbon) | Corrugated cardboard, newspaper, paper egg cartons | 200:1 to 350:1 | Remove plastic tape. Soak cardboard in water and tear into 2-inch strips. |
| Browns (Carbon) | Sawdust (untreated wood only), wood chips | 300:1 to 500:1 | Use sparingly. Sawdust clumps easily; mix thoroughly with coarse greens. |
Particle Size: The Overlooked Catalyst
Knowing what goes in a compost bin is only half the battle; how you prepare those materials dictates your timeline. Microbes attack organic matter from the outside in. By increasing the surface area, you exponentially increase the speed of decomposition.
- The 1-to-2 Inch Rule: For standard stationary bins and tumblers, chop all kitchen scraps, twigs, and cardboard into pieces no larger than 2 inches.
- Wood and Branches: Anything thicker than a pencil should be run through a wood chipper. Whole branches will take 2 to 3 years to break down and will create unwanted air pockets that dry out the core of the pile.
- Eggshells: While eggshells do not provide nitrogen or carbon, they add vital calcium to the finished compost. However, they decompose incredibly slowly. Crush them into a fine powder using a mortar and pestle or a blender before adding them to the bin.
The "Never Add" List and Dangerous Edge Cases
Certain materials introduce pathogens, persistent weeds, or chemical toxins that ruin your compost and threaten your garden soil.
⚠️ Pathogen Warning: Never add dog or cat feces to a standard home compost bin. Carnivore waste contains dangerous pathogens, including the roundworm Toxocara canis and Toxoplasma gondii. Home compost piles rarely sustain the 145°F (63°C) temperature required for three consecutive days to neutralize these parasites. Stick to herbivore manure (rabbit, horse, chicken) which is safe when properly hot-composted.
Materials to Strictly Avoid:
- Meat, Dairy, and Oils: These attract rodents, raccoons, and flies. They also create anaerobic conditions that produce foul-smelling butyric acid.
- Diseased Plants: Tomatoes with blight or squash with powdery mildew should be burned or bagged for municipal yard waste. Unless you are meticulously monitoring a hot compost pile with a long-stemmed thermometer, the fungal spores will survive and reinfect your garden next season.
- Treated Wood or Glossy Paper: Pressure-treated lumber contains copper, chromium, and arsenic. Glossy magazines and colored junk mail often contain heavy metal-based inks and plastic coatings that do not break down.
- Persistent Weeds: Bindweed, Bermuda grass rhizomes, and creeping Charlie can survive standard composting temperatures. If these are in your yard waste, solarize them in a sealed black plastic bag in the sun for four weeks before adding the dead matter to the bin.
Bin-Specific Adjustments: Tumbler vs. Open Pile
The physical design of your compost system slightly alters what you should add and how you should layer it.
Enclosed Tumblers: Because tumblers are sealed and retain heat and moisture exceptionally well, they are highly prone to going anaerobic if overloaded with wet greens. When using a tumbler, heavily bias your recipe toward dry browns (a 3:1 brown-to-green ratio by volume). Always add a handful of finished compost or garden soil when starting a new tumbler batch to inoculate it with the necessary thermophilic bacteria.
Open Stationary Bins: These rely on passive airflow and earthworm activity. You can use a 2:1 brown-to-green ratio by volume. The bottom layers should consist of coarse, bulky browns like small twigs or un-shredded corn stalks to create a "floor" that allows air to circulate upward from the soil.
Troubleshooting Your Compost Diet
If your bin is struggling, use this diagnostic framework to adjust what goes in your compost bin moving forward.
| Symptom | Underlying Cause | Immediate Fix |
|---|---|---|
| Smells like ammonia | Excess nitrogen (too many greens). Microbes are releasing unused nitrogen as ammonia gas. | Turn the pile and mix in 3 parts dry, shredded leaves or cardboard. |
| Smells like sulfur or rotten eggs | Anaerobic conditions. The pile is too wet or compacted, starving bacteria of oxygen. | Turn the pile vigorously with a pitchfork. Add coarse wood chips to create air pockets. |
| Pile is not heating up | Lack of nitrogen, lack of moisture, or insufficient mass (pile is under 3x3x3 feet). | Add fresh grass clippings or a commercial compost activator. Water the pile as you turn it. |
| Swarms of fruit flies | Exposed kitchen scraps on the surface of the pile. | Always bury new kitchen scraps at least 6 inches deep into the center of the pile and cap with browns. |
"Composting is not merely about waste disposal; it is about soil building. The quality of the humus you produce is directly tied to the diversity of the organic matter you feed the system. A bin fed only grass clippings and coffee grounds will never match the biological complexity of a bin fed autumn leaves, vegetable scraps, straw, and wood chips."
Final Harvesting and Curing
Once you have mastered what goes in a compost bin and maintained the correct ratios, your materials will transform into a dark, earthy-smelling substance. Stop adding new materials to the bin once it is 80% full, and allow it to "cure" for 3 to 4 weeks. During the curing phase, mesophilic bacteria and fungi finish breaking down complex lignins, and the pH stabilizes near neutral (6.5 to 7.0). Sift the finished compost through a 1/2-inch hardware cloth screen before applying it to your garden beds, returning any large, undecomposed chunks to the active bin for another cycle.

