
Grass Types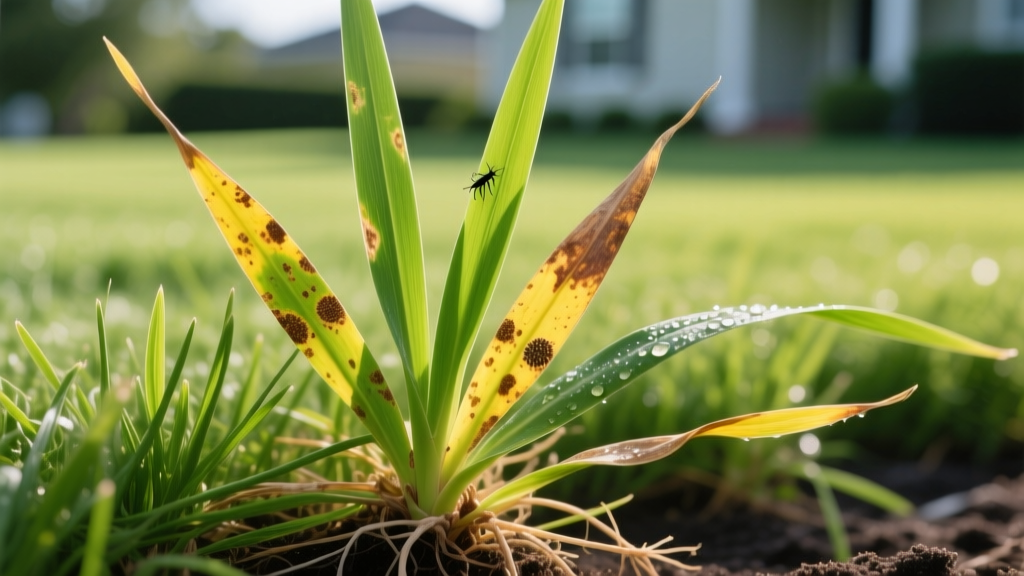
Visual Lawn Diagnostics: Using Pics of Bermuda Grass to Spot Disease
Accurate warm-season turf management begins with precise visual identification. Before applying a $65 bottle of systemic fungicide or broadcasting a 16-4-8 synthetic fertilizer, you must confirm the exact stressor affecting your lawn. Taking and systematically analyzing pics of bermuda grass (Cynodon dactylon) allows homeowners and agronomists to track disease progression, differentiate between nutrient deficiencies, and identify microscopic pest damage. According to turf pathology experts at NC State TurfFiles, misdiagnosis of turf disease leads to over $100 million in wasted chemical applications annually in the United States. By building a visual diagnostic framework, you can eliminate guesswork and apply targeted, cost-effective treatments.
Establishing the Visual Baseline for Healthy Cultivars
To identify what is wrong with your lawn, you must first understand what optimal health looks like. Hybrid bermudagrass cultivars like Tifway 419, Celebration, and Latitude 36 exhibit distinct visual characteristics when thriving. Healthy bermuda grass reflects a deep, blue-green hue, driven by a high concentration of chlorophyll a and b. The leaf blades should be rigid, upright, and free of necrotic spotting.
Optimal Baseline Metrics for Hybrid Bermuda
- Soil pH: 6.0 to 6.5 (crucial for nutrient uptake visibility)
- Mowing Height: 0.5 to 1.5 inches (scalping below 0.5 inches exposes brown thatch, mimicking disease)
- Nitrogen Requirement: 2 to 4 lbs per 1,000 sq ft annually
- Canopy Density: Should completely obscure the soil surface and thatch layer when viewed from a standing position
When capturing baseline pics of bermuda grass, shoot during mid-morning (around 9:00 AM) after the dew has dried but before the harsh midday sun washes out the color palette. This lighting provides the most accurate representation of the turf's true chlorophyll density.
Fungal Pathogen Identification via Photographic Evidence
Warm-season turf is highly susceptible to specific fungal pathogens during the transition periods of spring and fall, as well as the high-humidity peaks of summer. When comparing your lawn photos to established pics of bermuda grass disease databases, look for the specific lesion patterns and boundary lines detailed below.
| Disease | Visual Signature in Photos | Peak Trigger Conditions | Targeted Chemical Control |
|---|---|---|---|
| Spring Dead Spot | Distinct, sunken circular patches (6 inches to 3 feet) of bleached, dead grass with dark, necrotic roots visible upon close-up inspection. | Fall infection (soil temps 70°F-80°F); symptoms appear at spring green-up. | Preventative fall application of Pentathlon DF or Velista (penthiopyrad). |
| Brown Patch (Rhizoctonia solani) | Irregular circular patches with a dark "smoke ring" border in early morning. Individual blades show tan, irregular lesions with dark brown margins. | Nighttime temps > 68°F with > 10 hours of leaf wetness. | Heritage SC (azoxystrobin) or Banner MAXX (propiconazole) at 14-day intervals. |
| Dollar Spot | Small, silver-dollar-sized (1-3 inches) straw-colored spots that may coalesce. Cobweb-like mycelium visible in morning dew. | Low soil nitrogen combined with high humidity and temps 60°F-85°F. | Concert (chlorothalonil + propiconazole) or 26/32 Fungicide SC. |
Diagnostic Warning: Do not confuse drought stress with fungal die-off. Drought-stressed bermuda grass folds its leaf blades inward (a mechanism to reduce transpiration) and turns a dull, purplish-blue before browning uniformly. Fungal diseases present in localized, expanding geometric patterns. Always check soil moisture with a 6-inch probe before applying fungicides.
Decoding Nutrient and Environmental Stress in Photos
Lighting conditions heavily dictate how nutrient deficiencies appear in pics of bermuda grass. Iron chlorosis and nitrogen deficiency both cause yellowing, but their photographic signatures are fundamentally different when analyzed closely.
Iron Chlorosis vs. Nitrogen Deficiency
Iron is immobile within the plant. When bermuda grass suffers from iron chlorosis—often triggered by high soil pH (>7.0) locking up iron availability—the newest leaves at the top of the canopy turn bright yellow or white, while the veins remain green (interveinal chlorosis). In photographs, this creates a stark, high-contrast striping effect on the youngest blades.
Conversely, nitrogen is highly mobile. A nitrogen-deficient lawn will pull nutrients from older leaves to support new growth. In photos, this presents as a uniform, pale green or yellowish cast across the entire canopy, starting from the older, lower leaves. The visual transition is gradual and lacks the sharp vein-contrast of iron deficiency.
Actionable Fix: If your photos indicate iron chlorosis, apply a foliar spray of chelated iron (Fe-EDDHA or Fe-DTPA) at a rate of 2 to 4 ounces per 1,000 square feet. Products like Feature 6-0-0 provide rapid greening within 48 hours without the excessive vegetative flush associated with heavy nitrogen applications. For nitrogen deficiency, apply a quick-release urea or ammonium sulfate at 0.5 lbs of actual nitrogen per 1,000 sq ft.
Macro Photography Techniques for Turf Pests
Warm-season pests like the hunting chinch bug (Blissus insularis) and the fall armyworm (Spodoptera frugiperda) are notoriously difficult to spot with the naked eye. Modern smartphone macro lenses (such as the built-in macro modes on the iPhone 15 Pro or Samsung Galaxy S24 Ultra) allow homeowners to capture diagnostic pics of bermuda grass pests directly in the field.
- Identify the Damage Boundary: Pests typically feed at the leading edge of the damage. Locate the exact border where green, healthy grass meets yellowing or chewed turf.
- Part the Canopy: Use your fingers to gently separate the grass blades down to the thatch and soil line. Chinch bugs reside in the thatch layer, not on the tips of the blades.
- Deploy the Flush Test: If macro photos reveal chewed leaf margins but no visible insects, mix 2 tablespoons of lemon-scented dish soap in 2 gallons of water. Drench a 1-square-foot area at the damage boundary. Wait 3 minutes, then photograph the soil surface as armyworms and cutworms are forced to the surface.
- Capture the Diagnostic Shot: Position your smartphone camera 2 to 4 inches from the thatch layer. Tap the screen to lock focus on the insect's distinct markings (e.g., the white hourglass shape on an adult chinch bug's back) before capturing the image for expert verification.
Building a Longitudinal Photo Library for Your Lawn
A single photograph provides only a snapshot in time. To master warm-season grass care, you must build a longitudinal photo library. Agricultural extension offices, such as those managed by Texas A&M AgriLife Extension, heavily rely on time-series imagery to track the efficacy of turf management programs.
Establish five permanent GPS-marked "photo stations" in your yard. Place a standard 12-inch ruler vertically into the soil at each station to provide scale and thatch-depth context. Photograph these exact spots from the same angle and height on the 1st and 15th of every month from April through October. This practice allows you to objectively measure canopy density recovery after aeration, track the exact spread rate of a suspected fungal infection, and verify whether your pre-emergent herbicide application successfully halted crabgrass germination. By treating your pics of bermuda grass as scientific data rather than casual snapshots, you transition from reactive lawn repair to proactive turf agronomy.

