
Grass Types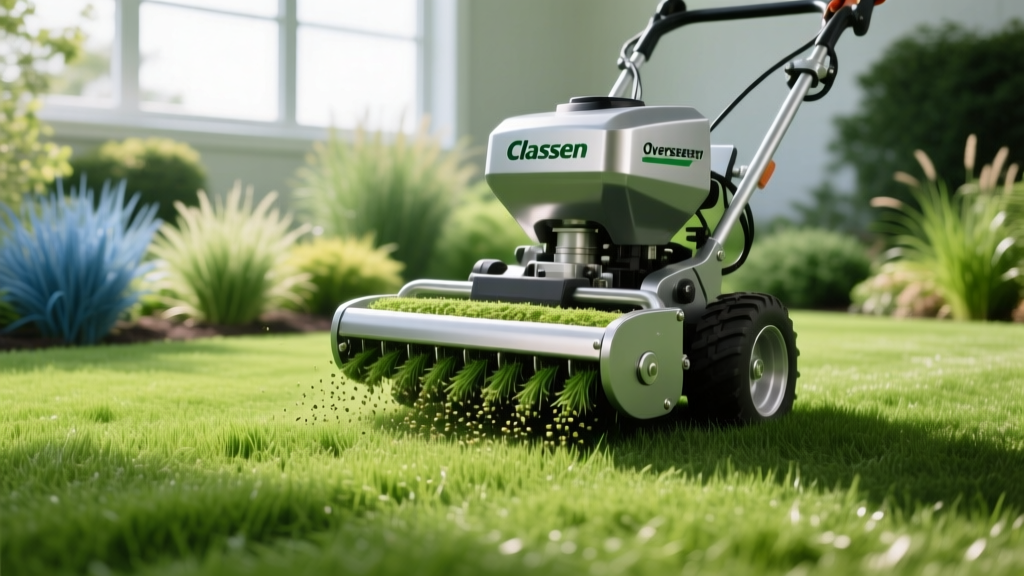
How to Use a Classen Overseeder for Flawless Lawn Establishment
Why Choose a Classen Overseeder for Seed Establishment?
Establishing a new lawn or renovating a thinning turf canopy requires more than just scattering seed over existing grass. Broadcast spreading leaves seed vulnerable to wind, washout, and bird predation, resulting in germination rates often below 30%. In contrast, mechanical slice seeding physically cuts through the thatch layer and places seed directly into the soil profile. According to Penn State Extension, achieving direct seed-to-soil contact is the single most critical variable for successful cool-season turf establishment. The Classen overseeder, particularly the iconic RS-20 walk-behind and the heavier commercial Pro series, remains the industry standard for creating precise, uniform seed furrows that maximize germination and anchor the seed against erosion.
Rental vs. Purchase Economics (2026 Market Data):
For homeowners tackling a single renovation, renting a Classen walk-behind from equipment yards or big-box stores typically costs between $85 and $120 per day. For landscaping professionals or property managers managing multiple acres, purchasing a used RS-20 ranges from $900 to $1,500, while new commercial-grade Classen Pro units exceed $3,500. The break-even point for ownership is generally three to four rental days.
For homeowners tackling a single renovation, renting a Classen walk-behind from equipment yards or big-box stores typically costs between $85 and $120 per day. For landscaping professionals or property managers managing multiple acres, purchasing a used RS-20 ranges from $900 to $1,500, while new commercial-grade Classen Pro units exceed $3,500. The break-even point for ownership is generally three to four rental days.
Machine Anatomy: The Classen RS-20 and Pro Series
Understanding the mechanical advantages of a Classen unit is essential before pulling the starter cord. Unlike aerators that pull plugs, or dethatchers that use flexible tines, a Classen overseeder utilizes a rotating reel of rigid, fluted steel blades.
- Cutting Width: Standard walk-behinds feature a 20-inch cutting path, allowing for efficient coverage of standard suburban lots without the maneuverability issues of 30-inch tractor-mounted units.
- Blade Spacing: Blades are typically spaced 1 inch apart on the reel. This spacing ensures that a single pass creates a dense grid of furrows without overly tearing the existing turf mat.
- Hopper Capacity: The standard RS-20 holds approximately 50 lbs of seed, while heavier commercial models can accommodate up to 85 lbs, reducing refill downtime on large properties.
- Fluted Blade Design: The blades are not flat; they feature a fluted or scalloped edge that aggressively fractures compacted soil at the bottom of the slit, creating a micro-trench with loose soil at the base for optimal seed nesting.
The 5-Step Calibration and Seeding Protocol
Operating a slice seeder without proper calibration is the fastest way to ruin a lawn. Follow this exact protocol to ensure optimal seed placement.
Step 1: Depth Calibration (The 1/4-Inch Rule)
The most common failure mode for DIY overseeding is setting the blades too deep. Cool-season grasses like Kentucky Bluegrass and Tall Fescue require light to trigger germination and should never be buried deeper than 1/4 to 1/2 inch. If the Classen's depth lever is set to 1 inch or deeper, the machine will act like a rototiller, trenching the lawn, severing established root systems, and burying the seed too deep to emerge.
Calibration Test: Lower the blades onto a bare patch of soil or a concrete driveway. The blades should just barely scratch the concrete. When moved to the lawn, the weight of the machine will naturally push the blades 1/4 inch into the soil and thatch. Adjust the depth lever until you see soil disruption, but not deep trenching.
Step 2: Hopper Gate and Seed Rate Matrix
The hopper gate controls the flow of seed into the drop zone behind the blade reel. Because seed sizes vary drastically (Kentucky Bluegrass is tiny; Tall Fescue is large), the gate setting must be matched to the species. Always test the drop rate on a 10x10 ft (100 sq ft) test square to verify your output before committing to the whole lawn.
| Grass Species | New Lawn Rate (lbs/1k sq ft) | Overseed Rate (lbs/1k sq ft) | Approx. Gate Setting |
|---|---|---|---|
| Tall Fescue | 8 - 10 | 4 - 6 | 3 - 4 (Medium) |
| Kentucky Bluegrass | 2 - 3 | 1 - 1.5 | 1 - 2 (Low) |
| Perennial Ryegrass | 6 - 8 | 3 - 5 | 2 - 3 (Med-Low) |
For precise regional seeding recommendations and cultivar selection, refer to the NC State Extension Carolina Lawns guide, which provides localized data on turfgrass adaptation.
Step 3: The Crisscross Pass Technique
Never rely on a single directional pass. To ensure uniform distribution and eliminate striping, you must mow in a crisscross pattern. Make your first pass horizontally across the lawn. For the second pass, walk at a 45-degree or 90-degree angle to the first. This dual-axis approach guarantees that the 1-inch blade spacing overlaps, effectively cutting slits every 1/2 inch across the entire turf canopy.
Step 4: Disengage on Turns
The blade reel on a Classen overseeder is heavy and aggressive. If you attempt to turn the machine while the blades are engaged in the soil, the lateral friction will tear the existing turf mat, leaving ugly, circular divots. Always pull the depth lever up to disengage the blades before reaching the end of your run, turn the machine on the bare soil or driveway, and re-engage only when you are aligned for the next straight pass.
Step 5: Drag and Roll
After the machine has passed, some seed will remain sitting on top of the thatch rather than inside the slits. Drag a heavy piece of chain-link fence or a specialized turf drag mat over the area to sweep loose seed into the furrows. Follow this with a lightweight lawn roller (filled halfway with water) to press the soil walls of the slit back against the seed, ensuring the intimate seed-to-soil contact required for moisture wicking.
Common Operator Errors and Turf Damage
Even with the right equipment, operator error can compromise establishment. Watch for these specific failure modes:
Warning: Hopper Clogging with Coated Seed
Many premium grass seeds feature fungicidal or moisture-retention coatings (like Apron or zinc). In high-humidity conditions, these coatings can become tacky and bridge across the hopper gate, causing the seed flow to stop entirely without the operator noticing. If using heavily coated seed, check the drop zone every 10 minutes and keep a wire brush handy to clear the gate mechanism.
Many premium grass seeds feature fungicidal or moisture-retention coatings (like Apron or zinc). In high-humidity conditions, these coatings can become tacky and bridge across the hopper gate, causing the seed flow to stop entirely without the operator noticing. If using heavily coated seed, check the drop zone every 10 minutes and keep a wire brush handy to clear the gate mechanism.
- Scalping the Lawn: If the existing grass is taller than 2 inches, the overseeder blades will catch the grass blades and rip them out by the root. Always mow the existing lawn down to 1.5 inches and bag the clippings before bringing in the Classen.
- Wet Soil Operation: Never run a slice seeder on saturated soil. The fluted blades will smear the wet clay, creating hard, compacted trench walls that restrict root growth and water infiltration. Wait until the top 2 inches of soil are dry to the touch.
- Overlapping Too Heavily: While a crisscross pattern is necessary, overlapping the exact same wheel tracks on the same axis will double the seed rate in those strips, leading to overcrowded seedlings that will inevitably die off from fungal damping-off disease due to poor airflow.
Post-Seeding Establishment Timeline
Once the Classen has done its work, the biological clock starts. Germination timelines depend heavily on soil temperature, not just air temperature.
According to turfgrass agronomy data available via the Classen equipment specifications and university extension trials, maintaining consistent moisture in the top 1/2 inch of soil is mandatory. This requires light watering 3 to 4 times a day for 5-10 minutes per zone.
- Days 1-7: Seed imbibes water and swells. Perennial ryegrass may show initial radical emergence.
- Days 7-14: Tall Fescue and Ryegrass establish visible leaf tissue. Keep foot traffic strictly off the lawn to avoid crushing the fragile cotyledons.
- Days 14-21: Kentucky Bluegrass finally begins to emerge. KBG is notoriously slow to germinate; do not assume the seed is dead if you only see Fescue at day 14.
- First Mow: Wait until the new grass reaches 3.5 inches tall. Mow it down to 2.5 inches using a sharp rotary blade. Dull blades will pull the shallow-rooted seedlings completely out of the freshly sliced soil.
By respecting the mechanical precision of the Classen overseeder and adhering to strict depth and rate calibrations, you transition lawn establishment from a game of chance into a highly predictable, professional-grade agronomic process.

