
Grass Types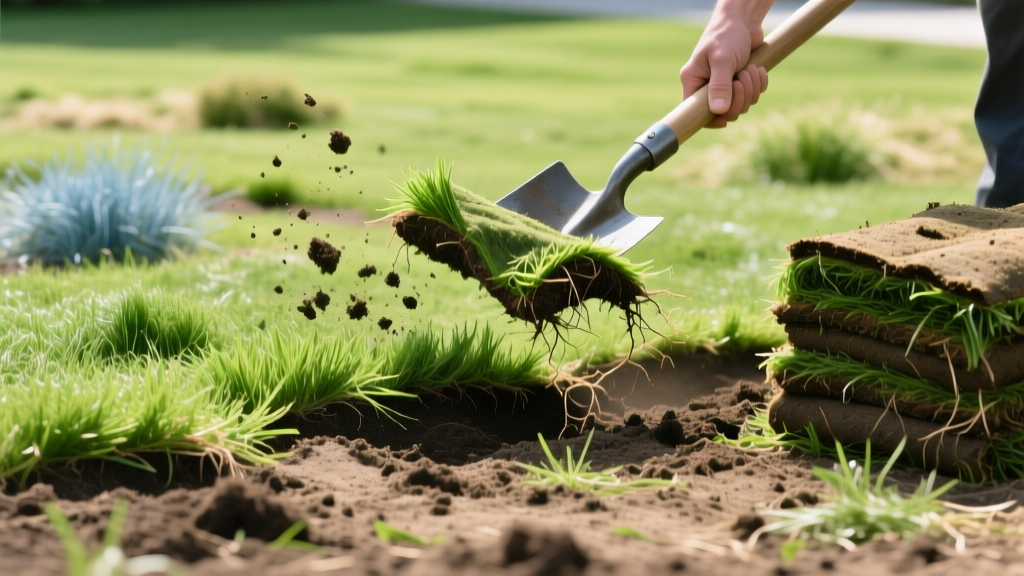
How to Cut Sod Out of Lawn to Re-Seed Failing Patches
Establishing a pristine, uniform lawn often requires surgical intervention. When localized patches succumb to necrotic ring spot, summer patch, or invasive grassy weeds like quackgrass (Elymus repens), simply broadcasting seed over the existing dead turf yields a germination success rate of less than 15%. The thatch layer and decaying root systems physically block seed-to-soil contact and harbor lingering fungal pathogens. To achieve true establishment, you must physically cut sod out of lawn sections that are compromised, remediate the underlying soil profile, and introduce premium, disease-resistant seed cultivars.
Diagnosing When to Cut Sod Out of Lawn
Not every bare spot requires complete sod removal. Minor thinning can be addressed with core aeration and overseeding. However, specific pathological and botanical issues demand total extraction of the existing turf mat. Use the decision matrix below to determine if cutting out the sod is the correct agronomic approach for your lawn's failing patches.
| Lawn Condition | Recommended Action | Agronomic Rationale |
|---|---|---|
| Grassy Weed Infestation (Quackgrass, Poa annua) | Cut Sod & Re-Seed | Selective herbicides cannot distinguish between these weeds and desirable turf; physical removal is the only permanent solution. |
| Fungal Scars (Summer Patch, Dollar Spot) | Cut Sod & Re-Seed | Pathogens overwinter in the thatch and root zone. Removing the sod eliminates the local inoculum source. |
| Dog Urine Burn Spots | Flush Soil & Re-Seed | The grass is dead, but the soil is heavily salted. Cutting sod helps, but deep soil flushing is required before seeding. |
| General Turf Thinning / Shade Loss | Aerate & Overseed | Existing root structure is intact; seed-to-soil contact can be achieved mechanically without full extraction. |
Equipment Selection and 2026 Rental Economics
The tool you choose to cut sod out of lawn patches depends entirely on the square footage of the damaged area. Using the wrong tool will result in uneven soil grading, making the eventual seed establishment prone to pooling water and rot.
- Manual Half-Moon Edger ($35–$50): Ideal for circular patches under 15 square feet. The sharp, flat blade allows you to score precise geometric boundaries around fungal scars without damaging adjacent healthy roots.
- Manual Sod Kicker / Plugging Tool ($60–$85): Best for extracting 2-inch to 4-inch diameter plugs of invasive weeds scattered across a larger area. This minimizes the amount of healthy grass you accidentally destroy.
- Walk-Behind Motorized Sod Cutter (e.g., Billy Goat SC1800H): Required for large dead zones exceeding 50 square feet. As of 2026, renting a walk-behind sod cutter from major home improvement centers averages $95 to $115 per day. These machines feature adjustable oscillating blades that slice cleanly beneath the root zone.
The Excavation and Soil Amendment Protocol
Once you have selected your equipment, follow this precise excavation sequence to prepare the seedbed. According to Purdue University Extension, proper seedbed preparation is the single highest predictor of successful turfgrass establishment.
- Score the Perimeter: Mark a boundary exactly 2 inches outside the visible edge of the dead or diseased grass. Fungal hyphae and weed rhizomes extend beyond the visible discoloration.
- Set the Blade Depth: Adjust your sod cutter or spade to a depth of exactly 1.5 inches. This captures the thatch layer and the upper crown of the grass without destroying the vital subsoil structure and earthworm channels below.
- Extract and Dispose: Roll the extracted sod into cylinders and remove it from the site. Warning: Never compost sod removed due to fungal disease or invasive rhizomatous weeds, as home compost piles rarely reach the 140°F required to kill these pathogens and seeds.
- Subsoil Scarification: Using a manual garden fork or a small powered tiller, break up the exposed compacted dirt to a depth of 3 to 4 inches. This relieves the compaction caused by the original sod mat.
- Amend and Grade: Incorporate 1 inch of screened, aged compost into the scarified soil. Rake the surface perfectly level, ensuring it sits exactly 0.5 inches below the surrounding healthy lawn. This accounts for the thickness of the new seed and starter mulch, preventing a raised bump in your finished lawn.
Selecting NTEP-Rated Cultivars for Patch Re-Establishment
Do not use generic "contractor mix" or cheap hardware store seed to fill the excavated patches. You must select cultivars that have been rigorously tested for disease resistance by the National Turfgrass Evaluation Program (NTEP). Upgrading the patch to a superior cultivar prevents the exact failure mode that killed the original sod.
- For Tall Fescue Lawns: Select endophyte-enhanced varieties like Bullseye, Titan Ultra, or Firenza II. These cultivars exhibit exceptional resistance to brown patch (Rhizoctonia solani). Apply seed at a heavy rate of 8 to 10 lbs per 1,000 sq ft to ensure rapid canopy closure in the bare patch.
- For Kentucky Bluegrass Lawns: Choose aggressive, rhizomatous varieties like Blue Note, Midnight, or Everglade. These will knit into the surrounding existing sod rapidly. Apply at 2 to 3 lbs per 1,000 sq ft.
- For Perennial Ryegrass Lawns: Use Palmer IV or Apple GL, which carry strong genetic resistance to gray leaf spot. Apply at 6 to 8 lbs per 1,000 sq ft.
⚠️ Pre-Emergent Herbicide Warning: If you applied a crabgrass preventer (such as prodiamine or dithiopyr) to your lawn in early spring, it will completely inhibit the germination of your new grass seed. You must wait 8 to 12 weeks after application before cutting sod and seeding. Alternatively, if immediate planting is required, you must use a specialized seed-safe pre-emergent containing siduron (Tupersan), which suppresses crabgrass without harming germinating cool-season turf seeds.
Fertilization and Irrigation Timelines
Newly seeded patches require a distinct nutritional and hydration profile compared to an established lawn. The NC State University TurfFiles database emphasizes that phosphorus is the limiting nutrient for seedling root development.
Immediately after sowing the seed and lightly raking it into the top 1/8 inch of the amended soil, apply a high-phosphorus starter fertilizer. Look for an N-P-K ratio similar to 10-18-10 or 18-24-12 (such as Scotts Turf Builder Starter Food or Lesco Professional Starter). Apply at a rate that delivers exactly 1.0 lb of Nitrogen per 1,000 sq ft. The elevated phosphorus will stimulate rapid radicle (root) emergence, anchoring the seedlings before they dry out.
For the first 14 days, the seedbed must remain consistently moist but never saturated. Program your irrigation system to water the patched area 3 to 4 times per day for 5 to 7 minutes per cycle. Once the seedlings reach a height of 1.5 inches, reduce the frequency to once daily, but increase the duration to 20 minutes to encourage deep root growth into the scarified subsoil. Delay the first mowing until the new grass reaches 3 inches in height, and ensure your mower blades are freshly sharpened to avoid uprooting the tender, newly established seedlings.

