
Grass Types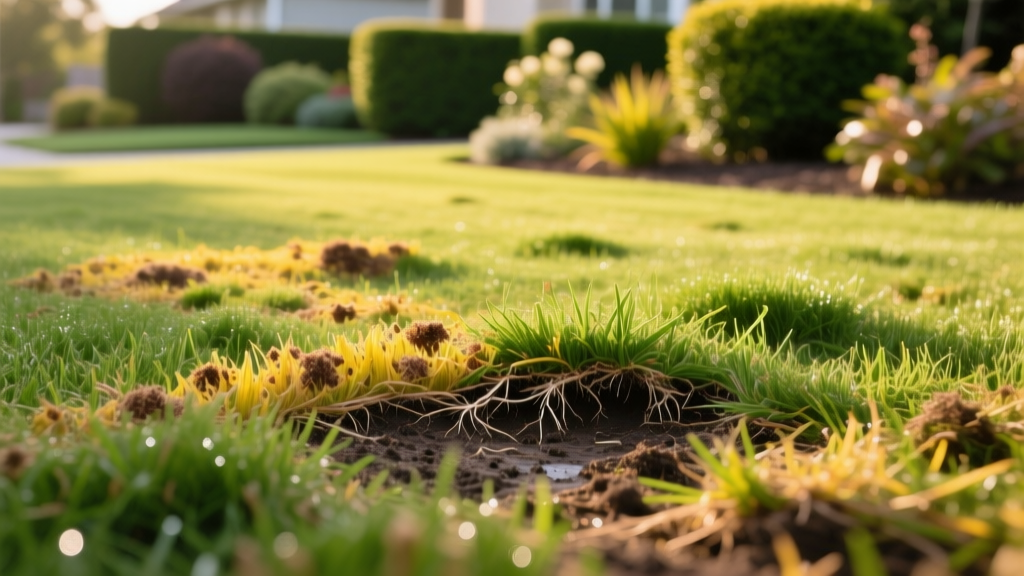
Diagnosing Patchy Sod: Symptom Identification and Rescue Fixes
The Financial and Biological Reality of Failing Sod
In 2026, the average installed cost of premium turfgrass sod ranges from $0.55 to $0.95 per square foot. When a 5,000-square-foot lawn begins exhibiting patchy sod symptoms within the first 14 to 30 days, homeowners face a potential $4,750 loss. Patchy sod is rarely a random occurrence; it is a biological distress signal indicating a failure in soil-to-root contact, moisture management, or pathogen defense. Freshly harvested sod is essentially a severed organ relying entirely on capillary action and immediate root regeneration to survive. When patches appear, you must diagnose the specific failure mode before applying a blanket rescue treatment, as overwatering a fungal patch will accelerate turf death, while underwatering a hydrophobic soil pocket will guarantee desiccation.
Diagnostic Matrix: Identifying Your Patchy Sod Culprit
Use this matrix to cross-reference your visual symptoms with the underlying physiological cause. Accurate diagnosis dictates the rescue protocol.
| Visual Symptom | Primary Suspect | Secondary Suspect | Immediate Diagnostic Action |
|---|---|---|---|
| Brown, shrinking seams between rolls | Capillary break / Soil shrinkage | Improper initial butting | Probe seam with a screwdriver; check for air gaps |
| Yellow/brown dieback in the center of rolls | Sod heating (Stack burn) | Hydrophobic soil pocket | Smell the soil; sour/ethanol odor confirms stack burn |
| Spongy turf that pulls up with zero resistance | Poor soil-to-root contact | Severe overwatering (root rot) | Perform the 'Tug Test' on 5 random patches |
| Irregular dead spots with dark lesions on blades | Pythium blight or Brown Patch | Fertilizer burn | Inspect leaf sheaths for mycelium at dawn |
Symptom 1: Visible Seams and Shrinking Edges
When sod shrinks, gaps form between the rolls. If a gap exceeds 1/8 of an inch, capillary action breaks. The edges of the sod dry out rapidly because they can no longer draw lateral moisture from adjacent rolls or the underlying soil. This is the most common cause of patchy sod in the first two weeks.
The Rescue Fix: Targeted Topdressing
Do not attempt to push the heavy, waterlogged sod rolls back together; you will tear the fragile new root hairs. Instead, bridge the gap with a specific topdressing mix.
- Material: Use 80% washed masonry sand (never play sand, which compacts, or builder's sand, which contains high salts) mixed with 20% finely screened compost.
- Application: Work the mix deeply into the seams using a stiff push broom. Fill the gap completely until it is level with the turf canopy.
- Cost: Masonry sand costs approximately $40 to $60 per ton. A single 50lb bag of screened compost ($6) is sufficient for 1,000 linear feet of seams.
Symptom 2: Center-of-Roll Dieback (Sod Heating)
If the edges of your sod rolls are green but the centers are yellowing or browning, you are likely witnessing the aftermath of 'sod heating.' When sod is harvested, rolled, and stacked on pallets, the grass continues to respire. In warm weather, the internal temperature of a rolled pallet can exceed 140°F within 12 hours. This anaerobic environment produces ethanol and acetic acid, literally cooking the grass in the center of the roll before it is ever unrolled on your property.
The Rescue Fix: Liquid Aeration and Surfactants
If the grass in the center is dead (brown and brittle), it will not recover and must be overseeded or plugged. If it is yellowing but the crown is still firm and white, you can rescue it by breaking up soil compaction and improving water infiltration.
Expert Protocol: Apply a non-ionic surfactant (wetting agent) like Aqua-Aid or Lesco Wetting Agent at a rate of 3 oz per 1,000 sq ft. This reduces the surface tension of water, allowing it to penetrate the hydrophobic thatch layer of the damaged sod. Follow this with a liquid aeration product containing humic acid to stimulate root growth without the physical tearing caused by mechanical core aeration on unestablished sod.
Symptom 3: Spongy Turf and the 'Tug Test' Failure
Healthy sod should resist pulling after 10 to 14 days. If your sod feels like a loose carpet and lifts easily when you grab a handful and pull straight up, the roots have failed to penetrate the native soil. This 'hovering' effect occurs when the ground was not properly graded, or when the sod was laid on top of dry, compacted clay. The roots remain trapped in the 1-inch thatch layer of the sod itself, making the turf highly susceptible to drought stress.
The Rescue Fix: Mechanical Rolling and Moisture Tapering
To force soil-to-root contact, you must apply downward pressure.
- Rent a lawn roller: Fill a standard 24-inch lawn roller with water to achieve approximately 250 to 300 lbs of weight.
- Timing: Roll the lawn when the soil is moist but not saturated. Rolling muddy clay will cause severe subsoil compaction and destroy soil structure.
- Direction: Roll in a grid pattern (North-South, then East-West) to ensure uniform contact.
- Irrigation Adjustment: Spongy sod is often overwatered. Transition from frequent, shallow watering (3x daily for 10 minutes) to deeper, less frequent watering (1x daily for 20 minutes) to force roots to chase the moisture downward into the native soil.
Symptom 4: Irregular Patches with Fungal Lesions
Fresh sod is highly vulnerable to fungal pathogens. The combination of frequent shallow watering (required for establishment) and the micro-tears caused by the sod harvesting knives creates an ideal environment for Rhizoctonia solani (Brown Patch) and Pythium species. According to NC State TurfFiles, these pathogens thrive when nighttime temperatures remain above 68°F and leaf wetness persists for more than 10 hours.
The Rescue Fix: Targeted Fungicide Application
Stop watering in the late afternoon or evening immediately. Water only between 4:00 AM and 6:00 AM so the grass blades dry quickly in the morning sun. If lesions are present, chemical intervention is required.
- Active Ingredients: Look for products containing Azoxystrobin (e.g., Heritage TL, Scotts DiseaseEX) or Propiconazole (e.g., Banner MAXX). These are systemic fungicides that move through the plant's vascular tissue.
- Application Rate: Apply Azoxystrobin at a preventive rate of 2 oz per 1,000 sq ft, or a curative rate of 4 oz per 1,000 sq ft if the patches are actively expanding.
- Rotation: Fungi develop resistance rapidly. Rotate to a different FRAC code (e.g., switch from FRAC 11 Azoxystrobin to FRAC 3 Propiconazole) every 21 days.
Decision Framework: When to Abandon Rescue and Replace
Not all patchy sod can be saved. The University of California IPM program notes that once the crown of the grass plant (the white, fleshy base where blades emerge) turns brown and mushy, the plant is dead and no amount of fertilizer or water will revive it.
The 40% Necrosis Rule: Inspect a 10-square-foot section of the worst patch. If more than 40% of the individual grass crowns are brown and necrotic, the cost of fungicides, wetting agents, and labor to rescue the area will exceed the $0.55 per square foot cost of cutting out the dead rolls and laying fresh sod. Use a sharp sod cutter or flat spade to remove the dead patches, amend the exposed soil with 1 inch of compost, and install replacement rolls immediately.
Preventing Future Failures
For comprehensive establishment guidelines, Penn State Extension emphasizes that proper soil preparation is the ultimate preventative measure. Before laying future sod, ensure the native soil is tilled to a depth of 4 inches, graded to a 2% slope for drainage, and tested for pH (target 6.0 to 6.8). Patchy sod is almost always a symptom of the soil environment, not a defect in the grass itself.

