
Grass Types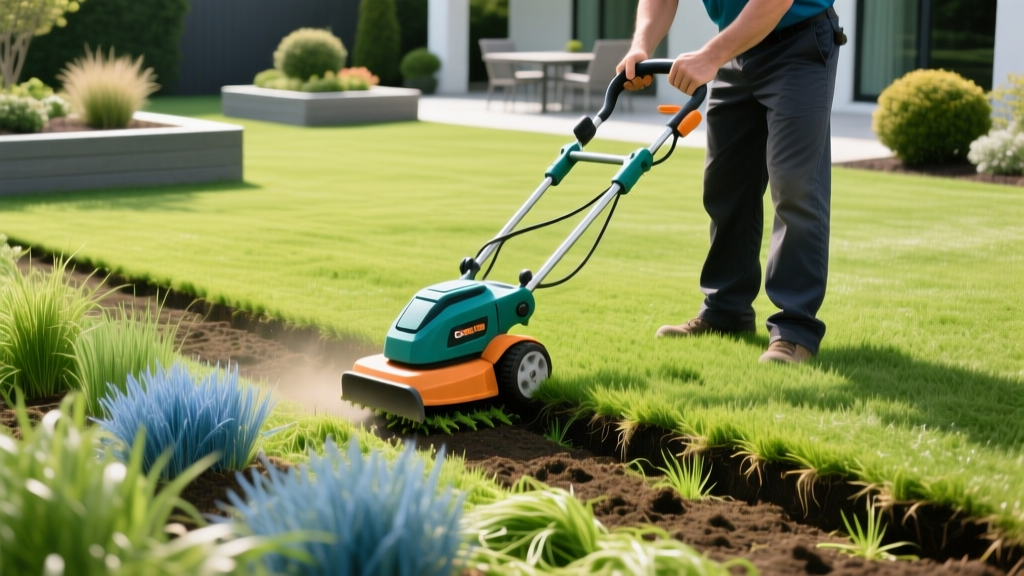
Electric Sod Cutter Guide: Preparing Your Lawn for Seed
Why Remove Existing Turf Before Seeding?
Overseeding directly into an established, degraded lawn often results in poor seed-to-soil contact and high germination failure rates. Complete turf removal exposes the mineral subgrade, allowing new grass seed roots to establish deeply without competing with existing thatch or aggressive weed rhizomes. While gas-powered walk-behind sod cutters have historically dominated the rental market, the 2026 outdoor power equipment landscape has shifted heavily toward high-torque 80V battery-powered and corded electric sod cutters. These electric models eliminate the carburetor maintenance, exhaust fumes, and 105-decibel noise levels associated with gas engines, making them ideal for dense residential zones.
Gas vs. Manual vs. Electric Sod Cutters: Equipment Matrix
Selecting the right cutting mechanism depends on your lawn's square footage, soil compaction, and budget. The table below breaks down the operational realities of each category for residential seedbed preparation.
| Equipment Type | Average Cost (Buy/Rent) | Weight & Maneuverability | Best Application | Limitations |
|---|---|---|---|---|
| Gas Walk-Behind | $1,400+ / $90-$120/day | 120-150 lbs (Self-propelled) | Lawns over 5,000 sq ft; heavy clay soils | High vibration, requires fuel stabilizer, loud |
| Manual Kick Plow | $60-$90 (Purchase) | 15 lbs (Human-powered) | Patch repairs, edges, under 500 sq ft | Extreme physical fatigue, inconsistent depth |
| Electric/Battery Turf Cutter | $350-$800 (Purchase) | 40-75 lbs (Push or self-propelled) | 1,000 - 4,000 sq ft; noise-restricted HOAs | Battery runtime limits on 40V models; cord drag on 120V |
Calibrating Blade Depth for Clean Sod Removal
The most common failure point in sod removal is setting the blade too deep, which extracts valuable topsoil along with the grass, or too shallow, which leaves the root mat intact. For most cool-season and warm-season turfgrasses, the target cutting depth is exactly 1.5 inches.
A 1.5-inch depth severs the primary root zone and the thatch layer while preserving the underlying A-horizon topsoil. If you are cutting aggressive warm-season grasses like Bermuda or Zoysia, which possess deep rhizomatous networks, you may need to increase the depth to 2.0 inches to prevent rapid regrowth from leftover stolons. Always engage the depth lever on the rear axle of your electric sod cutter and test on a 2x2 foot perimeter square before committing to the full lawn.
CRITICAL WARNING: Before operating any mechanized sod cutter, you must call 811 to have underground utilities marked. Sod cutter blades can easily slice through shallow-buried irrigation lines, fiber optic cables, or low-voltage landscape lighting wires, resulting in severe damage and personal injury.
The 4-Step Sod Removal and Seedbed Prep Protocol
Executing a clean removal requires a specific operational sequence to prevent the electric motor from binding and to ensure the soil remains workable for the incoming seed.
Step 1: Hydrate and Mow Low
Forty-eight hours before cutting, apply 0.5 inches of water to the lawn. This softens the soil profile just enough to reduce blade friction without turning the subgrade into mud, which will clog the cutter's chassis. Mow the existing grass to the lowest possible deck height (usually 1 inch) and bag the clippings. This reduces the volume of organic matter the electric motor must push through.
Step 2: Cut the Perimeter and Grid
Start by cutting a continuous perimeter strip around the entire work area. Next, cut parallel strips across the lawn, spacing them exactly 12 to 18 inches apart, matching the width of your sod cutter's blade. Do not attempt to cut the cross-grids immediately; leave the long parallel strips intact for easier rolling.
Step 3: Roll and Extract
Use a flat spade to sever the ends of your parallel strips. Roll the sod strips tightly like carpets. If the soil is properly hydrated, the 1.5-inch ribbons will peel away cleanly. Stack the removed sod on a tarp for disposal or relocation. Avoid dragging the sod across the exposed soil, as this will smear the subgrade and create a compacted glaze that repels water.
Step 4: Cultivate the Exposed Subgrade
Once the sod is removed, the exposed soil will likely be compacted from years of foot traffic and root pressure. Use a rear-tine rototiller to fracture the top 4 to 6 inches of the exposed subgrade. According to University of Minnesota Turf Science, deep cultivation is non-negotiable for new seedbeds, as grass seed roots require a loose, aerated medium to establish before the first summer heat stress.
Post-Cutting Soil Amendments for Grass Seed
Stripping the sod removes a significant amount of organic matter. To ensure high germination rates and long-term drought tolerance, you must amend the exposed, tilled soil before dropping seed.
- Compost Integration: Spread a 0.5-inch layer of screened, mature compost over the tilled area and rototill it into the top 3 inches. This restores the microbial biology stripped away with the old sod.
- Grade Leveling: Use a heavy landscape rake to level the surface. Remove any rocks larger than a golf ball, which will interfere with seed-to-soil contact and future mowing operations.
- Starter Fertilizer: Apply a high-phosphorus starter fertilizer (e.g., 10-18-10) at a rate of 4 lbs per 1,000 sq ft immediately before seeding to fuel initial root development.
"Proper seedbed preparation, including the complete removal of competing vegetation and the loosening of compacted soil, is the single greatest predictor of long-term lawn survival. Seed applied to an unprepared surface will germinate but rarely survive the first drought cycle." — UMass Extension Lawn Care Program
Troubleshooting Electric Sod Cutter Operational Failures
Electric turf cutters rely on high-amperage draw to maintain blade oscillation or rotation. When operating in dense soils, specific failure modes can halt your progress.
Motor Stalling in Clay Soils:
If your 80V battery-powered cutter repeatedly stalls or triggers its thermal overload shutoff, the soil moisture is likely too high, causing clay to adhere to the oscillating blade. Stop cutting, allow the soil to dry for 24 hours, and use a wire brush to clear the clay buildup from the blade housing. Never force the machine forward; let the blade's oscillation do the work, pushing at a maximum rate of 1 foot per second.
Rapid Battery Depletion:
Cutting through thick thatch layers (common in neglected Kentucky Bluegrass or St. Augustine lawns) increases the mechanical load on the electric motor, draining a 5.0Ah battery in as little as 20 minutes. For lawns exceeding 2,000 square feet, invest in a secondary 7.5Ah or 10.0Ah battery to swap mid-job, or opt for a 120V corded electric model if your worksite is within 100 feet of a GFCI-protected exterior outlet. Use a 12-gauge extension cord to prevent voltage drop, which can starve and damage the cutter's motor.
Uneven Cutting Depth:
If your sod strips are tearing or varying in thickness, the front caster wheels are likely sinking into soft patches or animal burrows. Adjust the rear depth lever to rely more on the rear drive wheels for elevation control, and fill any visible divots with sand prior to making your cutting passes to maintain a level chassis plane.

