
Grass Types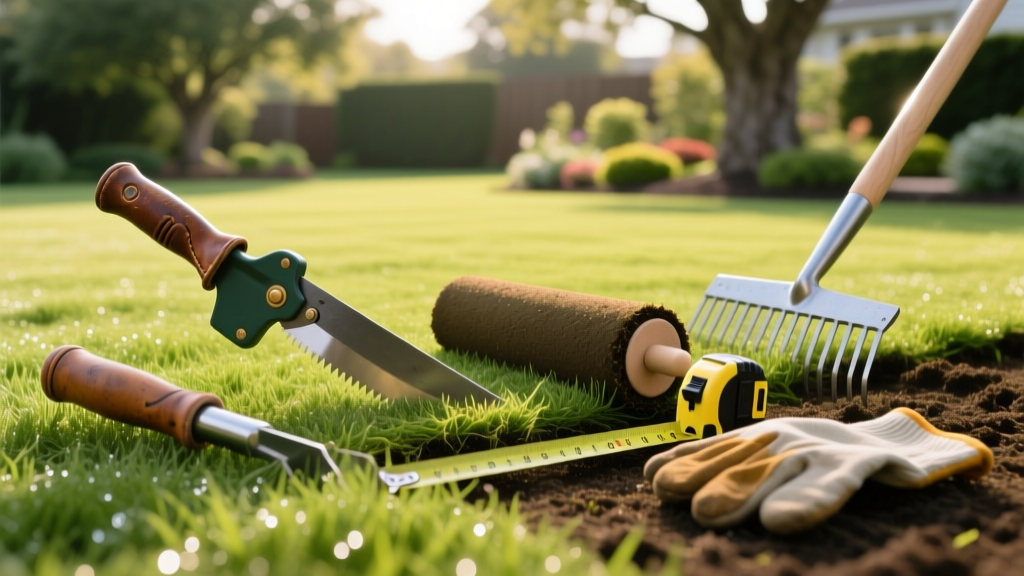
Essential Tools for Laying Sod: Prep, Cutting, and Rolling Guide
Establishing a lawn from sod offers instant gratification, but the 15-to-30-pound weight of each roll and the strict 48-hour root-establishment window demand specialized equipment. Relying on standard garden implements often leads to uneven grading, poor soil-to-root contact, and eventual desiccation. Whether you are installing a drought-tolerant Zoysia or a cold-hardy Kentucky Bluegrass, deploying the correct tools for laying sod ensures the root zone integrates seamlessly with the native soil profile.
Phase 1: Soil Preparation & Grading Equipment
According to University of Minnesota Extension, the most common cause of sod failure is inadequate soil preparation. The root zone must be fractured and leveled to a depth of 4 to 6 inches before the first roll is unrolled.
Walk-Behind Sod Cutters
If you are replacing an existing, weed-heavy lawn, a sod cutter is non-negotiable. Unlike a rototiller, which mixes live weeds and their root systems into your seedbed, a sod cutter slices horizontally beneath the thatch layer, removing the top 1 to 2.5 inches of vegetation. The Billy Goat SC18H is an industry standard, featuring an 18-inch cutting width and a self-propelled hydrostatic drive. Expect to rent this unit for $135 to $165 per day from major equipment centers.
Rototillers and Power Rakes
Once the old turf is removed, the soil must be fractured. For areas under 2,500 square feet, a front-tine tiller (like the Troy-Bilt Pony) is sufficient. For larger estates or heavily compacted clay soils, rent a rear-tine tiller (such as a Barreto 920H), which uses rear-wheel drive to pull the tines through dense earth at a consistent 4-to-6-inch depth. Follow tilling with a power rake or a heavy-duty iron drag mat to pull out subsurface rocks and remaining root wads.
Aluminum Leveling Rakes
Sod requires a perfectly flat substrate; even a half-inch depression will cause the sod to bridge, leaving an air gap that kills the roots. Ditch the standard steel bow rake and invest in a 30-inch aluminum leveling rake (such as the Rocklin Levelawn 2.0). The wide, flat aluminum head distributes topsoil and compost evenly without dragging heavy clods.
| Equipment Category | Specific Tool / Model | Primary Function | Estimated 2026 Cost |
|---|---|---|---|
| Turf Removal | Billy Goat SC18H Sod Cutter | Slices and removes top 1-2.5" of existing grass | $145/day (Rental) |
| Soil Fracturing | Barreto 920H Rear-Tine Tiller | Breaks compacted clay to a 6-inch depth | $120/day (Rental) |
| Surface Grading | 30" Aluminum Leveling Rake | Creates a flat, rock-free seedbed | $110 - $140 (Purchase) |
| Compaction | 24" x 30" Poly Lawn Roller | Ensures root-to-soil contact post-install | $90 - $130 (Purchase) |
Phase 2: Precision Cutting & Shaping Implements
Sod rarely fits a yard in perfect rectangles. Navigating around tree rings, curved landscape beds, and irrigation heads requires specialized blades that won't bind or tear the delicate root matrix.
- Linoleum Knives: A curved, hooked blade (like the Stanley 70-126) is the secret weapon of professional landscapers. The hook catches the sod's root netting and slices cleanly through the soil profile without requiring downward pressure that could crush the grass blades.
- Hori Hori Excavating Knife: For tight corners and slicing around valve boxes, a heavy-duty stainless steel Hori Hori with a serrated edge allows for one-handed sawing through thick rhizomes.
- Edging Spade: A sharp, flat-faced edging spade is required to trench a 2-inch deep boundary along concrete driveways. This allows the sod edge to sit flush with the hardscape, preventing the mower from scalping the perimeter.
Phase 3: Installation, Seaming, and Compaction
The physical act of laying the sod is labor-intensive, but the final compaction step dictates the long-term survival of the turf. UMN Turfgrass Science emphasizes that eliminating air pockets between the sod roots and the native soil is critical for capillary water movement.
Water-Filled Lawn Rollers
Never walk on newly laid sod without rolling it first. A 24-inch by 30-inch polyurethane or steel lawn roller (such as the Brinly PRC-24BH) is required. When filled with water, these units weigh between 200 and 300 pounds. This specific weight generates approximately 0.5 to 1 PSI of ground pressure—enough to press the sod roots firmly into the soil crevices without over-compacting the subsoil and restricting future drainage. Roll the lawn in a checkerboard pattern (North-South, then East-West) immediately after laying.
Pro-Tip: The Mason's Line Technique
For front yards visible from the street, staggered seams are mandatory. Drive wooden stakes at the edges of your property and run a high-visibility mason's line tightly between them. Use this line as a physical guide for your first row of sod. If your first row drifts by even one inch over a 50-foot run, the staggered seams will misalign, creating visible diagonal fault lines across your entire lawn.
Ergonomic Support Gear
Professional installers lay up to 3,000 square feet of sod per day. For homeowners tackling 1,000 square feet, knee fatigue is a primary bottleneck. Invest in professional-grade gel-insert knee pads (such as the DeWalt DG5204) or a mobile kneeling pad. This prevents soil compaction caused by kneeling directly on the graded seedbed before the sod is placed.
Agronomic Timing: Deploying Tools by Grass Species
The tools remain the same, but the timing of your deployment depends heavily on the grass species you are installing:
- Cool-Season Grasses (Kentucky Bluegrass, Tall Fescue, Perennial Ryegrass): Deploy your sod cutters and tillers in late summer to early fall (mid-August to late September). Soil temperatures are still warm enough (above 60°F) to stimulate rapid root growth, but ambient air temperatures are dropping, reducing transplant shock and water loss.
- Warm-Season Grasses (Bermuda, Zoysia, St. Augustine): Schedule your equipment rentals for late spring to early summer, exactly after the last frost date and when soil temperatures consistently exceed 65°F at a 2-inch depth. Installing warm-season sod too early in the spring leads to prolonged dormancy and high vulnerability to fungal pathogens like Pythium blight.
Frequently Asked Questions
Can I use a standard garden rake instead of a leveling rake for sod prep?
While a standard steel bow rake can move soil, its narrow, rounded head creates ridges and valleys. Sod requires a perfectly flat surface to prevent 'bridging'—where the center of a sod piece rests on a high spot while the edges hang in the air, causing the roots to dry out and die. A 30-inch flat aluminum leveling rake is highly recommended for a professional-grade finish.
Do I need to roll the sod if I water it heavily right after installation?
Watering is essential for hydration, but it does not replace mechanical compaction. Water will settle the soil slightly, but it will not generate the lateral and vertical pressure required to eliminate microscopic air pockets between the sod's root mat and the native soil. You must use a 200+ pound water-filled roller to ensure immediate capillary contact.
What soil temperature is required before laying sod?
According to Texas A&M AgriLife Extension, the root zone soil temperature should be at least 55°F for cool-season grasses and 65°F for warm-season grasses. Use a digital soil thermometer inserted 2 inches into the prepared seedbed to verify these metrics before unrolling your first pallet.

