
Grass Types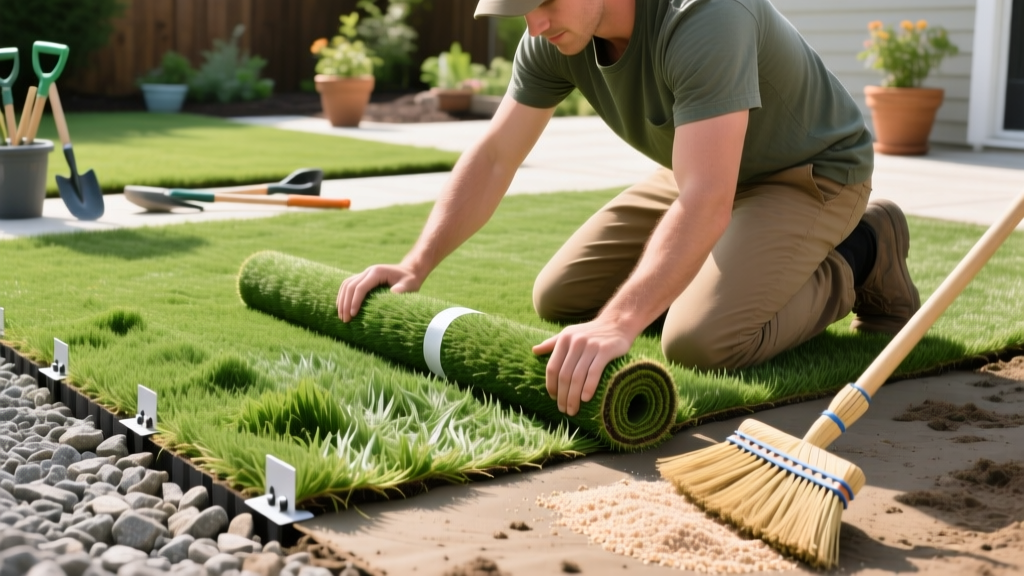
DIY Fake Turf Installation: Base Prep, Seaming, and Infill
The Hidden Science of Synthetic Lawn Establishment
While natural grass establishment relies on soil biology and root depth, fake turf installation is fundamentally a civil engineering project. According to the Synthetic Turf Council, over 80% of synthetic lawn failures—including base sinking, water pooling, and seam splitting—trace back to improper subgrade compaction and inadequate seaming protocols. Transitioning from natural sod to a synthetic surface requires precise material selection, exact moisture management during compaction, and chemical adhesion techniques that mimic the tensile strength of a continuous carpet.
This guide bypasses generic advice and details the exact specifications, material grades, and application rates required to install a high-traffic, pet-friendly synthetic lawn that maintains structural integrity and optimal drainage for 15 to 20 years.
Phase 1: Excavation and Subgrade Engineering
The longevity of your fake turf installation is dictated entirely by what happens below the surface. A standard residential lawn requires a 3 to 4-inch excavation to remove organic topsoil, which retains moisture and shifts under load.
Step-by-Step Base Construction
- Excavation and Weed Barrier: Excavate exactly 4 inches below your finished grade (accounting for the 1.5-inch turf pile height). Lay a woven geotextile fabric, such as Mirafi 500X or Typar, overlapping seams by 12 inches. This prevents base materials from migrating into the native soil while allowing water permeability.
- Primary Base Layer (Class II Road Base): Apply 2.5 to 3 inches of 3/4-inch minus Class II Road Base. This material contains a mix of crushed rock and fine dust that locks together when compacted. Critical detail: The material must have a moisture content of roughly 8-10%. Perform a squeeze test: grab a handful and squeeze. It should hold its shape without dripping water. If it's too dry, it won't compact; if too wet, it will turn to mud.
- Mechanical Compaction: Use a vibrating plate compactor (minimum 140 lbs, such as a Wacker Neuson or Multiquip). Compact the base in 2-inch lifts (layers). You must achieve a 95% Proctor density. This typically requires 3 to 4 passes with the plate compactor, overlapping each pass by half the plate's width.
- Leveling Layer (Decomposed Granite): Spread a 1-inch top layer of 1/4-inch minus Decomposed Granite (DG) or stone dust. This creates a perfectly smooth, hard surface that prevents the turf backing from telegraphing the texture of the larger rocks below. Compact this final layer until it feels like concrete.
Base Material Comparison Matrix
| Material Type | Drainage Rate | Compaction Quality | Best Use Case |
|---|---|---|---|
| Class II Road Base (3/4' Minus) | Moderate (15-20 in/hr) | Excellent (Locks tightly) | Primary structural base for all residential lawns |
| Crushed Misc Building (CMB) | High (20-30 in/hr) | Good (Requires more passes) | High-rainfall areas requiring maximum subsurface drainage |
| Decomposed Granite (1/4' Minus) | Low (5-10 in/hr) | Excellent (Smooth finish) | Top leveling layer only; never use as the primary deep base |
Phase 2: Turf Acclimation, Cutting, and Chemical Seaming
Synthetic grass is manufactured in large rolls and shipped tightly wound. Unrolling and immediately cutting the turf will result in severe wrinkling and seam failure as the material expands and contracts with temperature fluctuations.
Acclimation and Pile Direction
Unroll the turf and let it acclimate in direct sunlight for a minimum of 2 to 4 hours. This allows the backing to relax and the blades to stand up. When positioning the rolls, ensure the pile direction (the natural lean of the grass blades) faces toward the primary viewing area, usually the house or patio. This ensures the lawn looks lush and green rather than shiny and reflective.
Precision Seaming Protocol
Seaming is the most technically demanding part of fake turf installation. Relying on nails or staples along the seams will inevitably lead to splitting.
- Tape Selection: Use a 12-inch wide poly-coated seam tape. Never use 6-inch tape for primary field seams, as it lacks the surface area to handle shear stress.
- Adhesive Application: Apply a dual-component polyurethane adhesive or a high-grade single-component turf glue (like Super Seam) using a 1/8-inch notched trowel. Spread the glue evenly down the center of the tape.
- The 'Tack' Wait: Do not join the seams immediately. Wait 10 to 15 minutes for the adhesive to become 'tacky'. If you join it while wet, the glue will squeeze out into the grass fibers, permanently ruining the seam line.
- Joining and Weighing Down: Carefully fold the two edges together, ensuring no blades are trapped in the glue. Walk the seam to press it into the tape, then lay 50-lb bags of infill or paving stones along the entire seam for 24 hours while the chemical bond cures.
WARNING: Thermal Expansion Gaps
Synthetic turf expands and contracts with temperature changes. When seaming, leave a microscopic 1/16-inch gap between the two backing edges. If you butt the backing edges tightly together, summer heat will cause the material to expand, creating a visible ridge or 'bubble' along the seam line.
Phase 3: Infill Selection and Calibration
Infill is not optional; it is the structural ballast that weighs down the turf, protects the primary backing from UV degradation, and keeps the grass blades standing upright. According to landscape water conservation data from the EPA WaterSense program, homeowners switching to synthetic lawns must still manage surface temperatures and drainage, which infill directly influences.
Calculating Your Infill Load
The industry standard for residential landscaping turf is 1.5 to 2.0 pounds of infill per square foot. For a 500-square-foot lawn, you will need 750 to 1,000 pounds (15 to 20 standard 50-lb bags). Apply the infill in two separate passes using a drop spreader, brushing the turf between passes to ensure the material settles deep into the thatch layer.
Infill Material Comparison
| Infill Type | Avg Cost (50lb bag) | Key Properties | Best Application |
|---|---|---|---|
| Washed Silica Sand (16/30 mesh) | $12 - $18 | Heavy ballast, neutral pH, excellent drainage | Standard residential lawns, low-traffic landscaping |
| Natural Zeolite | $25 - $35 | Absorbs ammonia, reduces surface temp by up to 20% | Pet turf, dog runs, high-heat climate zones |
| Envirofill (Acrylic-Coated Sand) | $30 - $45 | Infused with Microban antimicrobial, highly durable | Premium lawns, playgrounds, commercial spaces |
| TPE (Thermoplastic Elastomer) | $40 - $60 | Organic feel, highest cooling properties, non-abrasive | Sports fields, barefoot traffic areas, luxury estates |
Phase 4: Power Brooming and Final Grooming
Once the infill is distributed, the turf will look matted and flat. You must mechanically groom the fibers to stand them up and work the infill down to the backing.
- Equipment: Rent a commercial power broom with nylon bristles. Never use wire bristles, as they will slice the synthetic fibers and void your manufacturer warranty.
- Technique: Set the brush depth so it barely grazes the backing. Push the broom in multiple directions (North-South, then East-West) to ensure the blades stand perfectly vertical and the infill is evenly distributed at the base of the thatch.
- Perimeter Securing: While the field is held down by infill and seams, the perimeter edges must be secured. Use 5-inch or 6-inch galvanized turf nails, spaced every 4 to 6 inches along all outer edges and around hardscape borders.
Frequently Asked Technical Questions
Can I install fake turf directly over an existing concrete patio?
Yes, but you must address drainage and cushioning. Drill 1/2-inch drainage holes into the concrete every 12 inches in a grid pattern. Lay a 5mm to 10mm shock pad (like SoftPad) over the concrete before gluing the turf down with a perimeter adhesive. Skipping the shock pad will result in a hard, unsafe surface and rapid wear on the turf backing.
How do I handle drainage in heavy clay soil regions?
Clay soil does not percolate water, leading to a 'bathtub effect' under your turf base. You must install a subsurface French drain system. Trench the perimeter or center of the excavation area, lay a 4-inch perforated PVC pipe wrapped in filter fabric, and route it to a storm drain or daylight exit. Cover the pipe with 3/4-inch clean drain rock before adding your Class II road base.
What is the ideal slope for synthetic grass drainage?
Aim for a minimum 1% to 2% grade (a 1 to 2-inch drop per 10 feet of horizontal distance) sloping away from the foundation of your home. While high-quality turf backing drains at rates exceeding 30 inches per hour, surface runoff relies entirely on your base grading.

