
Grass Types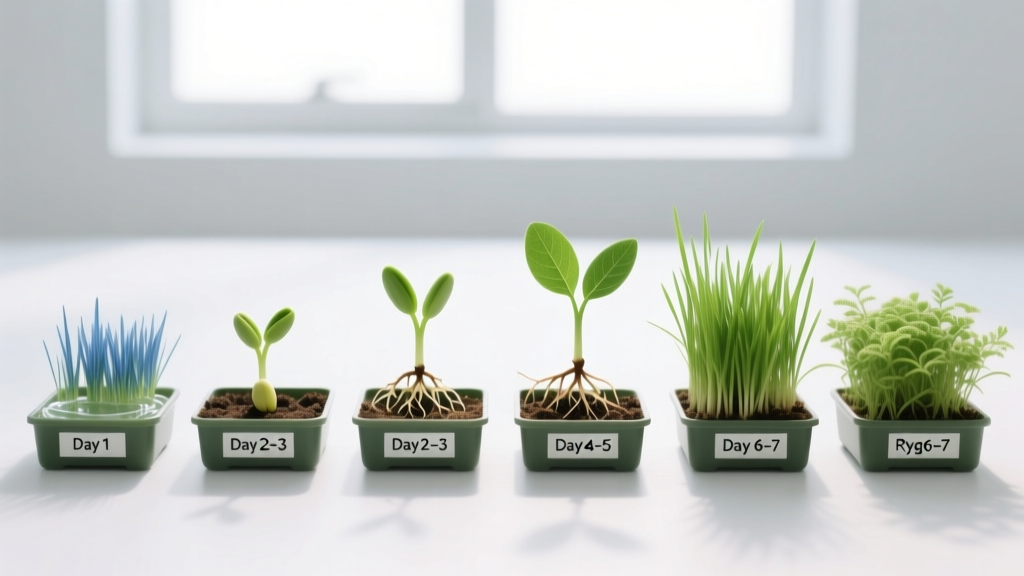
1 Week Grass Seed Germination Stages: Day-by-Day Timeline
The Biological Awakening: What Happens Before You See Green
When you scatter grass seed over prepared soil, the absence of immediate green shoots does not mean nothing is happening. The first seven days represent the most volatile and biologically active phase of a turfgrass plant's life cycle. Understanding the 1 week grass seed germination stages is critical for homeowners and landscapers, as a single environmental misstep during this 168-hour window can result in total seed loss. Germination is not merely 'waiting for grass to grow'; it is a complex metabolic sequence involving rapid water uptake, enzyme activation, and cellular division. According to turfgrass research from the Purdue University Turfgrass Science program, the transition from a dormant embryo to an autotrophic seedling requires precise moisture and temperature thresholds that must be maintained hourly, not just daily.
The Science of Imbibition and Radicle Emergence
The entire first week is governed by three primary physiological phases: imbibition, activation, and emergence. During imbibition, the dry seed absorbs water, increasing its weight by 200% to 300%. This swelling softens the seed coat (testa) and rehydrates the embryonic cells. Following this, the activation phase triggers the release of gibberellic acid, which signals the aleurone layer to produce alpha-amylase. This enzyme breaks down the starchy endosperm into simple sugars, providing the energy required for the radicle (primary root) to break through the seed coat. If the soil surface dries out during the transition between imbibition and radicle emergence, the fragile new root cells desiccate and die instantly, rendering the seed non-viable.
Day-by-Day Breakdown of 1 Week Grass Seed Germination Stages
While exact timing varies by species and soil temperature, fast-germinating cool-season grasses like perennial ryegrass follow a predictable 7-day timeline when soil temperatures are held at an optimal 60°F to 68°F.
Day 1-2: Water Uptake and Metabolic Ignition
- Day 1: The seed absorbs ambient soil moisture. Polymer-coated seeds (common in 2026 premium seed blends) may take 12-24 hours longer to initiate this phase as the hydroscopic coating slowly dissolves.
- Day 2: Respiration rates spike. Oxygen consumption increases dramatically as the embryo converts stored lipids and starches into usable ATP (cellular energy).
Day 3-4: Radicle Emergence and Anchoring
- Day 3: The radicle pierces the testa. This microscopic white root is highly susceptible to fungal pathogens like Pythium blight if the soil is waterlogged rather than merely moist.
- Day 4: Root hairs begin to develop, anchoring the seed to the soil matrix and establishing the initial vascular pathway for nutrient uptake.
Day 5-6: Coleoptile Push and Hypocotyl Elongation
- Day 5: The coleoptile (a protective sheath enclosing the first leaf) begins pushing upward through the soil profile. The seed is now entirely dependent on consistent soil moisture to facilitate this mechanical push.
- Day 6: Cellular elongation drives the shoot toward the surface. Soil crusting from heavy clay or poor preparation can physically block the coleoptile at this stage.
Day 7: First Leaf Emergence
- Day 7: The coleoptile breaches the soil surface and is exposed to sunlight. Photosynthesis initiates, and the first true leaf pierces the coleoptile sheath. You will see the first faint green 'fuzz' on the lawn.
Critical Warning: The Dry-Out Death Zone
Between Day 3 and Day 5, the emerging radicle is less than 2 millimeters long and cannot access deeper soil moisture. If the top 1/4 inch of soil dries out for even 4 hours during this window, the radicle will abort. According to the University of Minnesota Extension, maintaining continuous surface moisture is the single highest predictor of week-one survival.
Between Day 3 and Day 5, the emerging radicle is less than 2 millimeters long and cannot access deeper soil moisture. If the top 1/4 inch of soil dries out for even 4 hours during this window, the radicle will abort. According to the University of Minnesota Extension, maintaining continuous surface moisture is the single highest predictor of week-one survival.
Species-Specific Germination Windows vs. Week 1 Expectations
Not all grasses will show green by Day 7. The table below outlines what you should realistically expect at the end of week one based on your chosen species, assuming optimal soil temperatures.
| Grass Species | Optimal Soil Temp | Total Germination Window | Status at End of Week 1 |
|---|---|---|---|
| Perennial Ryegrass | 55°F - 65°F | 5 - 10 Days | First leaves visible; 40% emergence. |
| Tall Fescue | 60°F - 70°F | 7 - 14 Days | Radicle anchored; coleoptile at soil surface. |
| Kentucky Bluegrass | 50°F - 65°F | 14 - 30 Days | Imbibition complete; radicle just breaching testa. |
| Bermudagrass | 65°F - 75°F | 10 - 21 Days | Metabolic activation; no visible root emergence. |
Week 1 Maintenance Protocol: Watering and Mulching
To support the 1 week grass seed germination stages, your irrigation strategy must shift from deep, infrequent watering to shallow, high-frequency misting. The goal is to keep the top 1/2 inch of soil consistently damp without creating anaerobic, waterlogged conditions.
The 3x Daily Watering Rule
- Early Morning (6:00 AM - 8:00 AM): Water for 5 to 8 minutes per zone. This replenishes moisture lost to overnight evaporation and prepares the seed for daytime metabolic activity.
- Mid-Day (11:30 AM - 1:00 PM): Water for 3 to 5 minutes. This is strictly for cooling the soil surface and preventing the top 1/4 inch from desiccating under peak UV exposure.
- Late Afternoon (3:30 PM - 5:00 PM): Water for 5 minutes. Ensure this cycle finishes at least 3 hours before sunset to prevent prolonged overnight leaf wetness, which invites dollar spot and Pythium fungi.
Equipment Note: Use a fine-mist nozzle (such as the Dramm 400AR brass nozzle, typically priced around $28) rather than a standard oscillating sprinkler. Heavy droplets from standard sprinklers will displace unanchored seeds and cause soil crusting.
Mulching Economics and Efficacy
Applying a mulch layer reduces surface evaporation by up to 65%, drastically reducing the risk of radicle desiccation on Day 3 and 4.
- Certified Weed-Free Straw: Costs approximately $4 to $6 per bale, covering 1,000 square feet at a 1-inch depth. Best for large areas, but must be applied lightly enough that 50% of the soil is still visible.
- Penn Mulch (Recycled Newspaper): Costs around $18 per 50lb bag, covering 250 square feet. Excellent for small patches; it absorbs water and expands, locking seeds into the soil matrix.
- Hydromulch: Professional application costs $0.12 to $0.18 per square foot. Contains tackifiers that bind seed to soil, eliminating washout on slopes.
Troubleshooting Week 1 Failures
If your lawn fails to progress through the expected 1 week grass seed germination stages, use this diagnostic framework to identify the failure point.
Diagnostic Matrix: Week 1 Seed Failure
Symptom: Seeds are swollen but no white root is visible by Day 5.
Cause: Soil temperature is below the species threshold (e.g., KBG seeded in 45°F soil).
Fix: Apply a clear plastic germination blanket to raise soil temperature by 10°F to 15°F via the greenhouse effect.
Symptom: Seeds sprout a tiny white root, but the root turns brown and shrivels by Day 4.
Cause: Surface desiccation. The top 1/4 inch of soil dried out during the mid-day heat.
Fix: Increase mid-day watering frequency to every 4 hours; apply a 1/2 inch layer of peat moss to retain surface moisture.
Symptom: Seeds develop a fuzzy white or grey coating and rot.
Cause: Pythium blight or damping-off disease caused by waterlogged soil and poor drainage.
Fix: Reduce watering duration by 30%. For future plantings, use seeds treated with mefenoxam or azoxystrobin fungicide coatings.
Symptom: Seeds are swollen but no white root is visible by Day 5.
Cause: Soil temperature is below the species threshold (e.g., KBG seeded in 45°F soil).
Fix: Apply a clear plastic germination blanket to raise soil temperature by 10°F to 15°F via the greenhouse effect.
Symptom: Seeds sprout a tiny white root, but the root turns brown and shrivels by Day 4.
Cause: Surface desiccation. The top 1/4 inch of soil dried out during the mid-day heat.
Fix: Increase mid-day watering frequency to every 4 hours; apply a 1/2 inch layer of peat moss to retain surface moisture.
Symptom: Seeds develop a fuzzy white or grey coating and rot.
Cause: Pythium blight or damping-off disease caused by waterlogged soil and poor drainage.
Fix: Reduce watering duration by 30%. For future plantings, use seeds treated with mefenoxam or azoxystrobin fungicide coatings.
Beyond Week One: Transitioning to Root Establishment
Once the first true leaf emerges and the lawn takes on a faint green hue (typically Day 7 to 10 for ryegrass, Day 14 to 21 for fescues), the seedling transitions from the germination phase to the establishment phase. At this point, the secondary root system begins to develop. You must gradually reduce watering frequency while increasing duration—shifting from three 5-minute daily sessions to one 20-minute daily session—to force the new roots to chase moisture deeper into the soil profile. For comprehensive post-germination care and mowing thresholds, consult the turf establishment guidelines provided by Penn State Extension. Mastering the first seven days ensures the seed survives; mastering the subsequent three weeks ensures the lawn thrives for decades.

