
Grass Types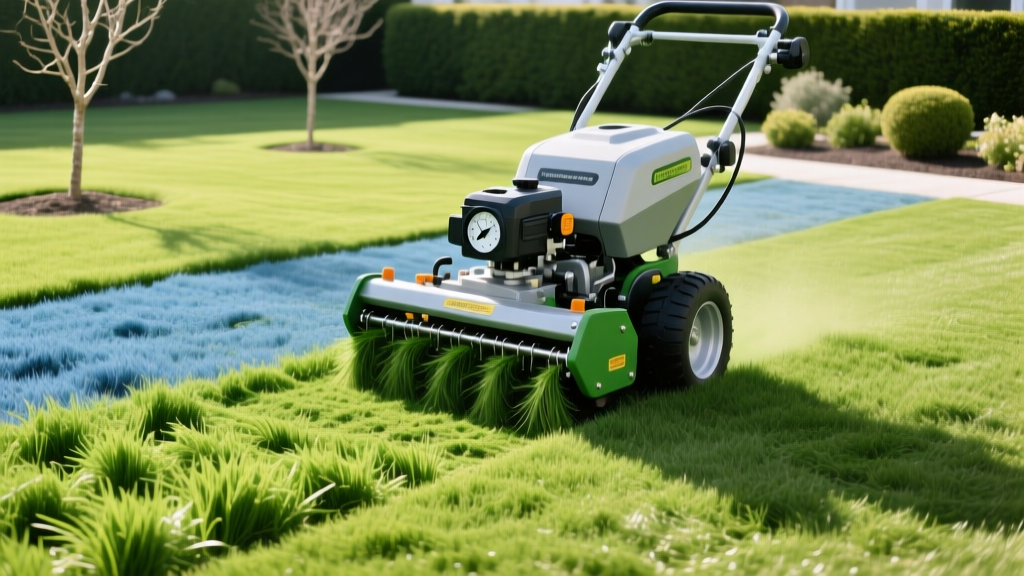
How to Choose and Calibrate a Grass Seeder Machine for New Lawns
Matching the Grass Seeder Machine to Your Establishment Goal
Establishing a new lawn or overseeding an existing one requires precise seed-to-soil contact and uniform distribution. A grass seeder machine eliminates the guesswork of hand-broadcasting, but selecting the wrong equipment for your specific grass species and soil condition will result in patchy germination and wasted seed. In 2026, the market offers three primary mechanical categories for residential and light-commercial turf establishment, each engineered for distinct scenarios.
1. Drop Spreaders (Precision Application)
Drop spreaders release seed directly downward through a series of holes in the hopper base. They are ideal for small, rectangular lawns bordered by garden beds, hardscapes, or water features where overspill is unacceptable. Because the application width is limited to the wheelbase (typically 22 to 30 inches), they require meticulous overlapping. Models like the Scotts Classic Drop Spreader remain the industry standard for precise Kentucky Bluegrass and Fine Fescue applications.
2. Broadcast Spreaders (Speed and Coverage)
These machines use a rotating impeller to fling seed in a wide, semi-circular pattern (up to 12 feet wide). They are the optimal choice for large, open areas and irregularly shaped properties. The primary drawback is the risk of seed landing in unwanted areas, requiring the use of edge guards. For open-acreage cool-season lawns, a calibrated broadcast spreader like the Earthway 2150 provides the most efficient coverage.
3. Slit Seeders / Overseeders (Maximum Germination)
A slit seeder (or power seeder) features rotating steel blades that cut micro-trenches into the soil, dropping seed directly into the furrows before packing them down. This guarantees optimal seed-to-soil contact, bypassing the need for manual aeration or heavy raking. While heavy and often rented rather than purchased (averaging $85 to $125 per day for residential models in 2026), slit seeders are mandatory for renovating severely degraded lawns or planting warm-season grasses like Bermuda and Zoysia that demand strict depth control.
Warning: Coated vs. Uncoated Seed Flow Rates
Many modern seeds feature clay or polymer coatings (e.g., Pennington Smart Seed) to retain moisture. Coated seeds are physically larger and heavier than uncoated seeds. If you use the manufacturer's standard dial setting meant for raw seed, a coated seed will flow up to 30% slower, resulting in severe under-seeding. Always perform a physical calibration test when using coated varieties.
Many modern seeds feature clay or polymer coatings (e.g., Pennington Smart Seed) to retain moisture. Coated seeds are physically larger and heavier than uncoated seeds. If you use the manufacturer's standard dial setting meant for raw seed, a coated seed will flow up to 30% slower, resulting in severe under-seeding. Always perform a physical calibration test when using coated varieties.
The Mathematics of Calibration: The Catch-Pan Method
Factory dial settings printed on seed bags are merely baselines. Humidity, seed size, machine wear, and walking speed drastically alter output. According to Clemson University's Home and Garden Information Center, physical calibration is the only way to guarantee accurate application rates. The most reliable technique for homeowners is the Catch-Pan Method.
- Measure a Test Area: Mark off a 100-square-foot section of your driveway or lay down a 10x10 foot tarp. (Testing on a hard surface allows you to recover and reuse the seed).
- Weigh the Catch Pan: Tape a lightweight plastic container or heavy-duty ziplock bag beneath the spreader's drop zone to catch all dispensed material. Weigh the empty container on a digital kitchen scale.
- Execute the Test Run: Fill the hopper with seed. Walk across the 100-square-foot test area at your normal, steady mowing pace while engaging the spreader.
- Weigh the Captured Seed: Weigh the container with the captured seed. Subtract the empty container weight to find the net weight of the seed dispensed in ounces.
- Calculate the Rate: Use the following formula to determine your output per 1,000 square feet:
(Ounces caught ÷ Test Area in sq ft) × 1,000 ÷ 16 = Pounds per 1,000 sq ft.
Example: You catch 1.2 ounces of Tall Fescue seed over a 100 sq ft test area.
(1.2 ÷ 100) × 1,000 = 12.
12 ÷ 16 = 0.75 lbs per 1,000 sq ft.
If your target rate is 6 lbs per 1,000 sq ft, your aperture is closed too tightly. Open the dial and repeat the test.
Target Seed Rates and Machine Selection Matrix
Different grass species require vastly different seeding densities due to seed size and tillering habits. Fine-bladed grasses require fewer pounds per square foot, while bunch-type grasses require heavier applications. The table below outlines the 2026 agronomic standards for new lawn establishment.
| Grass Species | Season | New Lawn Rate (lbs/1,000 sq ft) | Recommended Machine Type |
|---|---|---|---|
| Tall Fescue | Cool | 6.0 - 8.0 | Broadcast or Slit Seeder |
| Kentucky Bluegrass | Cool | 2.0 - 3.0 | Drop or Broadcast |
| Perennial Ryegrass | Cool | 5.0 - 7.0 | Broadcast or Slit Seeder |
| Bermudagrass (Hulled) | Warm | 2.0 - 3.0 | Slit Seeder (Strict Depth) |
| Zoysiagrass | Warm | 2.0 - 3.0 | Slit Seeder or Drop |
For comprehensive regional variations and soil-specific amendments, consult your local university extension office, such as the Penn State Extension's Lawn Establishment Guidelines, which provides localized data on cultivar performance and precise seeding windows.
Execution: Operating the Machine for Maximum Germination
Calibration is only half the battle; operator technique dictates the final uniformity of the turf canopy. Professional turf managers adhere to strict operational protocols to prevent striping and missed spots.
The 50% Overlap Rule
When using a broadcast spreader, the impeller throws the heaviest concentration of seed in the center of the pattern, tapering off at the edges. To achieve a uniform distribution, you must overlap your previous wheel track by exactly 50%. If your spreader throws a 10-foot swath, your return pass should be 5 feet away from the first pass. Many modern machines feature a small orange arrow or marker on the hopper edge to help you align with your previous tire track.
Speed and Engagement Sequencing
Never open the hopper gate while the machine is stationary, or you will dump a concentrated pile of seed that will smother the soil and burn the turf upon germination. The correct sequence is:
- Begin walking at a brisk, consistent pace (approx. 3 mph).
- Engage the hopper lever only once you are in motion.
- Close the lever a full half-second before you stop walking or reach the property boundary.
Troubleshooting Common Seeder Failures
Mechanical and environmental factors frequently disrupt seed flow. Use this diagnostic grid to resolve issues in the field.
| Symptom | Root Cause | Field Fix |
|---|---|---|
| Seed clumping in hopper; uneven flow | Static electricity buildup in dry, low-humidity conditions causing seed to stick to plastic walls. | Wipe the inside of the hopper with a dryer sheet or lightly dust the interior with food-grade diatomaceous earth or graphite powder. |
| Agitator wheel not turning | Shear pin broken due to impact with a rock, or debris jammed in the axle housing. | Clear the axle housing. Replace the shear pin with a manufacturer-approved cotter pin; never use a hardened steel bolt which will destroy the gearbox. |
| Visible striping (alternating thick/thin grass lines) | Inconsistent walking speed or failure to overlap properly on return passes. | Mark the perimeter with landscaping paint. Use the center-line alignment markers on the spreader deck to guarantee 50% overlap. |
| Seed bouncing off hard soil | Using a drop/broadcast spreader on compacted, unprepared clay soil. | Switch to a mechanical slit seeder, or core aerate the soil and drag a steel mat to break up cores before broadcasting. |
Post-Seeding Protocol for Machine-Applied Seed
Once the grass seeder machine has completed its passes, the establishment window begins. For broadcast and drop applications, lightly rake the area with a flexible leaf rake to ensure the seed is not left exposed to UV degradation and bird predation. Follow immediately with a thin layer (1/4 inch) of peat moss or screened compost to retain moisture. If using a slit seeder, the machine has already packed the seed into the soil; your only immediate task is to initiate the watering schedule. Apply 1/4 inch of water immediately after seeding to activate the seed coating and settle the soil around the embryo. Maintain continuous surface moisture for the first 14 to 21 days, watering 2 to 3 times daily for short intervals, until the first true leaves emerge and root into the subsoil.

