
Grass Types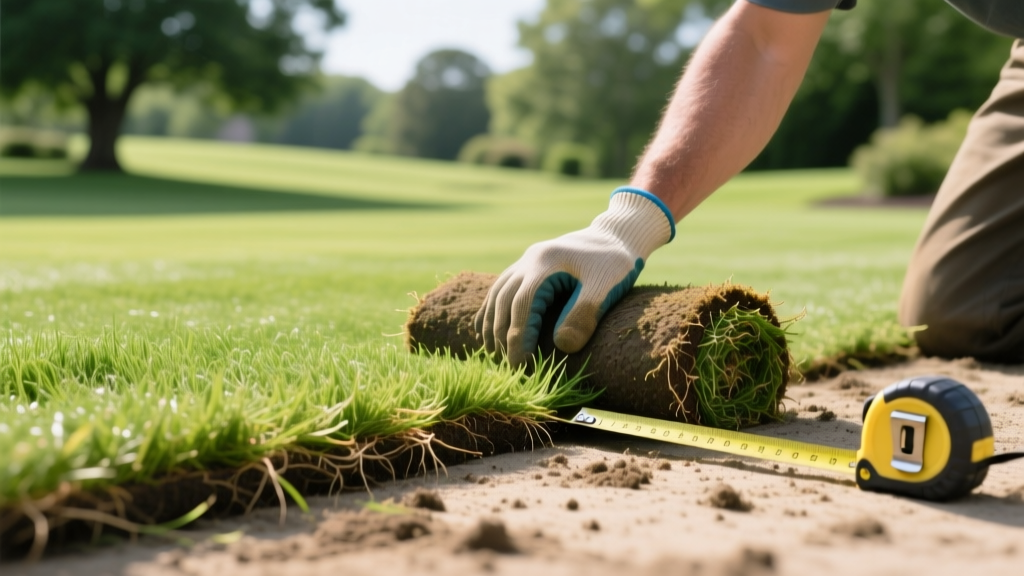
Mastering Grass Sod Placement for Flawless Lawn Establishment
The Physics of Grass Sod Placement: Why Seams and Roots Fail
The long-term survival of a sodded lawn is rarely determined by the quality of the turf at the farm; it is dictated entirely by the precision of the grass sod placement on your property. Industry data indicates that over 75% of early-stage sod failures—characterized by seam separation, localized desiccation, and shallow rooting—trace back to poor sub-grade preparation and improper physical placement. When sod is laid over unscarified soil or placed with improper seam alignment, capillary action is broken. Water cannot wick upward from the native soil into the sod's root zone, and the roots cannot penetrate downward. This creates an 'air pocket' effect where the underside of the sod dries out within hours, even if the surface blades appear green and hydrated.
According to turfgrass researchers at the University of Minnesota Extension, achieving immediate root-to-soil contact is the single most critical variable in the first 48 hours of establishment. Proper grass sod placement eliminates these microscopic air gaps, ensuring the rhizomes and stolons immediately begin anchoring into the underlying soil matrix.
Pre-Placement Soil Grading and Amendment Matrix
Before a single roll of sod touches the ground, the sub-grade must be engineered for drainage, nutrient retention, and physical stability. Simply rototilling the top two inches of existing dirt is a primary cause of post-placement settling and seam tearing. Below is the precise soil preparation matrix required for optimal grass sod placement, factoring in 2026 material costs and turf-grade specifications.
| Native Soil Type | Scarification Depth | Amendment Ratio (per 1,000 sq ft) | Target Grade Slope | Est. Material Cost |
|---|---|---|---|---|
| Heavy Clay | 4 to 6 inches | 2.5 cu yd compost + 50 lbs gypsum | 1.5% to 2% away from foundation | $130 - $175 |
| Sandy Loam | 2 to 3 inches | 1.5 cu yd peat moss + 20 lbs humic acid | 1% away from foundation | $85 - $110 |
| Compacted Fill Dirt | 6 to 8 inches | 3.0 cu yd compost + deep core aeration | 2% away from foundation | $160 - $210 |
After incorporating amendments, use a heavy landscaping rake to level the surface, followed by a lightweight empty roller to identify low spots. Any depression deeper than 0.5 inches must be filled and re-leveled. If you lay sod over a depression, the resulting 'spongy' pocket will prevent root penetration and invite fungal pathogens like Pythium blight.
Strategic Staggering: The Brickwork Pattern Explained
The physical arrangement of the sod rolls dictates how the lawn handles thermal expansion, contraction, and foot traffic during the establishment phase. Never place sod in continuous parallel lines (a 'stack bond' pattern). This creates continuous lateral seams that act as fault lines, prone to tearing and separating when the soil shifts or dries.
Execution Steps for Flawless Staggering
- Start at a Straight Edge: Begin your first row along a driveway, sidewalk, or a taut mason's line. Ensure the first row is perfectly straight; any deviation here will compound across the entire yard.
- The 18-Inch Offset Rule: When starting the second row, cut the first piece of sod in half (or offset it by at least 18 inches) so the vertical seams form a staggered 'brickwork' pattern. Never allow four corners of sod to meet at a single intersection. This creates a structural weak point and a depression where water will pool, rotting the grass crowns.
- Tight Seam Compression: Push the edges of the sod rolls tightly together. Do not leave a 1/4-inch gap to 'prevent overlapping.' As the Clemson University Home & Garden Information Center notes, sod shrinks up to 5% in width during the first week as it loses its farm-grown hydration. Seams placed with gaps will widen into unsightly brown trenches.
- Precision Cutting: Use a 12-inch stainless steel serrated sod knife or a heavy-duty utility knife with fresh snap-off blades to cut curves around irrigation heads and tree rings. Avoid tearing the sod mat, which frays the roots and delays edge healing.
⚠️ CRITICAL WARNING: The 'Shrinkage Gap' Mistake
Many DIYers intentionally leave a small gap between sod rolls, fearing that tight placement will cause the edges to buckle or overlap. This is a critical error. Sod naturally shrinks as the thatch layer compresses and moisture equilibrates. Always butt the edges tightly together. If a piece is slightly too wide, trim the excess from the back edge of the roll with a knife before pushing it into place.
Edge Securing and Slope Stabilization Tactics
Gravity and irrigation runoff are the enemies of fresh grass sod placement on inclined surfaces. On any slope exceeding a 15% grade, the sheer weight of the hydrated sod (which can exceed 50 lbs per roll) will cause the entire mat to slide downward, tearing the fragile new roots.
Slope Anchoring Protocol
- Select the Right Stakes: Use 6-inch biodegradable wooden U-stakes or galvanized landscape staples. Avoid plastic stakes, which do not grip the root zone effectively and can be pushed out by frost heave.
- Grid Spacing: Drive stakes through the sod and into the sub-grade every 2 feet in a staggered grid pattern across the entire slope.
- Topsoil Berms: At the very top of the slope, build a 3-inch high topsoil berm to intercept water runoff and force it to percolate down through the root zone rather than washing over the surface and undermining the sod edges.
The First 72 Hours: Hydration and Roller Weight Protocols
The physical act of grass sod placement is incomplete until the turf is mechanically pressed and hydraulically sealed to the soil. The timing and weight of your post-installation rolling and watering will dictate the speed of root establishment.
Rolling Specifications
Within two hours of placement, roll the entire lawn using a water-filled polyurethane lawn roller. Target a total roller weight of 200 to 250 pounds. This specific weight is heavy enough to press out air pockets and force the sod's root mat into the soil's microscopic crevices, but light enough to avoid crushing the grass crowns or compacting the underlying clay. Never roll sod if the underlying soil is saturated and muddy; this will cause severe sub-grade compaction and destroy soil structure.
The 1-Inch Hydration Rule
Immediately after rolling, apply exactly 1 inch of water across the entire lawn. Use empty tuna cans placed at various distances from the sprinkler to measure the output. The goal is to moisten the sod and the top 2 inches of the underlying soil. For the first 14 days, water lightly 2 to 3 times daily to keep the surface moist, gradually tapering to deeper, less frequent soaks to force roots downward.
Troubleshooting Placement Failures
Even with meticulous grass sod placement, environmental variables can cause localized failures. Use this diagnostic framework to identify and correct issues within the first 30 days.
- Symptom: Lawn feels spongy or soft underfoot.
Cause: An air pocket remains beneath the sod, or the sub-grade was not properly scarified, creating a thatch-to-clay barrier.
Fix: Lift the affected sod piece, aggressively scarify the soil with a hand cultivator to a depth of 3 inches, mist the soil, and re-lay the sod. Roll immediately. - Symptom: Brown, necrotic lines appearing exactly at the seams.
Cause: Edge desiccation due to shrinkage gaps or wind exposure pulling moisture from the exposed root edges.
Fix: Topdress the seams with a 1/4-inch layer of fine, screened compost. Hand-water the seams twice daily for 5 days to rehydrate the edge roots and encourage lateral stolon growth across the gap. - Symptom: Yellowing grass in low-lying areas.
Cause: Sub-grade settling created a depression, causing water to pool and suffocate the roots (hypoxia).
Fix: Peel back the sod, add a 50/50 mix of topsoil and coarse sand to elevate the grade, and replace the sod. Reduce watering in that specific zone until the soil drains properly.
'The difference between a lawn that survives its first summer and one that requires complete renovation is almost always found in the first 48 hours of soil contact. Precision in grading, staggering, and rolling is non-negotiable for professional-grade establishment.' — Turfgrass Establishment Guidelines, NC State University
Mastering grass sod placement requires treating the lawn not just as a cosmetic layer, but as a living biological interface that relies on precise physical and hydraulic connections to the earth beneath it. By adhering to strict grading matrices, executing flawless brickwork staggering, and enforcing immediate mechanical compression, you guarantee the structural integrity and long-term vigor of your new lawn.

