
Grass Types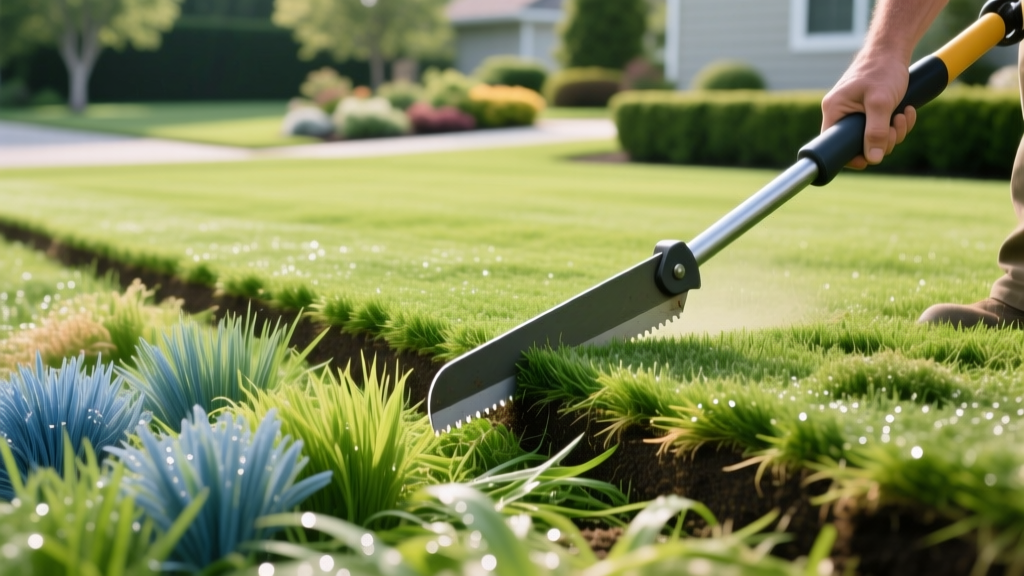
How to Cut Sod for Perfect Lawn Edges and Seamless Establishment
Cutting sod accurately is the critical difference between a lawn that knits together in 14 days and one that develops necrotic edges, gap shrinkage, and severe weed invasions. When establishing a new lawn from sod, the root zone must maintain continuous contact with the prepared soil base. Jagged cuts, improper overlaps, and torn root mats delay establishment and increase water requirements. This guide details the exact tools, dimensional tolerances, and cutting techniques required for professional-grade sod installation.
Essential Tools for Cutting Sod (With 2026 Pricing)
Using a standard kitchen knife or a dull utility blade will tear the rhizomes and stolons at the edge of the sod roll, causing the perimeter to die back before it can root. Invest in the correct cutting implements to ensure clean, flush seams.
- Heavy-Duty Utility Knife: A 9-inch retractable knife with snap-off carbon steel blades (e.g., Stanley FatMax 9-Inch, ~$18). The extended blade length is necessary for thicker Tall Fescue sod rolls.
- Serrated Sod Knife: A specialized knife with a hooked, serrated edge (e.g., A.M. Leonard Serrated Sod Knife, ~$35). The hook prevents the blade from slipping off the edge and slicing into your gloves or knees.
- Aluminum Screed Board or Straight Edge: A 6-foot to 8-foot aluminum screed (~$45) provides a rigid, perfectly straight guide for long runs. Wooden 2x4s tend to warp and bow, resulting in wavy seams.
- Landscaping Marking Paint: Inverted fluorescent paint (~$8 per can) for marking curves and obstacle boundaries directly on the soil base before laying the sod.
Pro Tip: Blade Maintenance
Sod soil is highly abrasive. A brand-new carbon steel blade will dull after cutting approximately 40 to 50 linear feet of sod. Snap off the dull segment or swap blades immediately. A dull blade requires 30% more downward pressure, increasing fatigue and the risk of the knife slipping.
Sod soil is highly abrasive. A brand-new carbon steel blade will dull after cutting approximately 40 to 50 linear feet of sod. Snap off the dull segment or swap blades immediately. A dull blade requires 30% more downward pressure, increasing fatigue and the risk of the knife slipping.
Pre-Cutting Preparation and Soil Grading Context
Before you make a single cut, your soil base must be graded correctly. The finished soil grade should sit exactly 1 inch below adjacent hardscapes (driveways, sidewalks, and patios). This accounts for the average 3/4-inch thickness of the sod root zone and 1/4-inch of soil settling after rolling. If your soil base is too high, the cut sod edges will sit above the hardscape, creating a tripping hazard and exposing the root zone to rapid drying. According to Penn State Extension, failing to account for sod thickness during the grading phase is the primary cause of edge desiccation in newly established lawns.
Step-by-Step: How to Cut Sod for Straight Edges and Curves
The technique for cutting sod varies drastically depending on whether you are navigating a long straight property line or wrapping around a curved garden bed.
Cutting Straight Lines and Seams
When joining two rolls of sod or trimming the perimeter against a straight driveway, never cut freehand. Lay your aluminum screed board directly over the sod where the cut needs to be made. Press down firmly on the board with your knee or foot to prevent the sod from shifting. Using your utility knife, slice through the sod in one continuous, fluid motion. Do not use a sawing motion; sawing frays the grass blades and tears the underlying netting or root mat. If the sod is particularly thick (common with Kentucky Bluegrass blends grown in heavy clay), score the top layer first, then press harder to slice through the dense root zone.
Navigating Curves and Irregular Obstacles
For curved garden beds or tree rings, lay a standard garden hose along the desired curve and mark the soil with landscaping paint. When laying the sod, allow the roll to overlap the painted line by at least 2 to 3 inches. Once the sod is pressed flat, use your serrated sod knife to trim along the painted line. Cutting from the top down after the sod is laid ensures the curve perfectly matches the soil bed below, eliminating the gaps that occur when you try to pre-cut curves on a flat surface.
Cutting Around Sprinkler Heads and Valves
Never attempt to measure and cut a perfect circle in a piece of sod before laying it. Instead, lay the sod directly over the sprinkler riser. Feel for the hard plastic of the riser through the sod, and use your knife to cut a small 'X' directly over the center. Fold the four resulting flaps back, press the sod down around the base, and then use a sharp knife or a 2-inch hole saw to trim the flaps into a clean circle. This method guarantees a tight fit and prevents the sod from tearing outward as it settles.
Sod Cutting Dimensions and Overlap Matrix
Sod is a living, respiring material that loses moisture rapidly once harvested. As detailed in Oregon State University Extension turfgrass guidelines, accounting for dimensional changes during the cutting and laying process is mandatory for seamless establishment. Use the matrix below to determine your cutting tolerances based on the specific installation scenario.
| Installation Scenario | Cut Type | Overlap / Gap Allowance | Reasoning |
|---|---|---|---|
| Longitudinal Seams (Roll to Roll) | Straight Butt Joint | 0-inch gap, tight push | Prevents lateral shifting during rolling. |
| Lateral Seams (End to End) | Staggered Brick Pattern | 1/2-inch overlap | Compensates for 2-4% longitudinal shrinkage. |
| Hardscape Perimeters (Driveways) | Straight Trim | 1/4-inch gap from concrete | Allows for thermal expansion of hardscape. |
| Curved Garden Beds | Contour Trim | Flush cut, 0-inch gap | Prevents edge desiccation into the mulch bed. |
Common Sod Cutting Mistakes That Kill Establishment
Even with premium sod, poor cutting techniques will result in patchy establishment. Avoid these critical failure modes:
The most common cause of seam failure is 'The Gap Shrink'. Installers butt the ends of sod rolls perfectly tight, but as the root zone dries over the first 48 hours, the sod shrinks by up to 4%. A perfect seam becomes a 1/2-inch gap, exposing the soil to air, drying out the adjacent roots, and creating a prime germination zone for crabgrass.
- Cutting Pieces Too Small: Never use scraps of sod smaller than 12x12 inches to fill gaps. Small pieces have a high surface-area-to-volume ratio, meaning they lose moisture faster than their roots can extract it from the soil. They will almost always die before knitting. Instead, cut a larger, custom-fitted patch that spans the gap and overlaps the surrounding established rolls.
- Ignoring Grass Type Thickness: Bermuda and Zoysia sod are typically harvested thinner (1/2 inch of soil) because they are grown in dense, tight mats. Cool-season grasses like Tall Fescue and Kentucky Bluegrass are harvested thicker (3/4 to 1 inch of soil). If you are mixing sod types for patch repairs, you must shave the soil off the bottom of the thicker sod with a flat spade to ensure the grass canopy sits perfectly level with the surrounding lawn.
- Leaving the Root Mat Intact on Heavy Clay: Some commercial sod farms use biodegradable netting to hold heavy clay soil together during transport. If your sod has thick plastic netting that is not breaking down, use your knife to score the netting lightly on the bottom of the roll every 6 inches before laying it. This allows the roots to penetrate the native soil without being choked by the synthetic mesh.
Post-Cutting Roll and Water Protocol
Cutting the sod is only half the establishment equation. Immediately after all cuts are made and seams are pushed tight, the lawn must be rolled. Use a water-filled lawn roller weighing between 150 and 200 pounds. Roll the entire area in two perpendicular directions (e.g., North-South, then East-West). This forces the freshly cut soil edges of the sod into intimate contact with the native soil base, eliminating air pockets that cause root desiccation. Within 15 minutes of rolling, apply exactly 1 inch of water. The water acts as a hydraulic settling agent, pulling the soil particles together and initiating the capillary action required for the cut edges to heal and knit into a single, unified turf canopy.

