
Grass Types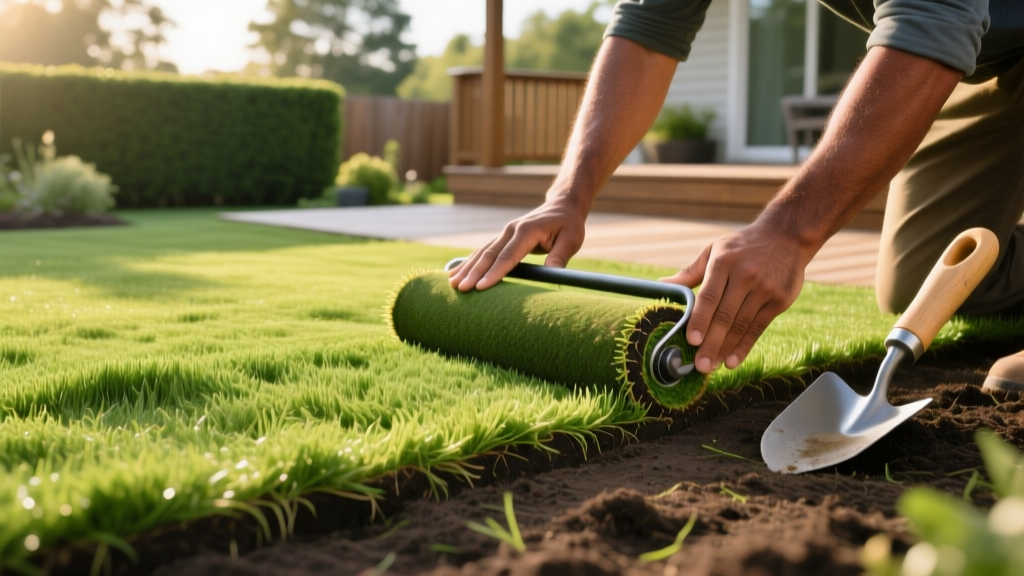
How to Install Sod Grass: Step-by-Step Lawn Establishment Guide
Most homeowners treat sod installation like unrolling a green carpet, assuming that simply laying it over dirt guarantees a lush lawn. In reality, sod establishment is a biological race against desiccation. If the harvested root system fails to penetrate and knit into the native soil within 14 to 21 days, the turf will experience severe moisture stress, leading to seam shrinkage, fungal rot, or total failure. Learning exactly how to install sod grass requires a focus on soil diagnostics, precise physical seaming, and a tapering hydration schedule that forces roots downward.
Pre-Installation Soil Diagnostics and Grading
The most common point of failure in sod establishment is poor soil-to-root contact caused by compacted subsoil or improper grading. Before a single roll of sod arrives, the site must be prepped to receive roots.
Pro-Tip: The Percolation Test
Dig a hole 12 inches deep and fill it with water. If it drains in under 2 hours, your soil is sandy and will require heavy compost amendment to retain moisture. If water pools for more than 4 hours, you have heavy clay. You must till in 2 to 3 inches of coarse builder's sand and 2 inches of organic compost into the top 6 inches of the clay profile to prevent the sod roots from drowning in anaerobic conditions.
Dig a hole 12 inches deep and fill it with water. If it drains in under 2 hours, your soil is sandy and will require heavy compost amendment to retain moisture. If water pools for more than 4 hours, you have heavy clay. You must till in 2 to 3 inches of coarse builder's sand and 2 inches of organic compost into the top 6 inches of the clay profile to prevent the sod roots from drowning in anaerobic conditions.
Grading and Slope Requirements
Water must flow away from your home's foundation. Use a string line and a line level to establish a minimum slope of 1/4 inch per foot for the first 10 feet away from the house. Rototill the top 4 to 6 inches of soil to break up compaction, then rake the area smooth. Remove all rocks larger than 1 inch, as they will create air pockets under the sod, causing localized dry spots and root death.
Calculating Sod Volume and Managing Pallet Burn
Sod is a living, breathing organism. When stacked on a pallet, the respiration of the grass generates significant heat in the center of the stack—a phenomenon known as 'pallet burn,' which can kill the turf in under 24 hours during summer months.
| Specification | Standard Pallet Metrics | Installation Notes |
|---|---|---|
| Coverage Area | 450 - 500 sq. ft. | Always order 5% to 10% overage for curves and cutting waste. |
| Pallet Weight | 2,000 - 3,000 lbs. | Requires forklift delivery; ensure truck access to the site. |
| Max Lay Time | 12 - 24 hours | Unstack and lay immediately upon delivery to prevent yellowing. |
According to the University of Wisconsin-Madison Extension, sod should ideally be installed on the same day it is delivered. If you must delay, unstack the rolls and lay them flat in a shaded area, keeping them lightly moist.
The Physical Installation: Staggered Seams and Root Contact
Proper seaming technique prevents water from channeling down the gaps and eroding your carefully graded topsoil. It also creates a uniform visual canopy as the grass matures.
- Start at a Straight Edge: Begin laying your first row along a long, straight boundary like a driveway or sidewalk. This ensures your entire lawn remains square.
- Use the Brickwork Pattern: Stagger the vertical seams of the second row so they fall in the middle of the sod pieces in the first row, exactly like laying bricks. This interlocks the turf and prevents continuous fault lines.
- Butt Seams Tightly, Never Stretch: Push the edges of the sod rolls tightly together. Never stretch the sod to cover gaps. Sod naturally shrinks as it loses moisture; stretching it guarantees 1/2-inch gaps will form within 48 hours, inviting weed seeds and drying out the exposed soil edges.
- Cut with a Serrated Knife: Use a sharp, serrated sod knife or a heavy-duty utility blade to cut pieces for curves and around sprinkler heads. Avoid using a shovel, which tears the root mat and leaves ragged edges.
- Roll the Turf: Once an area is laid, run a water-filled lawn roller (weighing 200 to 300 pounds) over the sod in two perpendicular directions. This presses the sod roots firmly into the soil, eliminating air pockets that cause rapid drying.
Post-Install Hydration and Root Knitting Schedule
The goal of watering newly installed sod is to keep the top 1 inch of soil constantly moist while gradually forcing the roots to grow deeper to seek water. Overwatering is just as deadly as underwatering, as it suffocates roots and promotes Pythium blight.
The 6-Week Root Knitting Matrix
| Timeframe | Watering Frequency | Duration / Depth | Mowing & Traffic |
|---|---|---|---|
| Week 1 | 3 to 4 times daily | 10-15 mins (Keep top 1" wet) | Zero traffic. No mowing. |
| Week 2 | 1 to 2 times daily | 20 mins (Soak top 2") | Perform the 'tug test'. No mowing. |
| Week 3 | Once daily | 30 mins (Soak top 3") | First mow if over 3.5". Set blade high. |
| Week 4-6 | Every 2-3 days | 45-60 mins (Deep soak 4-6") | Normal traffic. Mow at standard height. |
The University of Georgia Extension emphasizes the 'tug test' during Week 2: gently grasp a handful of grass and pull upward. If you feel resistance, the roots have successfully knitted into the native soil, and you can begin tapering your watering frequency to encourage deeper root growth.
Troubleshooting Early Establishment Failures
Even with meticulous preparation, environmental variables can disrupt establishment. Use this diagnostic guide to correct issues before they become permanent dead zones.
1. Seam Shrinkage and Gapping
The Cause: The sod was stretched during installation, or the soil beneath was not adequately moistened before laying, causing the edges to dry out and contract.
The Fix: Do not push the edges back together once they have shrunk; you will tear the newly forming roots. Instead, fill the gaps with a 50/50 mix of topsoil and fine compost, and keep the gaps heavily watered to encourage lateral rhizome growth to bridge the space.
2. Yellowing or 'Melting' Turf
The Cause: Anaerobic soil conditions from severe overwatering, or pallet burn from leaving the sod stacked too long before installation.
The Fix: If it is overwatering, immediately halt irrigation for 24 hours to let the soil breathe. Core aerate the affected area with a manual aerator to introduce oxygen to the root zone. If it is pallet burn, the center of the rolls will be dead; these sections must be physically cut out and replaced with fresh sod.
3. Spongy or Uneven Surface
The Cause: Failure to use a lawn roller after installation, leaving air pockets between the sod and the soil.
The Fix: If caught in Week 1, rent a water-filled roller and press the sod down immediately. If caught in Week 3 or later, the roots may have already anchored into the air pockets. You will need to top-dress the low areas with a 1/4 inch layer of masonry sand over the next several months to gradually level the canopy without smothering the grass.

