
Grass Types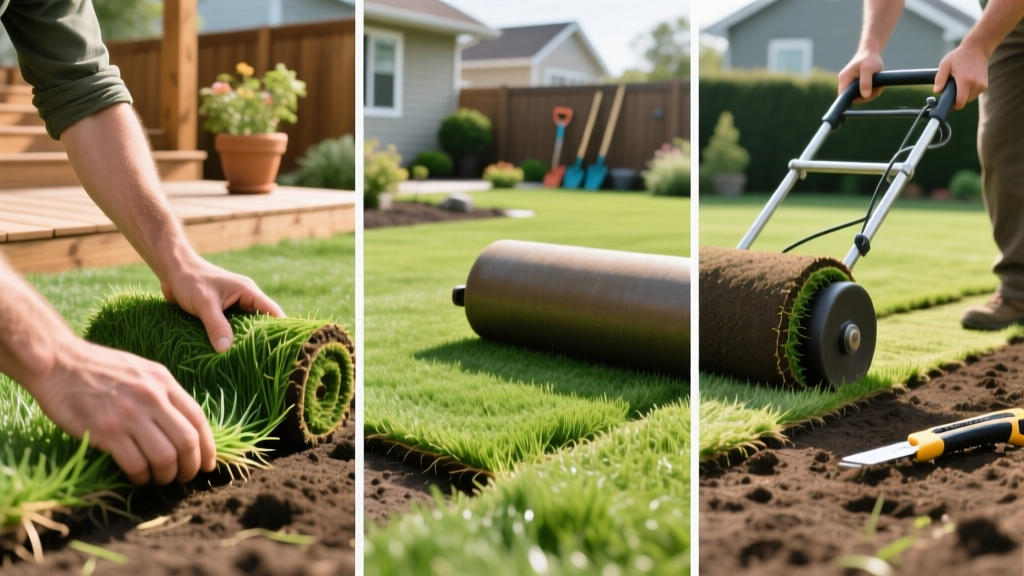
How to Install Turf Grass: Step-by-Step Sod Laying Guide
Installing turf (sod) provides an instant, mature lawn, bypassing the 3-to-6-week germination window and early-stage vulnerability associated with grass seed. However, treating sod like a simple "roll-out carpet" is the primary cause of installation failure. Improper soil preparation, inadequate grading, and incorrect post-installation watering lead to seam shrinkage, shallow rooting, and severe fungal outbreaks. This guide details the exact agronomic and physical steps required to install turf grass successfully, ensuring rapid root establishment and long-term viability.
Calculating Turf Requirements and Material Costs
Before breaking ground, accurately calculate your square footage and budget. Turf is typically sold by the pallet, which covers between 450 and 500 square feet, or by individual rolls (usually 2x4.5 feet, covering 9 square feet). Always order 5% to 10% extra to account for curves, edges, and cutting waste.
| Material / Service | Average Cost (per sq. ft.) | Notes & Specifications |
|---|---|---|
| Standard Sod (e.g., Tall Fescue, Bermuda) | $0.35 - $0.55 | Price fluctuates based on regional farm proximity and fuel costs. |
| Premium Sod (e.g., Zoysia, Hybrid Bermuda) | $0.60 - $0.85 | Slower-growing, higher-density cultivars require more farm time. |
| Topsoil / Compost Amendment | $0.10 - $0.20 | Required if native soil is heavy clay or nutrient-depleted sand. |
| Starter Fertilizer (High Phosphorus) | $0.02 - $0.04 | Crucial for initial root development; do not skip. |
| Professional Installation Labor | $0.50 - $1.00 | Varies heavily by site accessibility and grading complexity. |
Pre-Installation Soil Preparation
The most critical phase of turf installation occurs before the sod arrives. Sod roots will not penetrate compacted subsoil. According to University of Minnesota Extension, failing to properly loosen the soil profile is the leading cause of shallow root systems that fail during summer drought stress.
Step 1: Clearing and Tilling
Remove all existing weeds, rocks, and debris. Apply a non-selective systemic herbicide (like glyphosate) 14 days prior to tilling if killing off an existing lawn. Once clear, use a rear-tine rototiller to break up the top 4 to 6 inches of soil. If your native soil is heavy clay, incorporate 2 to 3 cubic yards of organic compost per 1,000 square feet during this tilling phase to improve drainage and aeration.
Step 2: Grading and Sloping
Water must drain away from your home's foundation. Use a landscaping rake to grade the soil to a 1% to 2% slope (a drop of 1 to 2 inches for every 10 feet) away from structures. Ensure the final soil grade sits exactly 1 inch below adjacent sidewalks, driveways, and sprinkler heads. This prevents the sod from overlapping hardscapes, which creates tripping hazards and edge-drying issues.
Step 3: Soil Testing and Fertilization
Test your soil pH; most turfgrasses thrive between 6.0 and 7.0. Apply a high-phosphorus starter fertilizer (such as a 10-18-10 N-P-K ratio) at a rate of 1 pound of actual phosphorus per 1,000 square feet. Phosphorus is immobile in soil and is strictly required to stimulate rapid root hair development in new sod. Lightly rake the fertilizer into the top half-inch of soil.
Pro Tip: Soil Moisture Check
Before the delivery truck arrives, lightly water the bare soil. The ground should be moist but not muddy. Laying sod on bone-dry soil will instantly shock the roots and draw moisture out of the turf, causing immediate wilting.
The Sod Laying Process: Step-by-Step
Sod is a perishable agricultural product. It must be installed within 24 hours of harvest. If the sod feels hot to the touch or smells sour (a sign of anaerobic decomposition), it has been on the pallet too long and will likely fail.
- Establish a Straight Edge: Begin laying your first row along a straight, fixed boundary like a driveway, sidewalk, or a tightly pulled mason line. This ensures your entire lawn remains square.
- Butt Joints Tightly: Push the edges and ends of the sod rolls tightly together. Do not overlap the edges, and do not leave gaps. Overlapping creates raised ridges that scalp when mowed; gaps lead to severe seam shrinkage and weed invasion.
- Stagger the Seams: Lay subsequent rows in a staggered, brick-like pattern. This prevents water from channeling down continuous vertical seams and hides minor imperfections in the cut lines.
- Cut with Precision: Use a sharp linoleum knife or a heavy-duty serrated landscaping knife to cut sod around trees, sprinkler heads, and curved beds. Never tear the sod with your hands, as this destroys the root mat integrity at the edges.
- Kneel on Boards: When working on the second and third rows, kneel on a piece of plywood placed over the newly laid sod. This distributes your weight and prevents deep knee indentations in the soft, prepared soil beneath.
- Roll the Turf: Once the area is fully laid, go over the entire lawn with a water-filled lawn roller (weighing approximately 150 to 200 pounds). This presses the sod roots firmly into the soil, eliminating air pockets that cause localized drying and root death.
Post-Installation Watering and Rooting Schedule
Watering is the single most important factor in the first 30 days. The goal is to keep the root zone consistently moist while gradually training the roots to grow deeper. According to Penn State Extension, transitioning from frequent, shallow watering to infrequent, deep watering is critical for drought tolerance.
| Timeframe | Watering Frequency | Duration / Depth | Objective |
|---|---|---|---|
| Day 1 (Installation) | Immediately after rolling | 1 inch of water (approx. 45-60 mins) | Settle soil, eliminate air pockets, hydrate root mat. |
| Week 1 | 2 to 3 times daily | 10-15 mins per zone (keep top 1" wet) | Prevent sod from drying out while initial root hairs form. |
| Week 2 | 1 time daily | 20-25 mins per zone | Encourage roots to stretch deeper into the native soil. |
| Week 3 | Every other day | 30-40 mins per zone | Hardening off the turf; preparing for standard irrigation. |
| Week 4 & Beyond | 1 to 2 times per week | 1 to 1.5 inches total per week | Establish deep, drought-resistant root architecture. |
Warning: The "Sponge" Effect
If the newly laid turf feels spongy or squishy underfoot, you are overwatering. Constant saturation deprives roots of oxygen, leading to root rot and Pythium blight. Lift a corner of the sod; the soil beneath should be moist and dark, but not pooling with standing water.
Verifying Establishment and First Mow
Do not rely on the calendar to tell you when the turf is established; rely on the "tug test." Grasp a handful of grass blades near the edge of a roll and pull gently upward. If the sod lifts easily, roots have not yet penetrated the subsoil. If you feel firm resistance and the soil holds fast, the turf is rooted.
You can safely mow the lawn once the turf passes the tug test, usually between 10 and 14 days post-installation. Set your mower deck high—removing no more than the top 1/3 of the grass blade. Ensure your mower blades are freshly sharpened; dull blades will tear the young grass and physically pull the unrooted sod out of the ground.
Common Installation Failures and Troubleshooting
- Seam Shrinkage (Gaps between rolls): Caused by laying sod on dry soil or failing to water heavily on Day 1. The edges dry out and contract. Fix: Fill gaps wider than 1/4 inch with a mix of topsoil and grass seed to prevent weed invasion.
- "Blueing" or Grayish Tint: This is the first visual sign of severe drought stress. The grass folds its leaf blades to conserve moisture. Fix: Apply water immediately. If caught within a few hours, the turf will recover without permanent damage.
- Yellowing at the Base: Often a sign of nitrogen deficiency or lack of sunlight, but in new sod, it usually indicates the sod was left on the pallet too long before installation, causing the lower leaves to etiolate and die from lack of light. Fix: Mow the lawn as soon as it roots to remove the dead tissue and allow light to reach the crown.
"The success of a sodded lawn is determined 80% by the soil preparation done before the delivery truck arrives, and 20% by the physical laying and subsequent watering. Never rush the rototilling and grading phases."
— Turfgrass Establishment Best Practices, University Agricultural Extensions

