
Grass Types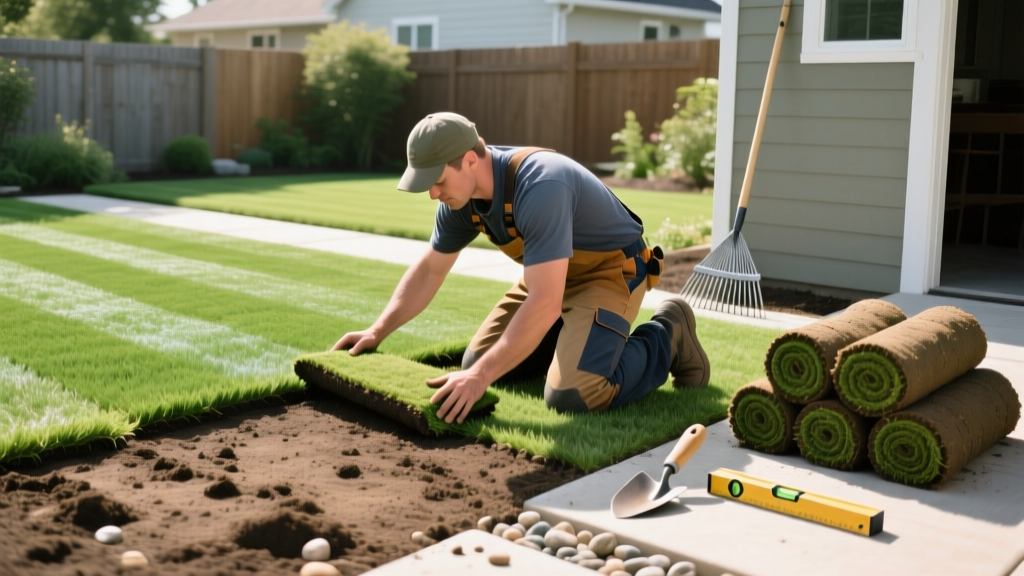
How to Lay Down Sod: Step-by-Step Lawn Installation Guide
The Economics and Agronomy of Sod Installation
Installing sod is the fastest route to a mature, erosion-resistant lawn, but the margin for error is razor-thin. In 2026, the national average cost for professional sod installation ranges from $1.50 to $2.85 per square foot, while DIY material costs hover between $0.45 and $0.85 per square foot depending on the grass cultivar. Whether you are planting a shade-tolerant St. Augustine or a high-traffic hybrid Bermuda, understanding how to lay down sod properly dictates whether your investment roots deeply or rots on the surface.
According to turfgrass researchers at Clemson University's Home and Garden Information Center, the success of sod establishment relies 80% on soil preparation and 20% on the physical installation and subsequent watering. This guide breaks down the exact measurements, soil chemistry requirements, and logistical timelines needed to establish a permanent root zone.
Essential Tool Checklist:
- Rototiller (capable of 6-inch depth)
- Heavy-duty landscaping rake and leveling bar
- Soil test kit (preferably a university extension lab mail-in kit)
- Serrated sod knife or heavy-duty utility shears
- Lawn roller (water-fillable, 24-inch minimum width)
- Oscillating sprinkler with a flow meter
Phase 1: Soil Preparation and Grading Mathematics
Never lay sod directly over existing grass, compacted dirt, or untreated clay. The root zone must be engineered to accept the 1.5 to 2 inches of soil that the sod brings with it.
Testing and Amending the Subgrade
Begin by extracting soil cores from at least five different areas of your yard. Target a pH between 6.0 and 6.8 for most warm-season grasses and 6.2 to 7.0 for cool-season fescues. If your pH is below 6.0, apply pelletized limestone at a rate of 50 lbs per 1,000 square feet for every 0.5 pH point adjustment required. Till the soil to a depth of 4 to 6 inches. During tilling, incorporate a 1-inch layer of screened compost to increase cation exchange capacity (CEC) and improve water retention.
Precision Grading for Drainage
Water pooling is the primary cause of sod failure and fungal diseases like Pythium blight. You must establish a minimum slope of 1/4 inch per foot (a 2% grade) away from your home's foundation. Use a 4-foot carpenter's level and a line level to verify the gradient. Once graded, use a water-fillable lawn roller to firm the subgrade. This prevents the sod from sinking and creating uneven depressions after the first heavy rain.
Phase 2: Pallet Logistics and Acclimation
Sod is a living, respiring organism. A standard pallet of sod covers 450 to 500 square feet and weighs between 1,500 and 2,000 lbs depending on moisture content. When harvested, the sod is stacked tightly, trapping heat generated by microbial respiration.
Warning: Pallet Burn
If ambient temperatures exceed 75°F, sod left on the pallet for more than 24 hours will begin to yellow and die from the inside out due to heat accumulation. Always schedule your soil prep to be completed 48 hours before delivery, and install the sod the exact same day it arrives. If you must delay, unstack the pallets and spread the pieces out in a shaded area.
If ambient temperatures exceed 75°F, sod left on the pallet for more than 24 hours will begin to yellow and die from the inside out due to heat accumulation. Always schedule your soil prep to be completed 48 hours before delivery, and install the sod the exact same day it arrives. If you must delay, unstack the pallets and spread the pieces out in a shaded area.
Before laying, lightly mist the exposed soil bed with a hose to prevent the dry subgrade from instantly wicking moisture out of the sod roots upon contact. Apply a high-phosphorus starter fertilizer (such as a 10-18-10 NPK ratio) at a rate of 1 lb of nitrogen per 1,000 square feet directly onto the bare soil just prior to installation to stimulate rapid root hair development.
Phase 3: The Installation Process
The physical act of how to lay down sod requires methodical precision to prevent seam shrinkage and tripping hazards.
Step-by-Step Laying Technique
- Start at a Straight Edge: Begin laying your first row along a long, straight boundary like a driveway, sidewalk, or string line.
- Use a Staggered Brick Pattern: Never align the seams vertically. Stagger the joints of the second row so they fall in the middle of the pieces in the first row, much like laying bricks. This interlocks the sod and prevents water from creating channels that wash away topsoil.
- Butt Seams Tightly: Push the edges of the sod pieces firmly together. Do not overlap them, and do not leave gaps. If gaps are left, the exposed soil will dry out, and the sod edges will shrink and die back.
- Cut for Curves and Obstacles: Use a serrated sod knife or a sharp spade to cut custom shapes around sprinkler heads, tree rings, and curved garden beds. Always cut from the top (grass side) down for the cleanest edge.
- Roll Immediately: As you complete a 500-square-foot section, roll it with a half-filled water roller. This forces the sod roots into direct contact with the subgrade, eliminating air pockets that cause localized drying.
Phase 4: The 28-Day Rooting and Watering Matrix
According to Penn State Extension, the most common mistake homeowners make is watering deeply but infrequently during the first two weeks. New sod has virtually no root system in your soil; it relies entirely on the thin layer of soil attached to the sod mat. Therefore, the goal is to keep that specific interface constantly moist without waterlogging it.
| Timeframe | Watering Frequency | Duration per Zone | Visual / Physical Indicators |
|---|---|---|---|
| Days 1-7 | 3 to 4 times daily | 5-10 minutes | Soil under sod is spongy; footprints remain briefly. |
| Days 8-14 | 2 times daily | 10-15 minutes | Sod resists light pulling; edges are knit together. |
| Days 15-21 | 1 time daily | 20-25 minutes | Sod cannot be pulled up easily; roots anchor in soil. |
| Days 22-28 | Every 2nd or 3rd day | 30-40 minutes | Transitioning to deep, infrequent soak (1 inch/week). |
Pro Tip: The Tug Test
Starting on day 10, gently grab a handful of grass and pull upward. If the sod lifts easily, roots have not established. If you feel resistance and the grass blades tear instead of the mat lifting, the root hairs have successfully penetrated the subgrade.
Starting on day 10, gently grab a handful of grass and pull upward. If the sod lifts easily, roots have not established. If you feel resistance and the grass blades tear instead of the mat lifting, the root hairs have successfully penetrated the subgrade.
Troubleshooting Establishment Failures
Shrinkage and Seam Gaps
If you notice brown lines forming between sod pieces by week two, the edges have dried out and retracted. This is usually caused by insufficient watering volume or gaps left during installation. To fix this, fill the gaps with a mixture of 50% topsoil and 50% fine sand, and increase watering frequency to rehydrate the edges. Do not attempt to push the shrunken pieces back together, as you will tear the newly forming roots.
Yellowing and Fungal Outbreaks
If the sod turns uniformly yellow or develops dark, water-soaked lesions that smell sour, you are likely dealing with Pythium blight or severe waterlogging. Reduce watering immediately. Ensure your subgrade has the proper 2% slope. If fungal pressure is high, apply a preventative systemic fungicide containing azoxystrobin or propiconazole, following label rates strictly for newly established turf.
Poor Rooting in Clay Soils
Heavy clay subgrades can create a textural interface barrier, where water pools at the boundary between the sandy sod soil and the dense clay below. If roots refuse to penetrate after 21 days, use a manual core aerator to punch holes directly through the sod and into the clay, then top-dress with compost to bridge the textural gap.

