
Grass Types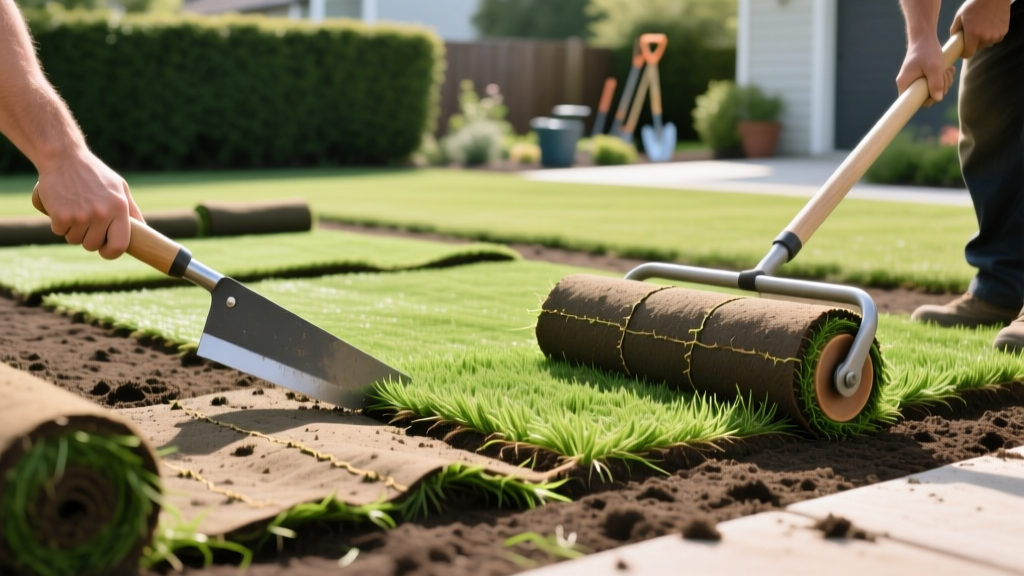
How to Lay Lawn Sod: A Step-by-Step Establishment Guide
Establishing a lawn from sod bypasses the months-long germination and vulnerability phases of seeding, delivering an instant, erosion-resistant turf. However, the assumption that sod is simply 'unrolled carpet' leads to catastrophic establishment failures, including hydrophobic soil rejection, seam shrinkage, and shallow root asphyxiation. Successfully installing sod requires precise subgrade engineering, strategic nutrient loading, and a rigid 14-day hydro-protocol.
Phase 1: Subgrade Engineering and Soil Amendment
The longevity of your sod is dictated entirely by the soil profile beneath it. Before unrolling a single pallet, the subgrade must be mechanically and chemically optimized to receive the shallow, 1-inch root zone of the harvested turf.
Mechanical Preparation
Remove existing vegetation using a gas-powered sod cutter (set to a 2.5-inch depth) or apply a non-selective herbicide like glyphosate 14 days prior to installation. Once clear, rototill the exposed soil to a depth of 4 to 6 inches. This breaks up compaction layers that restrict downward root penetration. According to Penn State Extension, failing to alleviate subsoil compaction is the primary cause of sod failure during summer drought stress, as roots remain trapped in the shallow thatch layer.
Chemical and Structural Amendments
Conduct a soil test to determine baseline pH and cation exchange capacity (CEC). Turfgrasses thrive at a pH between 6.0 and 7.0. If your soil pH falls below 5.5, incorporate pelletized limestone at the rate specified by your SMP buffer test results—typically 50 lbs per 1,000 square feet for a 0.5 pH point increase.
- Organic Matter: Spread 2 to 3 cubic yards of screened, aged compost per 1,000 square feet and till it into the top 4 inches.
- Starter Fertilizer: Apply a high-phosphorus starter fertilizer (e.g., 10-18-10 or 18-24-12) to fuel initial root development. Apply at a rate that delivers exactly 1.0 lb of Nitrogen per 1,000 square feet.
- Grading: Rake the surface smooth, ensuring a 1% to 2% slope away from your home’s foundation to prevent water pooling and basement intrusion.
Material and Equipment Cost Matrix
Budgeting accurately prevents mid-project delays. Below are the estimated material and rental costs for a standard 1,000-square-foot residential installation.
| Item / Service | Estimated Unit Cost | Quantity for 1,000 sq ft | Total Estimate |
|---|---|---|---|
| Premium Sod (e.g., TifTuf Bermuda, Zenith Zoysia) | $0.65 - $0.95 / sq ft | 1,000 sq ft | $650 - $950 |
| Screened Compost (Bulk) | $45 - $60 / cubic yard | 2.5 cubic yards | $112 - $150 |
| Starter Fertilizer (50lb bag) | $45 - $65 / bag | 1 bag | $45 - $65 |
| Gas Sod Cutter (Daily Rental) | $90 - $130 / day | 1 day | $90 - $130 |
| Water-Filled Lawn Roller (Rental) | $25 - $40 / day | 1 day | $25 - $40 |
Phase 2: Tactical Sod Placement
Sod must be installed within 12 to 24 hours of delivery. Palletized sod generates immense internal heat through respiration; leaving it stacked for 48 hours will literally cook the grass, resulting in yellow, necrotic turf that will not recover.
The Brickwork Layout
Always begin laying sod along the longest, straightest edge of your property, such as a driveway or sidewalk. Push the edges and ends of the sod rolls tightly together. Do not overlap the pieces, and do not stretch the sod to cover gaps, as stretching thins the root mat and guarantees shrinkage later.
Stagger the joints in a brickwork pattern so that the end seams of adjacent rows do not align. This interlocking structure prevents water from channeling through continuous seams and washing away the subgrade soil. Use a serrated sod knife or a heavy-duty utility knife with a fresh blade to cut curves around sprinkler heads and landscape beds.
Rolling and Seating
Once an area of 200 to 300 square feet is laid, use a water-filled lawn roller to press the sod into the soil. Fill the roller to one-third of its capacity (approximately 70 to 90 lbs). This specific weight is critical: it is heavy enough to eliminate air pockets between the sod root zone and the subgrade, ensuring immediate capillary water contact, but light enough to prevent severe soil compaction. As noted by NC State TurfFiles, eliminating these air pockets is mandatory to prevent the sod from drying out and dying from the bottom up within the first 48 hours.
Phase 3: The 14-Day Hydro-Protocol
Water management during the first two weeks dictates whether the sod knits to the soil or dies from desiccation. The goal is to keep the root zone and the top 1 inch of subgrade consistently moist, but never waterlogged.
Watering Schedule Matrix
| Timeframe | Watering Frequency | Duration / Volume | Objective |
|---|---|---|---|
| Day 1 (Installation) | Immediately after rolling | 0.5 to 1.0 inch of water | Settle soil, initiate capillary contact |
| Days 2 - 5 | 2 to 3 times daily | 10-15 mins per zone (keep surface moist) | Prevent root desiccation before knitting |
| Days 6 - 10 | 1 time daily | 20-30 mins per zone | Encourage deeper root penetration |
| Days 11 - 14 | Every other day | 30-45 mins per zone | Transition to deep, infrequent soakings |
Pro Tip: To measure your sprinkler output, place three empty tuna cans at varying distances across the zone. Time how long it takes to collect 0.5 inches of water in the cans, and use that exact duration for your irrigation controller programming.
Troubleshooting Establishment Failures
Even with meticulous preparation, environmental variables can cause establishment issues. Use this diagnostic framework to address common anomalies.
1. Seam Shrinkage and Gapping
Symptom: Visible lines of bare soil appear between sod rolls 5 to 7 days after installation.
Cause: The sod was stretched during installation, or the soil was allowed to dry out, causing the root mat to contract.
Correction: Do not push the edges back together, as this creates overlapping ridges. Instead, fill the gaps with a 50/50 mix of topsoil and sand to provide a medium for the lateral stolons to bridge the gap. Increase watering frequency slightly to maintain turgor pressure in the grass blades.
2. Hydrophobic Dry Spots
Symptom: Specific 2x2 foot patches of sod turn grayish-blue and wilt, despite the surrounding grass being green and the irrigation system running.
Cause: Localized hydrophobic soil or an irrigation blind spot. Water is running off the surface rather than penetrating the root zone.
Correction: Perform a manual infiltration test. Poke a screwdriver into the affected area. If it meets hard resistance, the subgrade is compacted. Use a spading fork to core the area deeply, then hand-water with a hose and a surfactant (like a few drops of baby shampoo mixed in a watering can) to break the water's surface tension and force penetration.
3. The 'Tug Test' Verification
Around day 10 to 14, perform the tug test. Grasp a handful of grass blades near a seam and pull gently upward. If the sod lifts easily, root establishment is delayed—maintain the high-frequency watering schedule. If you feel distinct resistance and the soil pulls up with the roots, the vascular connection to the subgrade is complete. You can now safely transition to a standard maintenance watering schedule of 1 to 1.5 inches per week, applied in two deep soakings, and schedule your first mowing. Ensure your mower blades are freshly sharpened to prevent tearing the tender, newly established leaf tissue.

