
Grass Types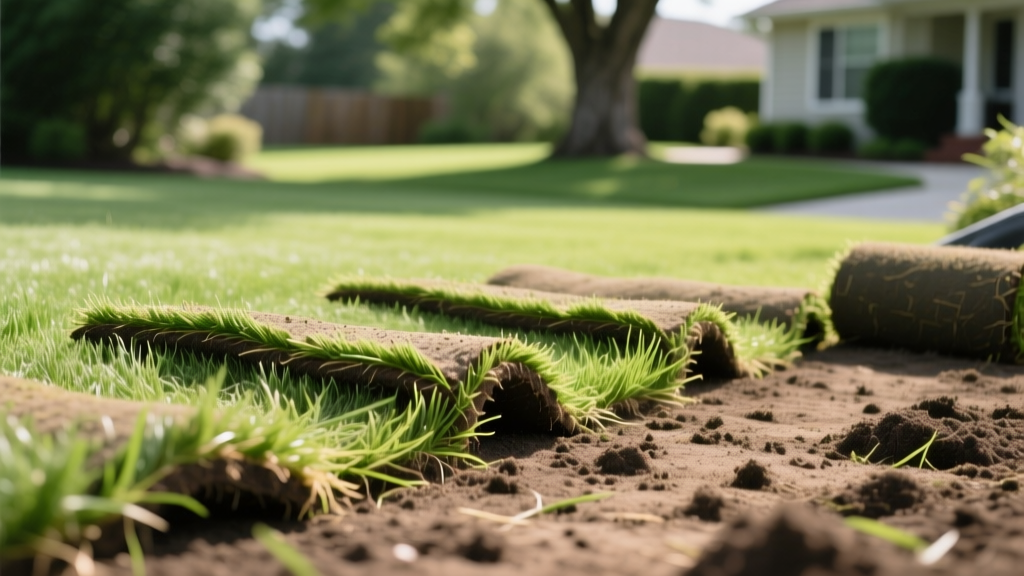
How to Plant Sod Grass: Soil Prep, Laying, and Rooting Guide
The Economics and Expectations of Sod Installation
Installing sod is the fastest route to a mature lawn, but it is also the most capital-intensive turfgrass establishment method. In 2026, premium turfgrass sod ranges from $0.45 to $0.85 per square foot, meaning a standard 5,000-square-foot yard requires a $2,250 to $4,250 material investment before delivery fees and soil amendments. Because the financial stakes are high, understanding exactly how to plant sod grass and manage the critical 21-day establishment window is non-negotiable. Failure to establish roots within this timeframe results in shrinkage, fungal rot, and total crop loss.
This guide bypasses generic advice and provides the precise measurements, soil chemistry requirements, and watering protocols necessary to guarantee sod survival and deep root integration.
Phase 1: Soil Preparation and Grading
Sod will not root into compacted subsoil or hydrophobic clay. The interface between the sod's root zone and your native soil must be physically and chemically compatible. According to Penn State Extension Lawn and Garden resources, proper seedbed preparation is the single highest predictor of turfgrass establishment success.
The 4-Inch Topsoil Rule: You must have a minimum of 4 inches of loose, amended topsoil. If your native soil is heavy clay, rototill to a depth of 6 inches and incorporate 2 inches of screened organic compost to improve drainage and cation exchange capacity (CEC).
Step-by-Step Soil Prep
- Test and Adjust pH: Most cool-season and warm-season grasses require a soil pH between 6.0 and 7.0. Apply pelletized limestone to raise pH or elemental sulfur to lower it at least 30 days before laying sod.
- Rototill and De-rock: Till the soil to a depth of 4 to 6 inches. Rake out all rocks larger than 1 inch, existing weed roots, and construction debris.
- Apply Starter Fertilizer: Broadcast a high-phosphorus starter fertilizer (e.g., 10-18-10 NPK) at a rate of 1.0 lb of actual nitrogen per 1,000 square feet. Phosphorus is critical for initial root proliferation.
- Grade for Drainage: Slope the soil away from your home's foundation at a minimum gradient of 1/4 inch per foot (a 2% slope). Use a landscaping rake to eliminate low spots where water will pool.
- Pre-Compact the Soil: Run a water-filled lawn roller (filled to 50% capacity) over the graded soil. This prevents the sod from sinking and creating uneven depressions after the first heavy watering.
Phase 2: Ordering and Acclimating Your Sod
Sod is a living, perishable crop. Once harvested, it begins to generate internal heat due to microbial respiration. If left on a pallet too long, the center rolls will undergo "sod burn," turning yellow and dying before they are even laid.
| Grass Type | Harvest-to-Lay Window | Pallet Storage Requirement |
|---|---|---|
| Cool-Season (Kentucky Bluegrass, Fescue) | 24 to 48 hours | Keep in shade; unstack if delaying over 24 hours |
| Warm-Season (Bermuda, Zoysia, St. Augustine) | 12 to 24 hours (in summer) | Must be laid same-day if ambient temp exceeds 85°F |
Always order 5% to 10% extra sod to account for cutting around curves, trees, and property lines. Do not attempt to stretch the sod to cover gaps; this guarantees shrinkage later.
Phase 3: Laying the Sod (The Brickwork Pattern)
The physical installation of sod requires a specific geometric approach to prevent water channeling and seam separation.
Installation Protocol
- Start at a Straight Edge: Begin laying the first row along a driveway, sidewalk, or string line to ensure a perfectly straight baseline.
- Stagger the Seams: Lay subsequent rows in a staggered "brickwork" pattern. Never align the vertical seams of adjacent rows. Continuous vertical seams create channels where water will run off, causing erosion and preventing the seams from knitting together.
- Butt Edges Tightly: Push the edges of the sod rolls firmly against each other. Do not overlap them, and do not stretch them. Stretching thins the sod and guarantees gaps will appear as the grass relaxes and dries.
- Roll Immediately: As soon as a 500-square-foot section is laid, run a lightweight, 1/3-full water roller over it. This forces the sod's root base into direct, intimate contact with the prepared soil below, eliminating air pockets that cause localized dry spots.
"Direct soil-to-sod contact is the most critical physical factor in establishment. Air gaps act as insulators, preventing capillary moisture from moving from the soil into the sod's root mat." — UC Davis Center for Turfgrass
Phase 4: The Critical 21-Day Rooting Protocol
Watering is where 90% of DIY sod installations fail. Newly laid sod has virtually no root system to draw moisture from the soil. You must keep the sod itself and the top 2 inches of soil constantly moist, but not waterlogged, until roots penetrate the native soil.
21-Day Establishment Watering Schedule
| Days Post-Install | Frequency | Duration per Zone | Target Moisture Depth |
|---|---|---|---|
| Days 1–7 | 3 to 4 times daily | 10–15 minutes | Top 2 inches saturated |
| Days 8–14 | 1 to 2 times daily | 15–20 minutes | Top 4 inches saturated |
| Days 15–21 | 1 time daily (or every other day) | 20–30 minutes | Top 6 inches saturated |
| Day 22+ | 2 times per week | 30–45 minutes | Deep root zone (6-8 inches) |
Warning: The Hydrophobic Edge Effect
The edges of your lawn (near driveways and sidewalks) will dry out 30% faster due to heat radiating from the hardscape. Hand-water these perimeter edges with a hose for an extra 2-3 minutes daily during the first two weeks to prevent edge desiccation and shrinkage.
The edges of your lawn (near driveways and sidewalks) will dry out 30% faster due to heat radiating from the hardscape. Hand-water these perimeter edges with a hose for an extra 2-3 minutes daily during the first two weeks to prevent edge desiccation and shrinkage.
Phase 5: First Mow and Fertilization
Do not mow the lawn until the sod has firmly rooted into the soil. To test this, perform the Tug Test: grasp a handful of grass and pull upward gently. If the sod lifts easily, it is not ready. If you feel resistance and the soil holds firm, the roots have established.
Mowing Specifications
- Timing: Usually 14 to 21 days post-installation.
- Blade Height: Set your mower to the highest possible setting (typically 3.5 to 4 inches). Never remove more than 1/3 of the grass blade in a single pass.
- Equipment: Use a sharp rotary mower. Dull blades will tear the young grass, creating frayed, white tips that are highly susceptible to disease.
- Follow-up Fertilization: Apply a balanced, slow-release fertilizer (e.g., 20-0-10 or similar, depending on your soil test) 30 to 45 days after installation to sustain vigorous lateral growth.
Troubleshooting Common Establishment Failures
Even with perfect preparation, environmental variables can cause issues. Use this diagnostic matrix to correct problems before they become permanent.
| Symptom | Primary Cause | Corrective Action |
|---|---|---|
| Sod shrinking / gaps at seams | Under-watering during days 1-7 | Increase watering frequency; hand-water gaps to prevent edge desiccation |
| Yellowing with a spongy feel | Over-watering / poor drainage | Reduce frequency; check soil saturation depth; apply preventative fungicide if Pythium blight is suspected |
| Water rolling off sod surface | Hydrophobic soil / thatch barrier | Core aerate lightly; apply a soil surfactant/wetting agent to break water surface tension |
| Sod turns gray/blue and footprints remain | Severe drought stress / wilting | Water immediately for 30 minutes; check irrigation head coverage for dry zones |
For comprehensive environmental safety and runoff prevention guidelines during the establishment phase, always consult the EPA's Healthy Lawns guidelines to ensure your fertilization and watering practices comply with local watershed protections.
Final Thoughts on Establishment
Learning how to plant sod grass is ultimately an exercise in moisture management and soil physics. By respecting the biological limits of the harvested turf, preparing a chemically balanced seedbed, and adhering strictly to the 21-day watering matrix, you will transition your investment from a vulnerable, shallow-rooted mat into a permanent, drought-resilient lawn.

