
Grass Types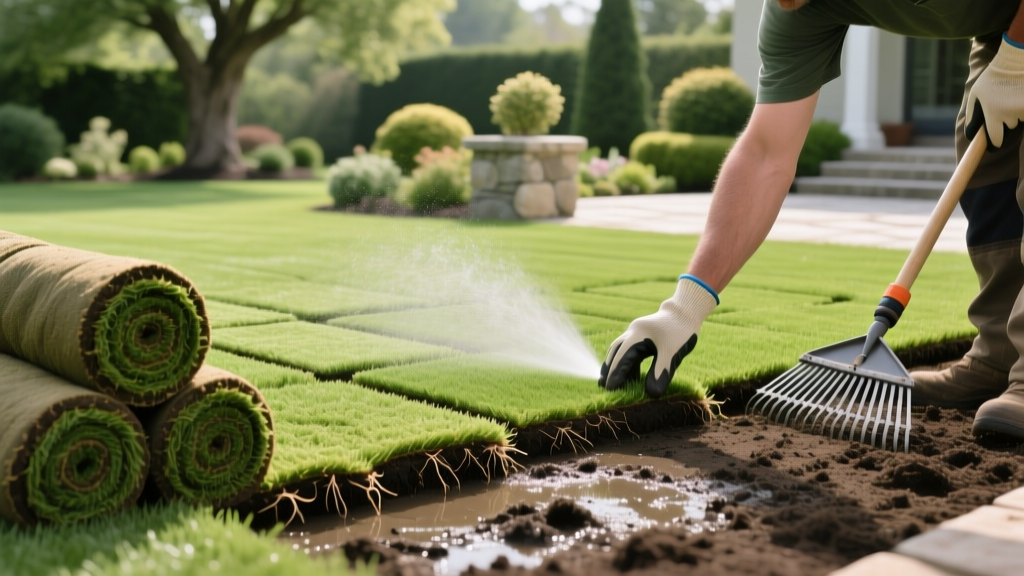
How to Plant Sod: A Step-by-Step Establishment Guide
The Economics and Logistics of Sod Installation
Establishing a lawn via sod offers an immediate, erosion-resistant turf canopy, but it requires precise execution to avoid costly failures like anaerobic rot or seam shrinkage. Before breaking ground, understand the financial and logistical baseline. In 2026, premium turfgrass sod (such as Kentucky Bluegrass, Tall Fescue, or Zoysia) typically costs between $0.45 and $0.85 per square foot. A standard pallet covers 450 to 500 square feet and weighs between 2,500 and 3,000 pounds, necessitating a forklift or manual unloading crew. Delivery fees generally range from $120 to $250 depending on distance.
Unlike seed, sod has a highly compressed installation window. Harvested sod begins to deplete its internal carbohydrate reserves within 24 to 48 hours of being cut. If left on the pallet for more than 36 hours in warm weather, the center of the roll will undergo 'pallet burn'—a rapid anaerobic decomposition that kills the grass. Schedule your soil preparation to be completed 24 hours before the delivery truck arrives.
Phase 1: Subgrade Preparation and Soil Amendment
The most common cause of sod failure is poor soil-to-root contact. Sod roots will not penetrate compacted subgrades or heavy clay pans. According to University of Minnesota Extension, proper seedbed preparation is the single most critical factor in long-term turf survival.
Pro Tip: The Jar Test for Soil Texture
Before amending, determine your soil composition. Fill a mason jar one-third with soil and the rest with water. Add a teaspoon of dish soap, shake vigorously, and let it settle for 48 hours. Sand settles in 1 minute, silt in 2-4 hours, and clay takes 24+ hours. Ideal loam is roughly 40% sand, 40% silt, and 20% clay.
Before amending, determine your soil composition. Fill a mason jar one-third with soil and the rest with water. Add a teaspoon of dish soap, shake vigorously, and let it settle for 48 hours. Sand settles in 1 minute, silt in 2-4 hours, and clay takes 24+ hours. Ideal loam is roughly 40% sand, 40% silt, and 20% clay.
Tilling and Grading Specifications
- Rototill to a depth of 4 to 6 inches. Do not skim the surface; deep fracturing is required for root penetration and water infiltration.
- Remove all debris. Extract rocks larger than 1 inch in diameter, old roots, and construction debris. Leftover wood chips will create nitrogen-robbing air pockets that cause the sod above them to yellow and die.
- Establish a 1% to 2% slope. Grade the soil away from your home's foundation at a drop of 1 inch per 8 feet to prevent hydrostatic pressure against basement walls.
- Incorporate organic matter. Spread a 1-inch layer of screened compost (not topsoil, which often contains weed seeds) and rototill it into the top 4 inches of the native soil.
Soil Amendment Matrix
| Native Soil Type | Primary Issue | Required Amendment (per 1,000 sq ft) | Target Result |
|---|---|---|---|
| Heavy Clay | Poor drainage, compaction | 3 cubic yards expanded shale or coarse compost | Increased macroporosity |
| Coarse Sand | Low water/nutrient retention | 2 cubic yards peat moss or humic acid | Higher cation exchange capacity (CEC) |
| Silty Loam | Surface crusting | 1 cubic yard aged pine bark fines | Improved surface friability |
Apply a starter fertilizer high in phosphorus (e.g., 10-18-10 NPK) at a rate of 1 pound of actual nitrogen per 1,000 square feet. Phosphorus is immobile in soil and must be physically incorporated into the top 2 inches of the seedbed to stimulate rapid root initiation. Note: Check local municipal codes, as some regions restrict phosphorus applications unless a soil test from a certified lab confirms a deficiency.
Phase 2: The Staggered-Brick Laying Technique
Once the soil is raked smooth and lightly compacted with an empty lawn roller, begin laying the sod. The industry standard is the staggered-brick pattern, which prevents water from channeling down continuous vertical seams and causing erosion trenches.
- Start at a straight edge: Begin along a driveway, sidewalk, or string line. Never start in the middle of an open area.
- Push, don't pull: Push the edges of the sod tightly together. Do not overlap the pieces, and never stretch the sod to cover gaps, as it will shrink back to its original dimensions upon drying.
- Stagger the joints: Offset the seams of the second row by at least 12 inches from the first row, mimicking a brick wall.
- Handle slopes with stakes: For inclines greater than 15%, secure the sod using 6-inch biodegradable wooden stakes or landscape pins every 2 feet to prevent slippage during heavy rain before roots establish.
After laying the sod, use a sharp serrated knife or a half-moon edger to cut around curves and obstacles. Immediately follow the laying process by rolling the entire lawn with a water-filled lawn roller weighing 150 to 200 pounds. This step is non-negotiable; it eliminates air pockets between the sod roots and the soil, ensuring immediate capillary action for water uptake.
Phase 3: The Critical 14-Day Hydration Matrix
New sod has a root depth of less than half an inch. It cannot access deep soil moisture. The goal of the first two weeks is to keep the sod and the top 1 inch of soil consistently moist, but never waterlogged. Overwatering leads to shallow rooting and fungal pathogens like Pythium blight.
14-Day Watering Schedule
| Timeframe | Frequency | Duration per Zone | Goal & Visual Indicator |
|---|---|---|---|
| Days 1 - 3 | 3 to 4 times daily | 5 - 10 minutes | Prevent wilting. Sod should feel spongy, not squishy. |
| Days 4 - 7 | 2 times daily | 10 - 15 minutes | Encourage downward root growth. Soil should be damp 1 inch deep. |
| Days 8 - 10 | 1 time daily | 20 minutes | Transition to deeper watering. Check for root resistance when lifting a corner. |
| Days 11 - 14 | Every other day | 30 minutes | Establish drought tolerance. Soil should be moist 3 inches deep. |
Warning: Do not rely on automated irrigation timers alone during the first 7 days. Mid-day heat spikes may require manual hand-watering of sunny spots, while shaded areas may require 50% less water to avoid rot. Adjust based on the physical feel of the grass blades—if they leave a visible footprint when stepped on, they are wilting and need immediate water.
Edge Cases and Troubleshooting Failures
Even with meticulous preparation, environmental variables can disrupt establishment. According to NC State University TurfFiles, diagnosing issues early prevents permanent turf loss.
Symptom: Visible Gaps Between Sod Pieces
Cause: Shrinkage due to inadequate watering or stretching the sod during installation.
Fix: Do not fill gaps with topsoil, which will smother adjacent grass. Fill narrow gaps (under 1 inch) with a mixture of 50% topsoil and 50% grass seed. For gaps wider than 1 inch, cut a new piece of sod to fit precisely and water heavily.
Symptom: Sod Lifts Easily After 10 Days
Cause: Hydrophobic soil, excessive thatch on the sod's underside, or insufficient rolling during installation.
Fix: Apply a liquid soil surfactant (wetting agent) to break the water's surface tension, allowing it to penetrate the soil interface. Ensure you are watering long enough to moisten the native soil beneath the sod, not just the sod itself.
Symptom: Yellowing or Blackening at the Seams
Cause: Anaerobic conditions from overwatering, or 'pallet burn' from sod sitting too long before installation.
Fix: Immediately reduce watering frequency. If the grass is black and smells sour, the roots have rotted; you must pull up the affected squares, scrape away the mucky soil, replace with fresh compost, and lay new sod.
By adhering to strict soil preparation metrics, utilizing the staggered-brick layout, and following a dynamic hydration matrix, your sod will root firmly into the subgrade within 14 to 21 days, providing a durable, weed-resistant lawn for decades.

