
Grass Types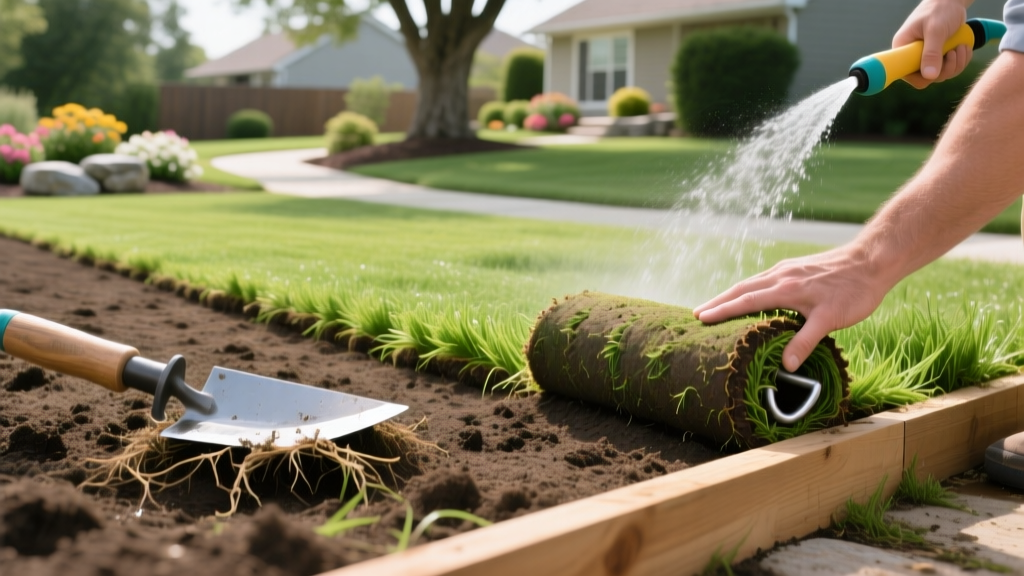
How to Put Sod Grass: Step-by-Step Installation Guide
The True Cost and Timeline of Sod Installation
Installing sod is the fastest way to establish a mature lawn, but it requires precise execution to prevent root desiccation and seam shrinkage. Before breaking ground, understand the financial and temporal investment required for a standard 1,000-square-foot residential area.
2026 Sod Installation Cost Breakdown (Per 1,000 Sq. Ft.)
- Sod Material: $350 - $850 (Varies by species; Zoysia and Bermuda are premium, Tall Fescue is budget-friendly)
- Delivery Fees: $75 - $150 (Pallets weigh 2,500+ lbs; freight delivery is mandatory)
- Soil Amendments & Starter Fertilizer: $120 - $200
- Equipment Rental (Rototiller & Lawn Roller): $90 - $140
- Total DIY Cost: $635 - $1,340
Professional installation typically adds $1.00 to $2.50 per square foot in labor. For a 1,000-square-foot yard, expect to pay between $1,600 and $3,800 total when hiring a licensed landscaping crew. The physical installation takes 1 to 2 days, but the critical establishment phase requires 4 to 6 weeks of strict monitoring.
Phase 1: Site Preparation and Soil Amendment
The most common cause of sod failure is poor soil-to-root contact. Sod roots will not penetrate compacted subsoil. You must create a transition zone that encourages downward root growth rather than allowing roots to remain trapped in the shallow sod mat.
Step 1: Eradication and Tilling
Kill existing vegetation using a non-selective herbicide (like glyphosate) 14 days prior to installation, or use a mechanical sod cutter to remove the top 2 inches of existing turf. Once clear, use a rear-tine rototiller to break up the soil to a depth of 4 to 6 inches. According to the University of Minnesota Extension, tilling deeper than 6 inches can bring dormant weed seeds to the surface and disrupt the natural soil horizon, so stick to the 4-to-6-inch sweet spot.
Step 2: Grading and Amendment
Rake the tilled soil to remove rocks larger than 2 inches in diameter. Grade the soil so it slopes away from your home's foundation at a minimum drop of 1 inch per foot for the first 10 feet to prevent basement water intrusion. Spread a 1-inch layer of screened compost over the area and rototill it into the top 3 inches of native soil to improve water retention.
Pro Tip: Soil pH Testing
Test your soil pH before laying sod. Most turfgrasses (Kentucky Bluegrass, Tall Fescue, Bermudagrass) thrive at a pH between 6.0 and 7.0. If your pH is below 6.0, apply pelletized limestone at a rate of 50 lbs per 1,000 sq. ft. and incorporate it during the tilling phase.
Step 3: Starter Fertilizer Application
Apply a high-phosphorus starter fertilizer immediately before laying the sod. Phosphorus (the middle number in the N-P-K ratio) is critical for early root development. Use a product with an N-P-K ratio similar to 10-18-10 or 24-25-4. Apply at the rate specified on the bag, typically 3 to 4 lbs per 1,000 sq. ft., and water it in lightly to activate the granules.
Phase 2: Laying the Sod
Sod is a perishable product. It must be laid within 24 hours of delivery. If the sod pallets sit in the sun, the center of the rolls will undergo anaerobic respiration, generating heat and turning yellow or black within 48 hours. Keep the pallets in the shade and lightly mist them if installation takes more than a few hours.
The Brick-Lay Pattern
Always start laying sod along the longest straight edge, such as a driveway or sidewalk. Stagger the seams in a brick-like pattern. This prevents water from channeling down continuous vertical seams, which causes erosion and washes away the underlying soil amendment.
Critical Mistake: Overlapping and Gapping
Never overlap sod edges, and never leave gaps. Overlapping creates ridges that dry out quickly and scalps when mowed. Gapping exposes the soil to the sun, causing the edges of the sod to shrink and die. Butt the edges together tightly so they touch without pushing up against one another.
Rolling the Sod
Once an area is laid, use a water-filled lawn roller to press the sod into the soil. Fill the roller to about one-third capacity (approximately 150 lbs). This eliminates air pockets between the sod roots and the soil. Air pockets act as insulators, preventing moisture transfer and causing the roots to desiccate and die within days. The Clemson University Home & Garden Information Center emphasizes that rolling is non-negotiable for ensuring rapid root-to-soil contact and preventing hydrophobic soil conditions.
Phase 3: The Critical 14-Day Rooting Watering Schedule
New sod has a root depth of less than half an inch. It cannot access moisture deep in the soil profile. You must keep the top inch of soil consistently moist, but not waterlogged, to prevent fungal diseases like Pythium blight. Note that rotor sprinkler heads output water slower than spray heads, so adjust your timing accordingly.
| Timeframe | Watering Frequency | Duration per Zone | Objective |
|---|---|---|---|
| Days 1 - 3 | 2 to 3 times daily | 10 - 15 minutes | Prevent surface drying; keep roots continuously moist. |
| Days 4 - 7 | 1 to 2 times daily | 15 - 20 minutes | Encourage roots to stretch downward into the subsoil. |
| Days 8 - 14 | Once daily | 25 - 30 minutes | Deepen root establishment; begin weaning off frequent watering. |
| Day 15+ | Every 2 to 3 days | 40 - 45 minutes | Transition to standard deep-and-infrequent lawn watering. |
Calibration Tip: Place empty tuna cans across the lawn to measure output; you want to apply roughly 0.1 to 0.2 inches of water per session during the first week.
Common Sod Failure Modes and Troubleshooting
- Sod Shrinkage (Gaps appearing between rolls): Caused by underwatering or laying the sod too loosely. Fix by topdressing the gaps with a 50/50 mix of fine sand and topsoil, then watering heavily to encourage lateral stolon growth across the gap.
- Yellowing or Blackening Centers: Caused by leaving rolled sod on the pallet for more than 36 hours. The grass suffocated. You must remove the dead sections, re-till the soil beneath, and lay fresh sod.
- Sod Pulls Up Easily After 3 Weeks: Caused by poor soil contact (failure to roll) or compacted subsoil. Lift the affected piece, scarify the soil beneath with a hand rake, apply rooting hormone or starter fertilizer, and replace the sod, pressing down firmly.
- Mushrooms Fruiting on New Sod: A sign of overwatering and poor drainage. Reduce watering frequency immediately and ensure the soil grade slopes correctly to shed excess water.
Frequently Asked Questions
Can I lay sod directly over my existing dead grass?
No. Laying sod over existing turf creates a thatch barrier that prevents the new roots from penetrating the native soil. The underlying dead grass will also decompose, creating a spongy, uneven surface that leads to drainage issues and root rot. You must completely remove the old grass or till it deeply into the subsoil.
How long does it take for sod to root?
Cool-season grasses like Kentucky Bluegrass and Tall Fescue typically establish shallow roots within 10 to 14 days, with deep rooting taking 4 to 6 weeks. Warm-season grasses like Bermudagrass and Zoysia root faster in peak summer heat, often anchoring in 7 to 10 days, but require strict temperature management to avoid heat stress during the establishment window.

