
Grass Types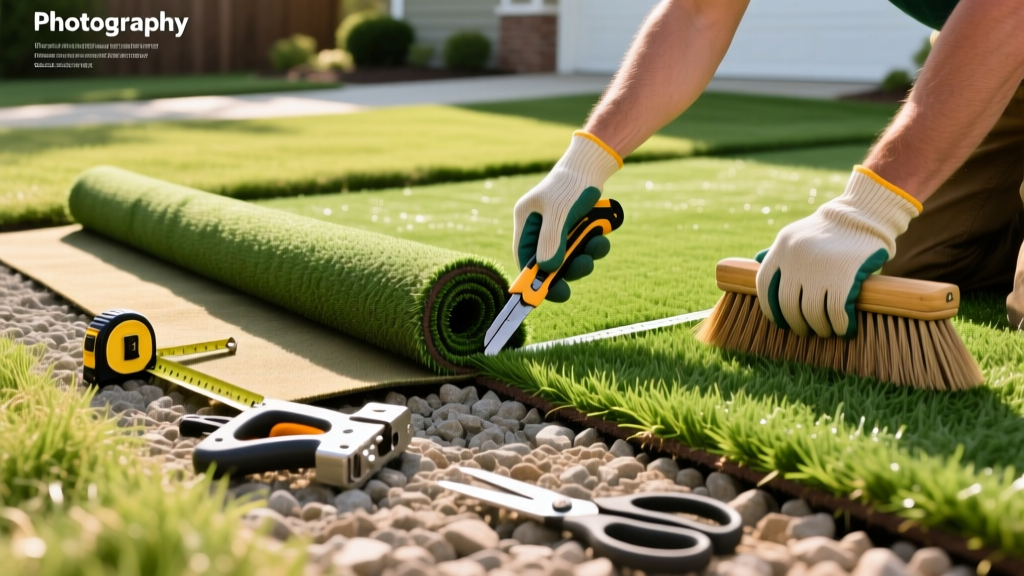
How to Install Synthetic Turf Grass: Complete DIY Yard Guide
The Engineering Reality of Artificial Lawns
Installing artificial grass is not a landscaping project; it is a hardscape engineering project disguised as a lawn. The most common failure mode for DIY synthetic turf is not the grass itself, but catastrophic base subsidence and seam separation. When you learn how to install synthetic turf grass correctly, you are essentially building a permeable, flexible concrete slab that requires precise aggregate grading, chemical adhesion, and calculated weight distribution.
According to regional water conservation guidelines, replacing natural sod with synthetic alternatives can save up to 55 gallons of water per square foot annually. However, achieving a flawless, undulating-free surface that lasts 15 to 20 years requires strict adherence to material specifications and compaction standards.
Material Costs: DIY vs. Professional Installation
Before breaking ground, you must understand the financial baseline. Professional installers typically charge between $9.00 and $16.00 per square foot, depending on site access and base complexity. A DIY approach reduces this to $3.50 to $5.50 per square foot, but requires renting heavy machinery.
| Material / Service | DIY Cost (Per Sq. Ft.) | Professional Cost (Per Sq. Ft.) | Notes & Specifications |
|---|---|---|---|
| Base Aggregate | $0.60 - $0.90 | $1.20 - $1.80 | 3/4-inch minus Class II road base |
| Synthetic Turf | $1.80 - $3.50 | $3.50 - $7.00 | 50-75 oz face weight, PU backing |
| Infill Materials | $0.30 - $0.60 | $0.80 - $1.50 | Rounded silica sand + Zeolite |
| Seaming & Fasteners | $0.20 - $0.40 | $0.50 - $0.80 | 12-inch tape, dual-component PU glue |
| Equipment Rental | $0.40 - $0.60 | Included | Vibratory plate compactor, power broom |
| Labor | $0.00 | $3.00 - $5.00 | Varies by region and site topography |
Phase 1: Excavation and Base Engineering
The longevity of your turf relies entirely on the sub-base. You must excavate 3 to 4 inches of native soil. If you leave organic topsoil beneath the base, it will decompose, causing the aggregate to sink and creating visible depressions in your lawn.
The Aggregate Selection and 95% Compaction Rule
Do not use washed or clean gravel. You must use 'minus' rock—specifically 3/4-inch minus Class II road base or crushed granite. The term 'minus' means the aggregate includes stone dust and fines. When moistened and compressed, these fines act as a binder, locking the rocks into a semi-rigid matrix.
Expert Compaction Protocol:
Rent a vibratory plate compactor capable of delivering at least 5,000 lbf (pounds of force), such as a Wacker Neuson or Mikasa model. Lay the aggregate in 2-inch lifts (layers). Lightly mist each lift with a garden hose—moisture is required for the fines to activate and lock. Run the compactor over each lift in overlapping passes until you achieve 95% Modified Proctor density. The surface should feel like a concrete driveway before the turf goes down.
Rent a vibratory plate compactor capable of delivering at least 5,000 lbf (pounds of force), such as a Wacker Neuson or Mikasa model. Lay the aggregate in 2-inch lifts (layers). Lightly mist each lift with a garden hose—moisture is required for the fines to activate and lock. Run the compactor over each lift in overlapping passes until you achieve 95% Modified Proctor density. The surface should feel like a concrete driveway before the turf goes down.
Weed Barrier Placement
Once the base is compacted and graded with a 1% to 2% slope for drainage, lay down a non-woven geotextile fabric. Avoid cheap woven plastic weed barriers; they trap moisture and degrade under UV exposure if exposed during installation. A 4 oz to 6 oz non-woven fabric allows water to percolate while blocking sub-surface weed growth.
Phase 2: Turf Selection and Acclimation
Not all synthetic grass is engineered for residential lawns. When selecting your turf, ignore marketing terms and look strictly at the specification sheet.
- Face Weight: Target 50 oz to 75 oz per square yard. This dictates the density and durability of the yarn.
- Pile Height: 1.5 inches to 1.75 inches is optimal for lawns. Anything taller will mat down under foot traffic; anything shorter looks like a putting green.
- Backing System: Demand a Polyurethane (PU) backing. Latex backings degrade over time, trap water, and drain at less than 10 inches per hour. PU backing drains at 30+ inches per hour and resists pet urine degradation.
Warning: The Acclimation Step
Synthetic turf is shipped tightly rolled on heavy cardboard tubes. If you unroll and cut it immediately, the backing will retain 'memory' and shrink or warp as it relaxes, ruining your seams. Unroll the turf in the sun and let it acclimate for a minimum of 24 hours before making any cuts or seams.
Synthetic turf is shipped tightly rolled on heavy cardboard tubes. If you unroll and cut it immediately, the backing will retain 'memory' and shrink or warp as it relaxes, ruining your seams. Unroll the turf in the sun and let it acclimate for a minimum of 24 hours before making any cuts or seams.
Phase 3: Seaming with Dual-Component Adhesives
Seam separation is the most visible flaw in a poorly installed lawn. Never rely on nails or single-sided tape for primary seams. You must use a chemical bond.
Step-by-Step Seaming Protocol
- Align the Pile Direction: Ensure the grass blades on both pieces point in the exact same direction. If they oppose each other, the seam will reflect light differently and remain permanently visible.
- Trim the Selvedge: Cut off the factory edges (selvedge) of both pieces. Factory edges are rarely perfectly straight and lack yarn density. Cut back 2 to 3 inches until you reach a dense, uniform row of stitches.
- Apply the Tape and Glue: Center a 12-inch wide seam tape under the joint. Use a dual-component polyurethane adhesive (e.g., Roberts 6700 or Turf Bond). Mix Part A (resin) and Part B (hardener) thoroughly.
- Mind the Pot Life: Dual-component glues are highly temperature-sensitive. At 75°F, you have a 30 to 45-minute pot life. At 90°F, this drops to 15 minutes. Only mix as much glue as you can apply in that window.
- Secure and Weight: Fold the turf edges over the glued tape, press firmly, and place heavy weights (like bags of infill sand) every 12 inches along the seam. Allow 24 hours for a full chemical cure before walking on it.
Phase 4: Infill Distribution and Power Brooming
Infill is not optional. It weighs down the turf, prevents thermal expansion wrinkles, and supports the yarn so it stands upright. The Synthetic Turf Council (STC) mandates specific infill rates to maintain manufacturer warranties.
Choosing the Right Infill
Avoid recycled tire crumb rubber for residential lawns. As noted in EPA research on crumb rubber infill, it retains excessive heat and can off-gas VOCs in high temperatures. Instead, use a two-layer system:
Base Layer (1 lb per sq. ft.): 16-30 mesh rounded silica sand. It must be rounded, not angular masonry sand, which will cut the grass fibers over time.
Top Layer (0.5 lb per sq. ft.): Zeolite. This is a naturally occurring volcanic mineral that absorbs ammonia and neutralizes pet odors, making it essential for homes with dogs.
Top Layer (0.5 lb per sq. ft.): Zeolite. This is a naturally occurring volcanic mineral that absorbs ammonia and neutralizes pet odors, making it essential for homes with dogs.
Apply the infill using a drop spreader in multiple light passes, alternating directions. Finally, rent a motorized power broom with stiff nylon bristles (never wire bristles). Run the broom over the lawn at a steady pace to drive the infill down to the backing and stand the grass fibers upright. This final step locks the system together and completes the installation.

