
Grass Types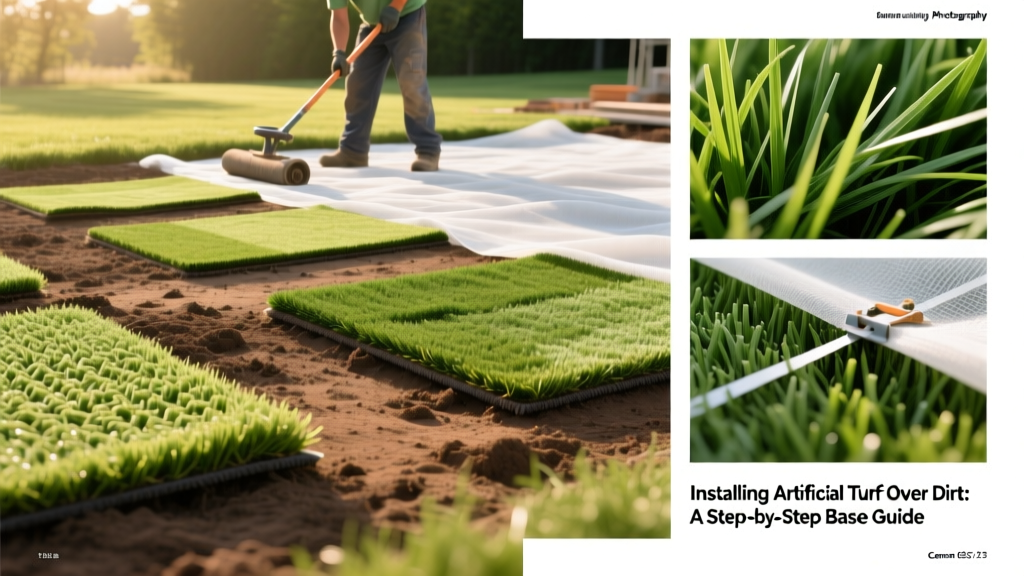
Installing Artificial Turf Over Dirt: A Step-by-Step Base Guide
Synthetic grass rarely fails because of the blades themselves; it fails because of the dirt beneath it. When installing artificial turf over native soil, the primary culprits for premature failure are poor drainage, base subsidence, and seam separation. A flawless synthetic lawn requires treating the ground beneath it as a structural engineering project rather than a simple landscaping task.
This guide details the exact excavation depths, aggregate ratios, and compaction metrics required to build a permanent sub-base for synthetic turf, ensuring optimal drainage and a level surface that lasts for decades.
Why the Base Layer Dictates Turf Longevity
Native soil expands and contracts with moisture fluctuations. Clay-heavy soils can swell significantly after heavy rain, pushing the turf upward and creating visible ridges. Conversely, sandy soils can wash away, causing the turf to sink. According to the University of Minnesota Extension, a properly engineered aggregate base isolates the synthetic turf from these native soil movements while facilitating rapid water percolation.
The goal is to achieve a 95% modified Proctor density in your base material. This engineering standard ensures the aggregate is compacted tightly enough to prevent shifting, but porous enough to allow water to drain through at a rate of at least 30 inches per hour.
Material Cost Breakdown for a 500 Sq. Ft. Yard
Pricing for synthetic turf installations has stabilized, but material quality varies wildly. Below is the current cost breakdown for a standard 500-square-foot residential project, excluding heavy machinery rentals.
| Material | Quantity Needed (500 sq ft) | Estimated Unit Cost | Total Cost Range |
|---|---|---|---|
| Class II Road Base | 3.5 tons | $35 - $50 per ton | $122 - $175 |
| Decomposed Granite (DG) | 1.5 tons | $45 - $65 per ton | $67 - $97 |
| Non-Woven Geotextile Fabric | 550 sq ft (overlap) | $0.25 per sq ft | $137 |
| Premium Synthetic Turf | 550 sq ft (waste factor) | $3.50 - $6.00 per sq ft | $1,925 - $3,300 |
| Antimicrobial Infill | 800 lbs (1.6 lbs/sq ft) | $0.40 - $0.80 per lb | $320 - $640 |
| Seaming Tape & Polyurethane Glue | 2 kits | $65 per kit | $130 |
Note: Professional labor typically adds $4.00 to $7.00 per square foot, bringing the total installed cost to between $8.50 and $14.50 per square foot.
Step 1: Excavation and Soil Grading
Do not lay turf directly on top of existing grass or topsoil. Organic matter will decompose, leaving voids that cause the turf to sink.
- Mark and Excavate: Dig out the entire area to a depth of 3 to 4 inches. If your native soil is heavy clay (percolation rate less than 0.5 inches per hour), increase the excavation depth to 5 inches.
- Establish the Grade: Use a laser level to establish a 1% to 2% slope away from your home's foundation. This translates to a 1/8-inch drop per foot. Even though synthetic turf is permeable, surface runoff must be directed away from structures.
- Compact the Subgrade: Run a vibrating plate compactor over the exposed native dirt to create a firm subgrade before adding any aggregate.
Warning for Clay Soils: If you are working with highly expansive clay, lay down a 1-inch layer of 3/4-inch crushed drain rock at the very bottom of your excavation before adding your road base. This creates a capillary break that prevents clay moisture from wicking up into your base layer.
Step 2: Building the Aggregate Base
The base consists of two distinct layers: a structural foundation and a leveling cap.
The Foundation Layer (Class II Road Base)
Spread 2 to 3 inches of Class II Road Base (or Crushed Miscellaneous Base). This material contains a mix of crushed rock and fine dust. The dust is critical—when lightly moistened and compacted, it acts as a binder, locking the rocks together into a concrete-like surface that still permits drainage.
The Leveling Cap (Decomposed Granite)
Top the road base with 1 inch of Decomposed Granite (DG) or Class A sand. DG provides a smoother finish, which is essential for preventing the aggregate texture from telegraphing through the turf backing. Mist the DG with water and compact it repeatedly until it is rock-hard and perfectly smooth.
Step 3: Laying the Weed Barrier and Turf
Once the base is fully compacted, roll out a heavy-duty, non-woven geotextile weed barrier. Avoid cheap woven plastics; they restrict drainage and trap water beneath the turf. Secure the fabric with 6-inch landscape staples every 18 inches.
Acclimation and Positioning
Unroll your synthetic turf and let it acclimate in direct sunlight for at least two hours. The heat relaxes the backing, flattening out shipping creases and allowing the material to expand to its true dimensions. Ensure all turf rolls are installed with the grass blades pointing in the same direction (typically toward the primary viewpoint, like the back door).
Cutting and Seaming
Cut the turf from the back using a sharp utility knife, leaving a 2-inch overhang at the edges. When joining two rolls, use a dual-component polyurethane adhesive applied to a specialized seaming tape.
Expert Tip: Do not use nails or staples to seam turf together. Mechanical fasteners will eventually work themselves loose as the turf expands and contracts with temperature changes. Polyurethane glue creates a flexible, permanent bond that moves with the material.
Secure the perimeter edges with 5-inch or 6-inch galvanized landscape nails, spaced 4 inches apart along the borders and 12 inches apart in the field.
Step 4: Applying the Correct Infill
Infill is not optional. It weighs down the turf, protects the primary backing from UV degradation, and keeps the grass blades standing upright. The California Department of Resources Recycling and Recovery (CalRecycle) notes that proper infill selection also plays a major role in managing surface temperatures and odor control.
| Infill Type | Best Use Case | Application Rate | Key Properties |
|---|---|---|---|
| Silica Sand (Rounded) | Standard landscaping, low traffic | 1.5 - 2.0 lbs / sq ft | Cheap, heavy, but offers no odor control and can retain heat. |
| Envirofill (Acrylic Coated) | High traffic, play areas, pets | 1.5 - 2.0 lbs / sq ft | Antimicrobial coating, highly durable, does not break down into dust. |
| Zeolite | Pet runs, dog daycares | 1.0 - 1.5 lbs / sq ft | Absorbs ammonia odors, holds 40% of its weight in water to cool the turf. |
Use a drop spreader to distribute the infill evenly, followed by a power broom with stiff nylon bristles (never use wire bristles, which will shred the synthetic fibers) to brush the infill deep into the thatch layer.
Common Installation Mistakes and How to Avoid Them
- Using Pure Sand for the Base: While sand drains well, it lacks structural integrity. Heavy rain can wash it out from under the turf edges, causing the perimeter to collapse. Always use an aggregate with fines (like road base or DG) that locks together.
- Skipping the Perimeter Bender Board: If your turf borders a garden bed or dirt area, install a composite or steel bender board along the edge. Nailing turf directly into dirt edges will result in the perimeter pulling away over time.
- Over-compacting the Top Layer: While the road base needs to be rock-hard, the top 1/2 inch of DG should be left slightly loose or 'scarified' with a stiff rake before laying the turf. This allows the turf backing to grip the base, preventing lateral shifting.
By adhering to these structural specifications, you eliminate the primary failure points of synthetic lawns. The upfront effort of engineering a proper base ensures the turf remains level, drains instantly during heavy storms, and maintains its aesthetic integrity for its entire 15-to-20-year lifespan.

