
Grass Types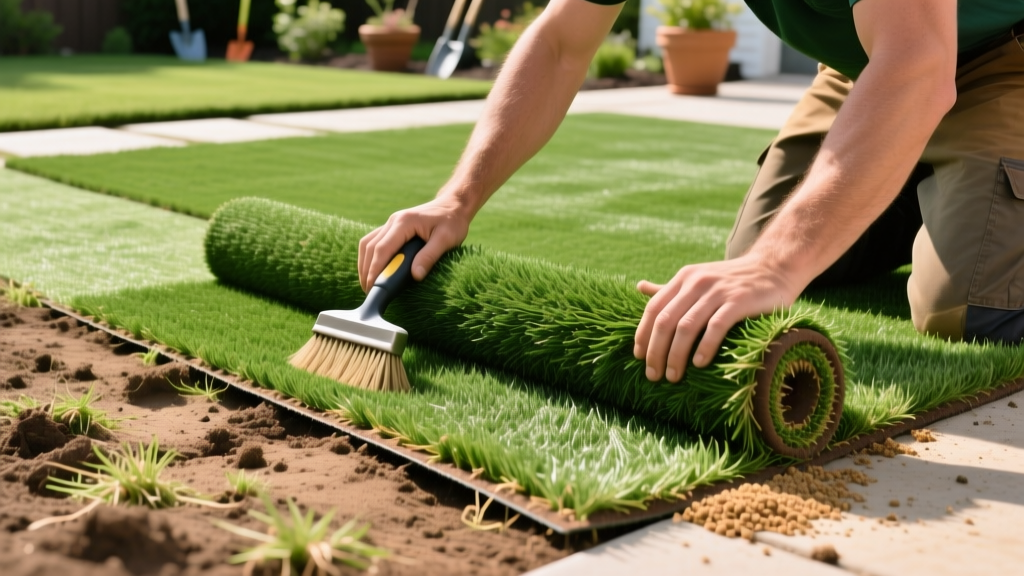
Expert Guide to Laying Artificial Turf Over Dirt and Existing Grass
Installing synthetic grass is a precision engineering task disguised as a landscaping project. While the turf itself gets the visual credit, the longevity and drainage of your installation depend entirely on the sub-base preparation and seaming techniques used beneath the surface. As of 2026, DIY material costs for a high-quality installation range from $6.50 to $10.50 per square foot, while professional contractors charge between $12.00 and $18.00 per square foot. Cutting corners on base materials or adhesive selection leads to visible seams, poor drainage, and premature matting.
This guide details the exact specifications, material grades, and structural requirements for laying artificial turf over native soil or existing lawns.
Site Assessment and Drainage Engineering
Before breaking ground, evaluate the native soil's percolation rate and the site's topography. Synthetic turf systems require a minimum slope of 1% (a 1-inch drop per 8 feet of run) to facilitate surface runoff. If your yard is entirely flat, you must engineer a crown or install a subsurface French drain system.
Warning: Heavy Clay Soils
If your native soil is heavy clay (expansive soil), it will retain water and shift during freeze-thaw cycles, destroying your base compaction. You must excavate an additional 2 inches and install a non-woven geotextile stabilization layer directly on the subgrade before adding your aggregate base.
If your native soil is heavy clay (expansive soil), it will retain water and shift during freeze-thaw cycles, destroying your base compaction. You must excavate an additional 2 inches and install a non-woven geotextile stabilization layer directly on the subgrade before adding your aggregate base.
Excavation and Base Material Selection
Remove all existing grass, weeds, and organic topsoil to a depth of 3.5 to 4 inches. Organic matter decomposes over time, causing the base to sink and creating depressions in the turf surface. The Synthetic Turf Council recommends using angular, mechanically crushed aggregate for the base layer to ensure interlocking stability.
| Material | Max Particle Size | Compaction Target | Cost per Ton (Avg) | Best Application |
|---|---|---|---|---|
| Class II Road Base | 3/4 inch | 95% Modified Proctor | $35 - $55 | Primary structural base (bottom 2.5 inches) |
| Decomposed Granite (DG) | 3/8 inch | 90% Standard Proctor | $50 - $75 | Leveling cap (top 0.5 - 1 inch) |
| Crushed Limestone | 1/2 inch | 95% Modified Proctor | $40 - $60 | High-moisture environments (excellent drainage) |
Apply the base material in 2-inch lifts (layers). Wet each layer lightly with a hose and compact it using a vibratory plate compactor (minimum 5,000 lbs of centrifugal force). Do not attempt to compact 4 inches of aggregate in a single pass; the bottom layer will remain loose and settle later.
Weed Barrier and Shock Pad Integration
Once the base is compacted and graded, lay down a 4oz to 6oz non-woven geotextile fabric. Avoid woven, slit-film weed barriers, as they restrict vertical water drainage and cause pooling beneath the turf. Overlap the fabric edges by 6 inches and secure them with 6-inch landscape staples every 3 feet.
If the turf is being installed in a playground or pet area, install a closed-cell foam shock pad over the geotextile. Look for pads that meet ASTM F1292 standards for impact attenuation, typically rated for a 1.25-inch thickness to achieve a 5-foot critical fall height rating.
Rolling, Cutting, and Seaming the Turf
Unroll the turf and let it acclimate to the ambient temperature for at least 4 hours. This allows the synthetic backing to expand or contract and eliminates installation wrinkles. When trimming the perimeter, always cut from the backside (the polyurethane or latex backing) using a sharp utility knife, leaving a 2-inch overhang for final edge tucking.
The Seaming Protocol
Visible seams are the most common failure in DIY installations. Follow this exact seaming procedure to create invisible joints:
- Trim the Factory Edges: Factory edges are often distorted during manufacturing. Cut exactly two rows of stitches off both adjoining edges to ensure you are joining straight, true lines.
- Align the Pile Direction: Ensure the grass blades on both pieces point in the exact same direction. Joining opposing pile directions will create a permanent, highly visible color mismatch.
- Apply the Tape and Adhesive: Center a 12-inch wide polyurethane-coated seam tape under the joint. Apply a continuous bead of two-part polyurethane seam adhesive (or a high-grade single-part urethane for DIY) down the center of the tape.
- Join and Weight: Fold both edges into the adhesive, ensuring no grass blades are trapped in the glue. Use a weighted seam roller (minimum 75 lbs) to press the backing into the adhesive, then place 50 lb bags of infill along the seam.
Adhesive Curing Times:
Standard polyurethane turf adhesives require 24 to 48 hours to fully cure. If the ambient temperature drops below 50°F (10°C) or humidity exceeds 85%, curing times will double. Do not apply infill or walk on the seams until the adhesive has achieved full tensile strength.
Standard polyurethane turf adhesives require 24 to 48 hours to fully cure. If the ambient temperature drops below 50°F (10°C) or humidity exceeds 85%, curing times will double. Do not apply infill or walk on the seams until the adhesive has achieved full tensile strength.
Infill Selection and Power Brooming
Infill is not optional; it weighs down the turf, protects the primary backing from UV degradation, and keeps the grass blades standing upright. According to landscaping standards outlined by This Old House, skipping infill will void most manufacturer warranties and cause the turf to mat down within a single season.
| Infill Type | Primary Benefit | Application Rate | Cost per 50lb Bag |
|---|---|---|---|
| Silica Sand (Mesh 12/20) | Structural weight, blade support | 1.5 - 2.0 lbs / sq ft | $12 - $18 |
| Zeolite (Clinoptilolite) | Ammonia absorption (pet odor control) | 1.0 - 1.5 lbs / sq ft | $35 - $45 |
| Acrylic-Coated Sand (e.g., Envirofill) | Antimicrobial, long-lasting, low dust | 1.5 - 2.0 lbs / sq ft | $40 - $55 |
| Crumb Rubber (SBR) | High shock absorption, softness | 2.0 - 3.0 lbs / sq ft | $20 - $30 |
Distribute the infill evenly using a drop spreader. Immediately follow this with a stiff-bristle power broom (running at roughly 3,000 RPM) to drive the infill down to the base of the yarn and stand the blades upright. Brush in two perpendicular directions for optimal coverage.
Common Installation Failures and Troubleshooting
| Symptom | Root Cause | Corrective Action |
|---|---|---|
| Water pooling on surface | Insufficient base slope or compacted clay subgrade blocking percolation. | Cut small drainage slits in the backing and turf; install localized French drains if subgrade is impermeable. |
| Visible ridges at seams | Adhesive applied too thickly, or edges not trimmed straight before joining. | Cut out the defective seam, re-trim two rows of stitches, and re-glue using a thinner, even adhesive bead. |
| Turf matting in high-traffic zones | Insufficient infill weight or using turf with a low face weight (under 50oz). | Top-dress the area with an additional 0.5 lbs/sq ft of acrylic-coated sand and power broom aggressively. |
| Perimeter lifting | Nails spaced too far apart or driven into uncompacted base material. | Re-secure the perimeter using 6-inch galvanized spiral nails placed every 4 inches along all borders. |
By strictly adhering to these base compaction, seaming, and infill specifications, your synthetic lawn will maintain structural integrity and aesthetic quality for 15 to 20 years, requiring only occasional rinsing and debris removal.

