
Grass Types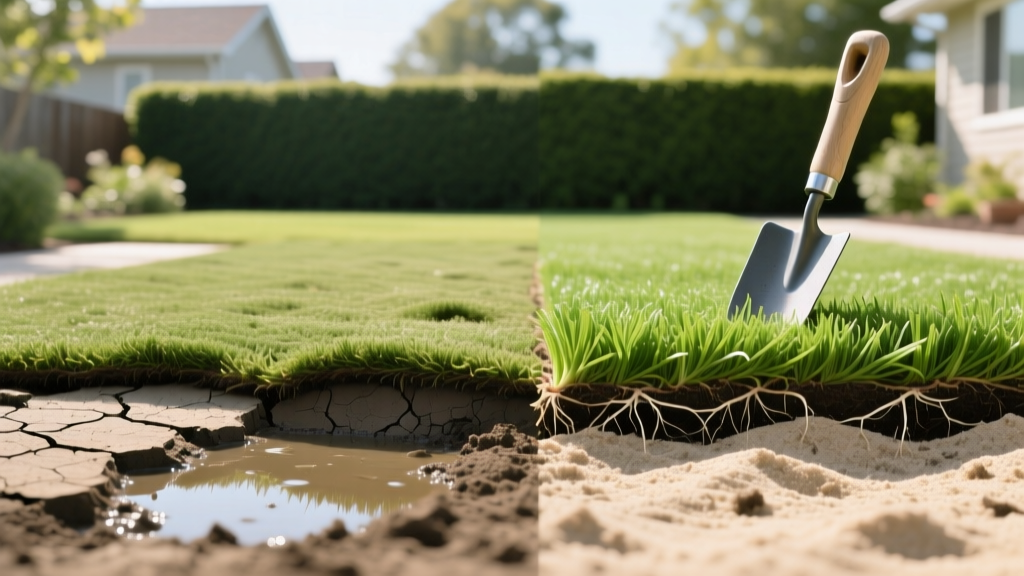
Laying Sod on Clay vs Sand: Soil Prep, Costs, and Rooting Guide
Laying sod is a premium investment that delivers an instant lawn, but the success of the installation is entirely dictated by the soil profile beneath it. Homeowners often spend $1,500 to $3,000 on premium turfgrass only to watch it fail within six weeks because the underlying clay compacted or the sandy base leached vital nutrients. Proper soil preparation is the non-negotiable bridge between a temporary green carpet and a deeply rooted, drought-tolerant lawn.
The Core Challenge: Soil Texture Dictates Sod Survival
Sod farms grow grass in highly controlled, loamy environments. When you transplant that sod onto your property, the roots must transition from the farm soil into your native soil. If the textural difference is too extreme, a 'perched water table' or a 'hydrophobic barrier' forms at the interface, killing the turf.
Clay Soil Dynamics (Compaction and Drainage)
Heavy clay soils possess microscopic pore spaces that restrict oxygen flow and trap water. When laying sod over clay, the primary risk is shallow rooting and fungal diseases like brown patch or Pythium blight caused by prolonged surface moisture. Clay must be mechanically fractured and amended to increase macroporosity before the sod is unrolled.
Sandy Soil Dynamics (Nutrient Leaching and Drought)
Sandy soils drain rapidly, which prevents root rot but starves the sod of moisture and fertilizer during the critical 14-day establishment window. When laying sod on sand, the focus shifts to increasing the soil's cation exchange capacity (CEC) so it can hold onto water and nutrients.
| Soil Type | Primary Issue | Required Amendment | Application Rate (per 1,000 sq ft) | Estimated Material Cost |
|---|---|---|---|---|
| Heavy Clay | Compaction, poor drainage | Coarse compost & expanded shale | 1.5 to 2 cubic yards | $60 - $90 |
| Sandy Loam | Nutrient leaching, drought | Peat moss & biochar | 1 to 1.5 cubic yards | $45 - $75 |
| Silty Loam | Minor crusting | Standard organic compost | 0.5 to 1 cubic yard | $25 - $40 |
Step-by-Step Soil Preparation for Laying Sod
According to turfgrass specialists at the University of Minnesota Extension, skipping soil prep is the leading cause of sod failure. Follow this exact sequence to ensure a seamless transition.
- Vegetation Eradication: Apply a 41% glyphosate solution to existing weeds or grass. Wait 7 to 10 days for complete translocation to the roots. Do not lay sod over dormant weeds; they will push through the new turf.
- Rough Grading: Establish a minimum 1% slope (1 inch of drop per 8 feet) away from your home's foundation to prevent water intrusion.
- Deep Tillage: Use a rear-tine rototiller to fracture the soil to a strict depth of 4 to 6 inches. Shallow tilling (under 3 inches) creates a hardpan layer just beneath the sod roots.
- Amendment Integration: Spread your calculated compost and a starter fertilizer. Till again to mix the top 4 inches uniformly.
- Fine Grading and Rolling: Rake the surface smooth, removing rocks larger than a golf ball. Run a 300-pound water-filled lawn roller over the dirt to firm the base and reveal any low spots that need filling.
Warning: The Phosphorus Ban Edge Case
Standard starter fertilizers are high in phosphorus (e.g., 10-18-10) to stimulate root growth. However, states like New York, New Jersey, and Florida have strict phosphorus bans to protect waterways. If you live in a restricted zone, you must use a zero-phosphorus starter (like 20-0-10) and rely heavily on high-quality compost to provide the natural phosphorus needed for initial root development.
Standard starter fertilizers are high in phosphorus (e.g., 10-18-10) to stimulate root growth. However, states like New York, New Jersey, and Florida have strict phosphorus bans to protect waterways. If you live in a restricted zone, you must use a zero-phosphorus starter (like 20-0-10) and rely heavily on high-quality compost to provide the natural phosphorus needed for initial root development.
2026 Cost Breakdown: Laying Sod vs. Alternatives
When budgeting for lawn establishment, homeowners must weigh the immediate gratification of sod against the lower upfront costs of seeding. As of early 2026, material and labor costs have stabilized, but premium drought-tolerant cultivars command a higher price.
| Establishment Method | Material Cost (per 1,000 sq ft) | Professional Installation (per 1,000 sq ft) | Time to Usable Lawn | Water Requirement (First 30 Days) |
|---|---|---|---|---|
| Laying Sod (Standard) | $450 - $600 | $1,500 - $2,200 | 14 - 21 days | Very High (Daily irrigation) |
| Laying Sod (Premium/Drought) | $650 - $850 | $1,800 - $2,600 | 14 - 21 days | Very High (Daily irrigation) |
| Hydroseeding | $150 - $250 | $800 - $1,200 | 60 - 90 days | High (2-3 times daily) |
| Dry Seed (DIY) | $40 - $90 | N/A (Labor intensive) | 90 - 120 days | Moderate (Keep moist) |
The 14-Day Rooting Protocol and the 'Tug Test'
Once the sod is laid, the watering schedule must be meticulously managed. The goal is to keep the top inch of soil and the sod pad constantly moist without saturating the native soil beneath it. The Texas A&M AgriLife Extension recommends adjusting irrigation based on the 'Tug Test'.
- Days 1 to 7: Water 2 to 3 times daily for 10-15 minutes. The sod should feel like a wet sponge. If the seams begin to shrink and gap, you are underwatering.
- Days 8 to 14: Reduce frequency to once daily, but increase the duration to 20-30 minutes to encourage roots to chase the moisture deeper into the native soil.
- The Tug Test (Day 10+): Gently grab a handful of grass and pull upward. If the sod lifts easily, roots have not yet penetrated the soil interface. If you feel resistance and the soil pulls up with the grass, the sod has successfully knit to the earth. Once the tug test shows resistance across 80% of the lawn, transition to a deep, infrequent watering schedule (1 inch of water twice a week).
'The most common mistake we see in new sod installations is the 'set it and forget it' irrigation approach. Sod requires micro-management for the first two weeks. You are essentially keeping a severed plant alive while it grows a new vascular system.' — Dr. Becky Griffin, Turfgrass Specialist, Penn State Extension
Common Failure Modes and Edge Cases
Even with perfect soil prep, specific environmental and installation errors can derail the establishment process. Watch for these specific failure modes:
- The 'Sponge Effect' on Clay: If you lay Kentucky Bluegrass or Tall Fescue sod over unamended clay and water it heavily, the water cannot percolate. The sod pad becomes a floating sponge, leading to shallow roots and rapid fungal decay. Fix: Aerate heavily and reduce watering duration while increasing frequency.
- Seam Shrinkage: Leaving 1/4-inch gaps between sod rolls during installation allows the edges to dry out and die, creating permanent brown lines in the lawn. Fix: Always butt seams tightly together and stagger the joints like brickwork.
- Tree Root Competition: Laying sod directly over the shallow feeder roots of mature oak or maple trees often results in mutual destruction. The sod starves the tree of oxygen, and the tree outcompetes the sod for water. Fix: Maintain a 3-foot mulch ring around mature trunks and avoid laying sod in heavy drip lines.

