
Grass Types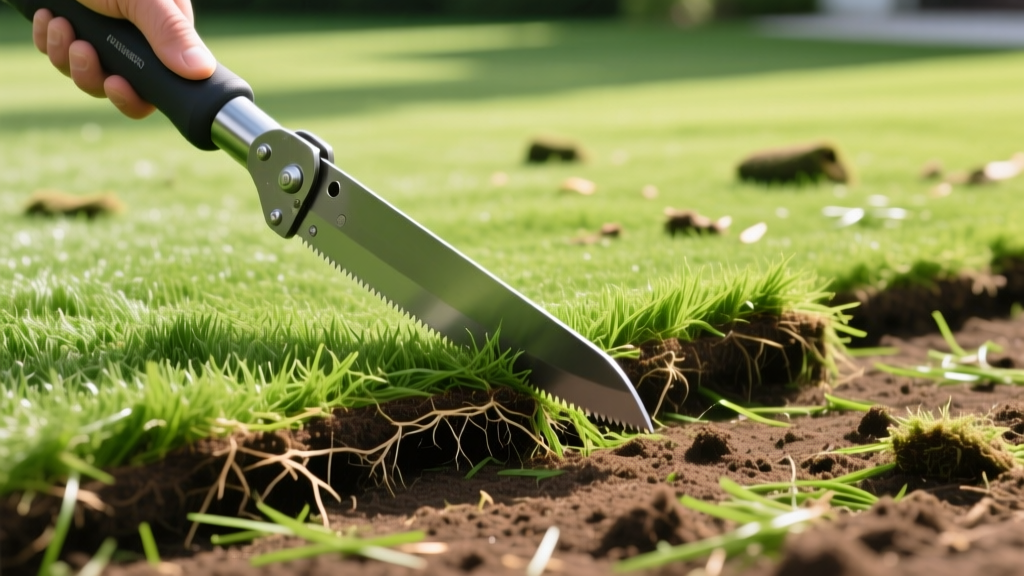
Using a Sod Cutter Hand Tool for Seedbed Preparation
Why Physical Removal Beats Chemical Eradication for Seedbeds
Establishing a new lawn from seed requires flawless seed-to-soil contact. When renovating a yard plagued by invasive species like creeping bentgrass, quackgrass, or bermudagrass, simply killing the existing turf with glyphosate leaves behind a dense mat of dead thatch and rhizomes. This decaying root barrier prevents new grass seedlings from anchoring into the mineral soil, leading to shallow root systems and high drought vulnerability. Using a sod cutter hand tool—often referred to as a manual sod kick plow or turf spade—physically extracts the root zone, instantly exposing the bare, nutrient-rich topsoil necessary for rapid seed germination.
According to turfgrass researchers at University of Minnesota Extension, complete removal of the existing sod and thatch layer is the most reliable method for total lawn renovation, particularly when transitioning between incompatible grass species. While motorized sod cutters are common for large commercial jobs, a manual hand tool offers superior precision for residential yards, tight corners, and delicate garden borders without the risk of deep soil compaction caused by heavy machinery.
Manual vs. Motorized: Choosing the Right Equipment
Deciding between a manual hand tool and a gas-powered walk-behind cutter depends on your lot size, soil composition, and budget. Below is a functional comparison to help you choose the right approach for your seedbed preparation.
| Feature | Manual Sod Cutter (Hand Tool) | Motorized Walk-Behind Cutter |
|---|---|---|
| Cost | $45 - $85 (One-time purchase) | $85 - $130 (Daily rental) |
| Ideal Area | Under 1,500 sq. ft. | Over 2,000 sq. ft. |
| Soil Compaction | Zero (Human weight only) | High (Machine weighs 250+ lbs) |
| Precision | High (Navigates tight radii) | Low (Requires wide turning radius) |
| Physical Effort | High (Requires leg/core strength) | Low (Self-propelled) |
Anatomy and Setup of a Manual Sod Cutter
Not all hand tools are engineered for turf extraction. A standard flat spade will slice roots but fail to lift the sod strip. A proper manual sod cutter features specific geometric traits:
- Blade Width: 10 to 12 inches. This width matches the average human stride and allows for manageable rolling of the extracted sod strips.
- Blade Angle: The cutting edge should be beveled at a 15 to 20-degree upward angle. This specific pitch slices the rhizomes while simultaneously lifting the turf away from the subsoil.
- Shaft Length: 48 to 54 inches. A longer fiberglass or steel handle provides the necessary leverage to keep the user's back straight while transferring force from the rear leg into the cutting blade.
- Foot Crossbar: A reinforced horizontal step located 6 inches above the blade, designed to withstand repeated impacts from a work boot.
Pro Tip: Before beginning, sharpen the blade with a 10-inch mill bastard file. Even a brand-new tool from the hardware store often has a factory edge that is too blunt for slicing dense clay soils. A razor-sharp edge reduces the required kicking force by up to 40%.
Step-by-Step Seedbed Extraction Process
Proper technique prevents blade bounce and ensures a uniform cutting depth, which is critical for preserving your valuable topsoil layer.
1. Scalp and Hydrate the Turf
Mow the existing lawn to the lowest possible setting (approx. 0.5 inches) and bag the clippings. Twenty-four hours before cutting, apply exactly 0.5 inches of water. The goal is to moisten the top 2 inches of soil. Perform a squeeze test: grab a handful of soil. If it crumbles, it is too dry; if water drips out, it is too wet. Optimal moisture allows the blade to glide through roots without turning the soil into heavy mud clods.
2. Establish the Perimeter
Use a half-moon manual edger to cut a clean boundary line around the entire work area. This severs lateral stolons and prevents the sod strips from tearing into adjacent landscaping or hardscapes.
3. The Kick-and-Glide Technique
Position the blade at the edge of your perimeter cut. Tilt the handle forward so the blade rests flat against the soil surface. Place your dominant foot on the crossbar. Push forward and slightly down, driving the blade exactly 1.5 to 2 inches deep. This depth is the sweet spot: it severs the primary root zone of most cool-season grasses and shallow warm-season stolons without digging into the nutrient-poor subsoil. Once the blade is buried, pull the handle backward toward your body to lever the sod strip upward.
4. Roll and Remove
Advance the tool 10 inches and repeat the kick. After cutting a 3-to-4-foot strip, roll it up like a carpet. Removing the strips immediately prevents them from drying out and becoming heavy, brittle mats that are difficult to transport.
Warning: Never cut deeper than 2.5 inches. Removing deep subsoil destroys the natural grading of your yard and exposes raw clay, which will severely stunt the germination and early root development of your new grass seed.
Troubleshooting Common Manual Cutting Failures
When using a sod cutter hand tool, physical feedback from the soil will tell you if your technique or environment needs adjustment.
Symptom: The blade bounces off the soil surface or stops abruptly.
Cause: The soil is excessively dry, or you have struck a buried rock or dense clay lens.
Fix: Water the area and wait 12 hours. If the issue persists in a specific spot, use a digging bar to probe for buried construction debris left behind by the original home builder.
Symptom: The sod strips tear horizontally, leaving half the roots in the ground.
Cause: You are cutting too shallow, or the blade angle is too steep.
Fix: Lower the handle to achieve a flatter 15-degree attack angle and push the blade 0.5 inches deeper to ensure you are below the primary rhizome network.
Symptom: The extracted sod is incredibly heavy and muddy.
Cause: Cutting too soon after heavy rainfall.
Fix: Halt operations. Allow the sun and wind to dry the topsoil for 24 to 48 hours. Cutting saturated soil destroys soil structure and creates severe compaction.
Post-Removal Soil Prep for Optimal Seed Germination
Once the sod is removed, you are left with a blank canvas of bare soil. According to establishment guidelines from NC State Turfgrass Science, the next 48 hours are critical for seedbed conditioning.
- Core Aeration / Light Tilling: Use a manual core aerator or a light garden fork to fracture the top 2 inches of the exposed soil. This relieves any minor surface compaction caused by your footsteps during the cutting process.
- Amend and Grade: Spread a 0.25-inch layer of screened compost over the bare soil. Rake it smooth, ensuring a consistent grade that slopes away from your home's foundation at a minimum 2% decline.
- Seed and Roll: Apply your chosen grass seed at the manufacturer's recommended rate. Follow immediately with an empty, lightweight lawn roller to press the seed firmly into the compost-amended soil, ensuring the vital seed-to-soil contact required for moisture uptake and germination.
Expert FAQ
Can I use a manual sod cutter to remove deep-rooted weeds like dandelions?
Yes, but it is inefficient for spot treatment. A manual sod cutter is designed for broad, continuous strips. For isolated deep taproots, use a specialized stand-up weeder with a clawed head to extract the root without disturbing the surrounding seedbed.
What should I do with the removed sod strips?
Do not till them back into the seedbed; they will introduce weed seeds and create air pockets. Stack them in a compost pile, layering them with high-nitrogen materials like grass clippings or blood meal to accelerate the breakdown of the root mass, or offer them to neighbors for patch repairs.

