
Grass Types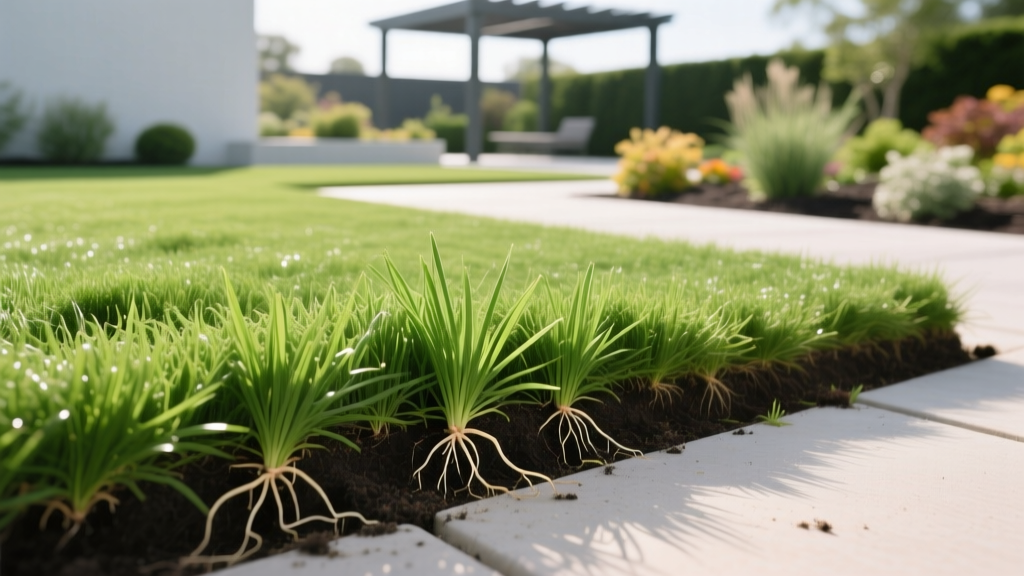
New Sod After 1 Week: Rooting Milestones, Watering, and Care Guide
The first seven days after installing sod dictate the long-term viability of your lawn. While the grass may look lush and green on day one, the critical physiological work is happening entirely out of sight beneath the soil surface. Understanding the exact developmental milestones of new sod after 1 week allows you to adjust irrigation, prevent fungal outbreaks, and ensure deep root penetration before the critical 14-day mark.
The 7-Day Rooting Timeline: What is Happening Underground
When sod is harvested, the root system is severely truncated. The grass survives the first few days on residual moisture and stored carbohydrates in the crown and stolons. By day three or four, the plant initiates new root primordia. By day seven, you should observe the emergence of fine, white capillary roots penetrating the underlying soil profile.
Rooting speed varies significantly by species and soil temperature. According to research from NC State Turfgrass Science, warm-season grasses like 'TifTuf' Bermuda and 'Meyer' Zoysia will exhibit visible root penetration into the soil within 5 to 7 days if soil temperatures remain consistently above 65°F. Cool-season grasses, such as 'Midnight' Kentucky Bluegrass or 'Titan Ultra' Tall Fescue, operate more slowly, often requiring 7 to 10 days to achieve the same initial soil anchoring, preferring soil temperatures between 55°F and 65°F.
The 'Tug Test' Protocol
To verify root establishment on day seven, perform the tug test. Grasp a handful of grass near the edge of a sod roll and pull straight upward with approximately 2 to 3 pounds of force. If the sod lifts easily with no resistance and no soil attached to the roots, the grass has not yet knitted to the subgrade. If you feel distinct resistance and see white root hairs holding onto the native soil, the initial rooting phase is successful.
Week 1 Watering Matrix: Exact Schedules by Grass Type
The most common cause of sod failure in the first week is improper irrigation—either underwatering, which causes the edges to shrink and desiccate, or overwatering, which drowns the emerging root primordia and invites Pythium blight. The goal during week one is to keep the top two inches of soil and the sod pad continuously moist, but never saturated.
Instead of one long daily watering session, week one irrigation must be split into multiple short cycles. This prevents runoff and ensures the water penetrates the seam between the sod and the soil without pooling. Below is the precise week-one watering matrix based on evapotranspiration rates for major turf species.
| Grass Species (Cultivar Examples) | Daily Cycles | Minutes Per Cycle | Target Weekly Volume |
|---|---|---|---|
| Bermuda (TifTuf, Celebration) | 3 to 4 cycles | 5 - 8 minutes | 1.0 - 1.5 inches |
| Zoysia (Meyer, Geo) | 3 cycles | 7 - 10 minutes | 1.0 - 1.25 inches |
| Kentucky Bluegrass (Midnight, Mazama) | 2 to 3 cycles | 10 - 15 minutes | 1.25 - 1.5 inches |
| Tall Fescue (Titan Ultra, RTF) | 2 cycles | 12 - 15 minutes | 1.25 - 1.5 inches |
Note: These timings assume standard residential spray heads delivering 1.5 inches per hour. If using rotary nozzles (like the Hunter MP Rotator), which deliver roughly 0.4 inches per hour, multiply the cycle durations by 3.
Troubleshooting Week 1 Sod Failures
Even with meticulous soil preparation, environmental variables can trigger specific failure modes during the first seven days. Identifying these early prevents permanent loss of the turf.
1. Sod Shrinkage and Edge Gapping
If you notice gaps of 0.5 inches or more forming between the sod rolls by day five, the turf is experiencing severe moisture stress and shrinking. This occurs when the underlying soil is hydrophobic or when watering cycles are too infrequent. The Fix: Do not stretch the sod to close the gaps, as this will tear the newly formed roots. Instead, topdress the gaps with washed river sand or a 50/50 sand-topsoil mix to protect the exposed edges from desiccation while you increase your irrigation frequency.
2. Pythium Blight (Grease Spots)
Warm-season sod installed in late spring or early summer is highly susceptible to Pythium blight if kept constantly saturated in temperatures above 85°F. Symptoms appear as small, irregular, water-soaked spots that quickly turn dark and feel greasy to the touch. The Fix: Immediate application of a systemic fungicide containing Azoxystrobin (e.g., Heritage) or Propiconazole. In 2026, professional-grade Azoxystrobin costs approximately $140 to $160 per gallon and is applied at a rate of 0.2 to 0.4 oz per 1,000 square feet. Reduce watering frequency immediately and improve air circulation.
3. Blueing or Purpling of Cool-Season Grasses
Kentucky Bluegrass and some Fescue cultivars will exhibit a distinct blue-gray or purple hue when experiencing moisture stress or phosphorus deficiency. If the soil was not amended with a starter fertilizer prior to laying the sod, the roots cannot access nutrients fast enough to support the canopy. The Fix: Apply a liquid kelp extract or a fast-acting liquid phosphorus fertilizer (e.g., 10-52-10) at half the recommended label rate to stimulate root growth without burning the stressed foliage.
Mowing and Traffic Restrictions
A frequent mistake homeowners make is mowing the lawn before the roots have adequately anchored the sod to the soil. Mowing too early will result in the mower wheels tearing the sod rolls completely out of the ground, destroying the root primordia.
Critical Rule: Never mow new sod until it passes the tug test. For most warm-season grasses, this is day 10 to 14. For cool-season grasses, this is day 14 to 21. When you do perform the first mow, ensure the mower deck is set to the highest possible setting (3.5 to 4 inches) and the blades are freshly sharpened to prevent tearing the unanchored turf.
Regarding foot traffic, the first week requires absolute restriction. The soil directly beneath the sod is kept at field capacity, making it highly susceptible to compaction. Even light foot traffic from children or pets will compress the soil pores, suffocating the emerging roots and creating permanent depressions in the lawn grade.
Week 1 Fertilizer and Herbicide Rules
Do not apply granular nitrogen fertilizers during the first week. Sod farms heavily fertilize the turf prior to harvest to ensure a deep green color for sale. Adding more nitrogen forces the plant to push top-growth at the expense of root development, a phenomenon known as 'shoot-root competition.' Furthermore, excess nitrogen in the presence of high moisture creates an ideal breeding ground for fungal pathogens.
Similarly, avoid all pre-emergent and post-emergent herbicides. According to establishment guidelines from UC Davis Turfgrass Research, herbicides can severely stunt the cell division required for new root formation. Wait until the sod has been mowed at least three times (usually 45 to 60 days post-installation) before applying any chemical weed control. If weeds emerge in week one, pull them by hand, ensuring you do not lift the surrounding sod in the process.
By strictly adhering to these week-one protocols—split-cycle irrigation, traffic restriction, and vigilant disease monitoring—you transition the sod from a fragile, harvested product into a deeply rooted, resilient lawn capable of thriving for decades.

