
Grass Types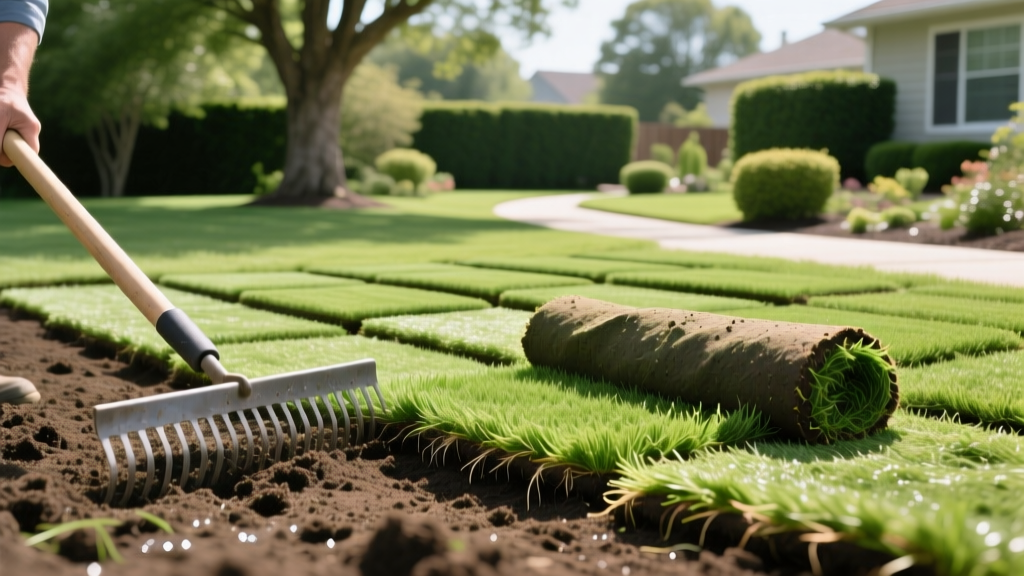
How to Plant a Lawn From Sod: Expert Prep, Layout, and Rooting Guide
The True Cost of Sod Installation in 2026
Before breaking ground, understand the financial commitment. While seed costs roughly $0.05 per square foot, learning how to plant a lawn from sod requires a premium investment for instant maturity. In 2026, a standard 450-square-foot pallet of certified turfgrass (such as TifTuf Bermuda or Zenith Zoysia) ranges from $240 to $390, heavily dependent on regional freight and cultivar patents. Factor in delivery fees ($75 to $150 per load), soil amendments ($0.15 per square foot), and equipment rentals, bringing the realistic DIY cost to $0.85 to $1.30 per square foot.
Pro Tip: The Pallet Weight Reality
A single pallet of freshly harvested sod retains immense moisture, weighing between 2,500 and 3,000 pounds. Ensure your driveway or staging area can support this concentrated load without cracking asphalt or sinking into soft subgrades.
Phase 1: Subgrade and Soil Preparation (The 4-Inch Rule)
Sod does not magically root through compacted clay. The UC Davis Turfgrass Culture program emphasizes that shallow root systems established on hardpan lead to chronic drought stress and winter kill. You must engineer a receptive subgrade.
- Clear and Till: Remove all existing vegetation, rocks larger than 0.5 inches, and construction debris. Use a rear-tine rototiller to break the soil to a depth of 4 to 6 inches. Shallow tilling (1-2 inches) is the primary cause of establishment failure.
- Amend the Profile: Spread 2 to 3 cubic yards of screened, aged compost per 1,000 square feet. Till this into the top 4 inches to increase cation exchange capacity (CEC) and improve drainage.
- Grade and Slope: Rake the area to achieve a 1% to 2% slope away from your home's foundation (a 1 to 2-inch drop per 10 feet). Use a laser level or a string line to verify the grade.
- Firm the Seedbed: Run a water-weighted lawn roller (filled one-third with water) over the soil. The ground should be firm enough that your footprints are no deeper than 0.25 inches. This prevents the sod from sinking and creating uneven depressions later.
- Pre-Plant Fertilization: Apply a starter fertilizer. If your state permits phosphorus, use an 18-24-6 blend at 4 lbs per 1,000 square feet. In states with phosphorus bans on established lawns, a 24-0-6 starter with humic acid is the legal and effective alternative.
Phase 2: Delivery, Acclimation, and Staging
Timing is your biggest vulnerability. Sod is a living, respiring organism. When stacked on a pallet, the center rolls undergo anaerobic respiration, generating heat. If ambient temperatures exceed 80°F, the center of the pallet will begin 'sweating' (turning yellow and emitting a sour, silage-like odor) within 18 to 24 hours.
Coordinate your delivery for the exact morning you plan to lay the turf. If you must delay, unroll the sod in a shaded area and lightly mist it. Never leave sod wrapped in plastic on a hot driveway.
Phase 3: Precision Layout and Staggered Seaming
Proper layout prevents linear water channels and structural weakness. According to Penn State Extension turf management guidelines, seams must be staggered to distribute tension and prevent erosion pathways.
| Layout Pattern | Description | Best Use Case |
|---|---|---|
| Brick (Staggered) | End joints are offset by half the roll length in adjacent rows. | Standard residential lawns; prevents long linear seams. |
| Grid (Aligned) | All end joints align, creating a checkerboard of seams. | Avoid. Creates structural fault lines and water channels. |
| Random | Pieces cut to varying lengths to randomize end joints. | Irregularly shaped yards, curves, and tight garden beds. |
Execution Steps:
- Start at a Straight Edge: Begin along a driveway, sidewalk, or string line to ensure your first row is perfectly straight.
- Butt Seams Tightly: Push edges together so they touch, but do not overlap. Overlapping causes the top edge to dry out and die. Leave no gaps wider than 1/8 inch.
- Cutting Curves: Use a serrated landscaping knife or a half-moon edger to cut sod around sprinkler heads and tree rings. Never tear the sod with your hands, as this frays the root mat.
- Roll the Seams: Immediately after laying a 500-square-foot section, run a lightweight roller over it. This presses the sod roots into intimate contact with the subgrade, eliminating air pockets that cause localized desiccation.
Phase 4: The Critical 14-Day Rooting Hydration Matrix
Watering is not a 'set it and forget it' task. Newly laid sod has a root depth of less than 0.5 inches. Your goal is to keep the soil-sod interface constantly moist without drowning the subgrade, gradually forcing roots to dive deeper.
Warning: Hydrophobic Soil Repellency
If your subgrade contains high sand content or was heavily compacted, it may become hydrophobic (water-repellent) when dry. If water pools on the sod surface and refuses to penetrate, peel back a corner, apply a liquid soil surfactant to the exposed soil, water lightly, and press the sod back down.
Days 1 to 7: The Saturation Phase
Water 2 to 3 times daily for 10 to 15 minutes per zone. The objective is to keep the top 1 inch of soil beneath the sod continuously moist. Lift a corner of the sod daily; the soil underneath should feel like a wrung-out sponge. If it is muddy and squelches, reduce watering time to prevent Pythium blight (water mold).
Days 8 to 14: The Transition Phase
Reduce frequency to once daily, but increase duration to 20 to 25 minutes. This encourages the emerging white root hairs to push 2 to 3 inches into the subgrade in search of deeper moisture. You will notice the sod resisting when you gently tug upward on the grass blades—this is the sign of successful knitting.
Days 15 and Beyond: Deep Root Establishment
Transition to a standard deep-watering schedule: 1 inch of water per week, split into two 45-minute sessions (depending on your sprinkler head precipitation rate). This trains the turf to develop a 4-to-6-inch root system capable of surviving summer heat.
Troubleshooting Common Sod Establishment Failures
Seam Shrinkage and Gapping
The Symptom: Visible brown dirt lines appear between sod rolls within the first week.
The Cause: Edge desiccation. The edges of the sod rolls dry out faster than the center because they are exposed to wind and sun on two sides.
The Fix: Hand-water the seams with a hose for an extra 2 minutes after your automated cycle finishes. If gaps have already formed, fill them with a topdressing mix of 70% screened topsoil and 30% sand to protect the exposed roots from dying back further.
Yellowing and 'Melting' in Pallet Centers
The Symptom: The grass in the middle of the roll is pale yellow, limp, and smells like rotting hay.
The Cause: Pallet sweating due to delayed installation and anaerobic bacterial growth.
The Fix: There is no cure for severely melted sod; the crown tissue is dead. You must discard the damaged rolls and purchase replacements. To prevent this, never accept delivery more than 12 hours before you are ready to lay the turf.
Fungal Outbreaks (Brown Patch or Dollar Spot)
The Symptom: Circular brown patches with dark smoke rings on the leaf margins, typically appearing in week two.
The Cause: Excessive nighttime moisture combined with high nitrogen from starter fertilizers.
The Fix: Adjust your watering schedule so the final irrigation cycle finishes before 10:00 AM, allowing the grass blades to dry before nightfall. If the fungus persists, apply a preventative fungicide containing Azoxystrobin at the curative rate of 3.5 lbs per 1,000 square feet.
Mastering how to plant a lawn from sod requires treating the installation as a precision engineering project rather than a simple landscaping chore. By enforcing strict subgrade preparation, executing staggered layouts, and adhering to a calculated hydration matrix, your new turf will knit into a resilient, drought-tolerant carpet within 21 days.

