
Grass Types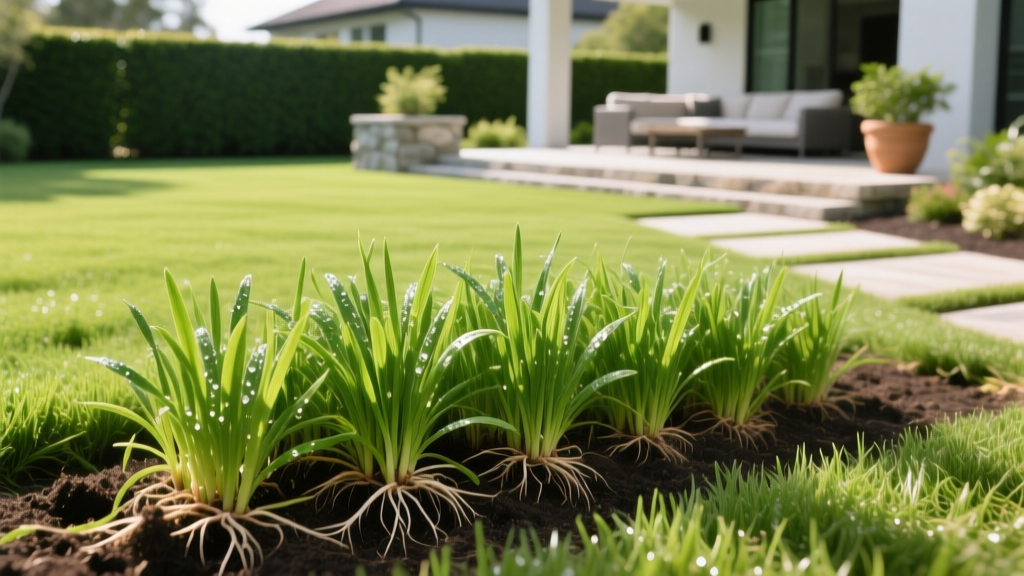
How to Plant Bermuda Grass Sprigs for Fast Lawn Coverage
Establishing a premium, high-traffic lawn often requires vegetative propagation rather than traditional seeding. If you are planting elite hybrid cultivars like Tifway 419, Celebration, or Latitude 36, you cannot use seed; these varieties are sterile and must be established via sod or sprigs. Learning how to properly plant bermuda grass sprigs offers a massive cost advantage over sodding while delivering full coverage significantly faster than common seeded varieties.
Sprigs are essentially 3-to-5-inch cuttings of rhizomes (underground stems) and stolons (above-ground runners) that contain active growth nodes. When placed in contact with moist soil, these nodes rapidly generate roots and new shoots. This guide details the exact spacing, soil preparation, and 30-day care matrix required to turn a box of bare sprigs into a dense, durable turf.
Establishment Matrix: Sprigs vs. Seed vs. Sod
Before purchasing your plant material, understand where sprigging fits into the broader establishment landscape. The data below reflects average residential costs and timelines for a 5,000-square-foot lawn area.
| Method | Cost (per 1,000 sq ft) | Time to Full Coverage | Cultivar Availability | Labor Intensity |
|---|---|---|---|---|
| Bermuda Grass Sprigs | $50 - $120 | 6 - 10 weeks | All Hybrids & Commons | High (Initial Planting) |
| Common Bermuda Seed | $25 - $60 | 8 - 14 weeks | Common Varieties Only | Low |
| Hybrid Bermuda Sod | $350 - $600 | Instant (2 weeks to root) | All Hybrids & Commons | Extreme (Heavy Lifting) |
Calculating Your Sprigging Rate and Spacing
Sprigs are typically sold by the bushel. A standard bushel contains roughly 1,000 to 1,200 individual sprigs. Your required volume depends entirely on your chosen planting geometry. According to Texas A&M AgriLife Extension, tighter spacing yields faster coverage but requires more upfront material.
The Spacing-to-Coverage Formula:
- 12x12 inch grid: 1 bushel covers ~1,000 sq ft. Full coverage in 6-8 weeks.
- 18x18 inch grid: 1 bushel covers ~2,200 sq ft. Full coverage in 10-12 weeks.
- 24x24 inch grid: 1 bushel covers ~4,000 sq ft. Full coverage in 14+ weeks (high weed competition risk).
For most homeowners seeking a balance of budget and speed, the 12x12 inch or 18x18 inch grid is the optimal choice. If you are sprigging a 5,000-square-foot yard at a 12-inch spacing, you will need to source exactly 5 bushels of fresh sprigs.
Step-by-Step Soil Preparation
Sprigs lack the stored energy reserves found in seeds or the mature root systems of sod. They are entirely dependent on immediate soil contact and moisture. Failure to prep the soil is the number one cause of sprig mortality.
- Eradicate Existing Vegetation: Apply a non-selective herbicide (like a 41% glyphosate solution) to the target area. Wait 14 days for complete translocation and tissue death. Do not skip this step; competing weeds will easily outpace young sprigs.
- Test and Amend pH: Bermuda grass thrives at a pH of 6.0 to 6.5. If your soil test indicates a pH below 5.8, incorporate pelletized lime at the rate of 50 lbs per 1,000 sq ft during the tilling phase.
- Till to 4-6 Inches: Use a rear-tine rototiller to break up soil compaction. Sprigs cannot push through hardpan clay.
- Incorporate Starter Fertilizer: Broadcast a high-phosphorus starter fertilizer (such as a 10-20-10 or 5-10-5 N-P-K ratio) at a rate of 1 lb of actual Nitrogen per 1,000 sq ft. Till this into the top 3 inches of soil to fuel immediate root development.
- Grade and Firm: Rake the area perfectly level. Run a lightweight lawn roller (filled only halfway with water) over the soil. You want a firm seedbed so the sprigs do not sink into air pockets after watering.
The Planting Process: Trenching vs. Broadcasting
While commercial farms use mechanical sprig planters, residential establishment relies on two manual methods: broadcast-and-disk or hand-trenching. Hand-trenching is vastly superior for homeowners because it guarantees precise depth control.
The Hand-Trenching Method
Using a hoe or a specialized hand trencher, dig shallow furrows 1 to 1.5 inches deep, spaced 12 inches apart. Lay the sprigs end-to-end in the furrow. Cover the sprigs with soil, but leave the top 1/2 inch of the sprig and at least one growth node exposed to the air.
⚠️ Critical Failure Mode: The Buried Node
If you bury the entire sprig beneath the soil surface, it will rot before it can push a shoot through the dirt. Conversely, if you lay it entirely on top of the soil without covering the lower nodes, the rhizomes will desiccate and die in the sun within 48 hours. The 'half-buried' technique is non-negotiable.
If you bury the entire sprig beneath the soil surface, it will rot before it can push a shoot through the dirt. Conversely, if you lay it entirely on top of the soil without covering the lower nodes, the rhizomes will desiccate and die in the sun within 48 hours. The 'half-buried' technique is non-negotiable.
After placing the sprigs in the trenches, use the back of a steel rake to gently press the soil firmly against the plant material. This ensures capillary action can draw moisture from the soil directly into the sprig tissue.
The 30-Day Post-Planting Irrigation Matrix
Water management during the first month dictates your success. According to NC State Extension TurfFiles, newly planted vegetative material requires frequent, shallow watering to prevent the exposed nodes from drying out, transitioning to deeper, less frequent watering as roots establish.
| Timeframe | Watering Frequency | Duration per Zone | Goal |
|---|---|---|---|
| Days 1 - 14 | 3 to 4 times daily | 5 - 8 minutes | Keep top 1 inch of soil constantly moist; prevent exposed nodes from drying. |
| Days 15 - 21 | 2 times daily | 10 - 15 minutes | Encourage roots to anchor; soil should dry slightly between afternoon cycles. |
| Days 22 - 30 | 1 time daily | 20 - 30 minutes | Train roots to grow deeper; transition to standard establishment watering. |
| Day 31+ | Every 3rd day | 45 minutes | Deep soaking to promote drought tolerance and deep rhizome networks. |
Fertilization and Weed Control During Establishment
Once the sprigs have anchored to the soil (usually around day 21, test by giving a sprig a gentle upward tug), apply a second round of fertilizer. Use a balanced, quick-release fertilizer like 16-4-8 at a rate of 1 lb of Nitrogen per 1,000 sq ft. This fuels the rapid lateral stolon growth required to close the gaps in your grid.
Herbicide Restrictions: You cannot apply pre-emergent herbicides (like prodiamine or dithiopyr) to a sprigged lawn. Pre-emergents inhibit root cell division and will kill your unestablished sprigs. You must wait at least 60 days after planting, or until you have mowed the lawn twice, before applying a pre-emergent. For broadleaf weeds that emerge during the first two months, spot-treat with a selective post-emergent containing 2,4-D or Quinclorac, but keep the application rates at 50% of the label recommendation to avoid stunting the young Bermuda.
Troubleshooting Common Sprigging Issues
| Symptom | Probable Cause | Corrective Action |
|---|---|---|
| Sprigs turn brown and brittle within 3 days. | Desiccation due to inadequate watering frequency or poor soil contact. | Increase watering to 5x daily for 5 mins. Roll the area to press sprigs into soil. |
| Sprigs turn black, mushy, and smell sour. | Rot from planting too deep or waterlogged clay soil. | Reduce watering duration. Ensure soil drains properly; aerate if water pools. |
| Sprigs root but fail to push new green shoots. | Soil temperature too low or nitrogen deficiency. | Bermuda requires soil temps above 65°F to grow. Apply a light urea foliar spray. |
| Heavy crabgrass invasion between sprig rows. | Inability to use pre-emergents during the first 60 days. | Hand-pull large weeds. Spot spray Quinclorac carefully to suppress crabgrass. |
Planting bermuda grass sprigs requires meticulous attention to depth and moisture during the first three weeks. By adhering to strict 12-inch spacing, utilizing the half-buried trenching method, and following the precise 30-day irrigation matrix, you will establish a premium, drought-tolerant hybrid lawn at a fraction of the cost of professional sodding.

