
Grass Types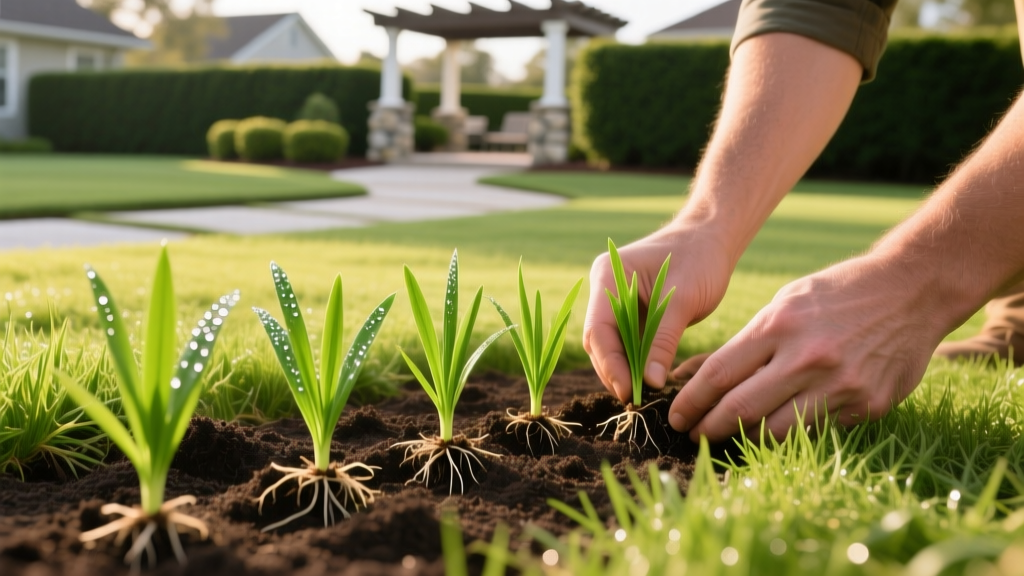
How to Plug St. Augustine Grass: Spacing, Timing, and Care
St. Augustinegrass (Stenotaphrum secundatum) remains the premier warm-season turf for shaded, coastal, and subtropical lawns. However, unlike Bermuda or Zoysia, St. Augustine produces very little viable seed, making vegetative propagation the only reliable establishment method. While solid sod provides an instant lawn, it is expensive and prone to transplant shock. Learning how to plug St. Augustine grass offers a highly cost-effective middle ground, allowing you to establish a dense, creeping turf over a single growing season for a fraction of the cost of sod.
Why Choose St. Augustine Plugs Over Sod or Seed?
The decision to use plugs hinges on budget, timeline, and labor tolerance. St. Augustine spreads via above-ground stolons, which root at the nodes and rapidly colonize bare soil when given adequate moisture and warmth. According to the University of Florida IFAS Extension, vegetative planting is the industry standard for this species due to the genetic instability and poor germination rates of commercially available seeds.
2026 Cost & Labor Comparison (Per 500 Sq. Ft.):
- Solid Sod: $350 - $550 (Materials) + High physical labor for transport and laying. Instant coverage.
- St. Augustine Plugs: $225 - $425 (approx. 500 plugs at $0.45 - $0.85 each) + Moderate labor for drilling and planting. Full coverage in 4 to 8 months.
- Seed: Not recommended. Commercial St. Augustine seed yields weak, genetically inconsistent turf with high failure rates.
The Ideal Planting Window: Timing Your Plug Installation
Timing is the single most critical variable in plug survival. St. Augustine is a warm-season grass that goes dormant and turns brown when soil temperatures drop below 55°F. Planting too early in the spring invites rot, while planting too late in the fall prevents stolon establishment before winter dormancy.
"The optimal window for plugging St. Augustine is when nighttime air temperatures consistently stay above 65°F and soil temperatures at a 2-inch depth reach 70°F. In most USDA Zones 8-10, this falls between mid-May and late July."
Use a digital soil thermometer to verify temperatures before purchasing your plugs. If you buy plugs and a cold snap is forecasted, keep them in a shaded, well-ventilated area and mist them daily; do not let the root zones dry out, but avoid waterlogging the trays.
Calculating Plug Quantities and Spacing Strategies
St. Augustine stolons can creep 12 to 24 inches in a single season under optimal conditions. Your spacing dictates your budget and how long you will tolerate bare dirt between plants. The Texas A&M AgriLife Extension recommends adjusting spacing based on the specific cultivar's vigor (e.g., 'Palmetto' and 'Floratam' spread faster than 'Seville').
| Spacing Strategy | Distance Between Plugs | Plugs per 100 Sq. Ft. | Estimated Fill-In Time |
|---|---|---|---|
| High Density | 6 - 8 inches | 22 - 40 | 3 - 4 months |
| Standard (Recommended) | 12 inches | 10 - 12 | 5 - 7 months |
| Economy | 18 - 24 inches | 3 - 5 | 10 - 14 months |
Step-by-Step Installation: Soil Prep to Planting
Proper soil-to-root contact is non-negotiable for plug survival. Follow this exact sequence to ensure your St. Augustine plugs take root rapidly.
- Eradicate Existing Weeds (14 Days Prior): Spray the target area with a non-selective herbicide like glyphosate. Wait two weeks for complete dieback. Tilling live weeds into the soil will only chop and redistribute their root systems.
- Till and Amend: Rototill the soil to a depth of 4 inches. St. Augustine prefers a soil pH between 5.0 and 8.5. If your soil test indicates heavy clay, incorporate 2 inches of organic compost to improve drainage and prevent crown rot.
- Select the Right Tool: Skip the hand trowel. Use a specialized lawn plugger tool (such as the Pro Plugger) or a 3-inch bulb planter. These tools extract a clean core of soil, leaving a perfectly sized hole for the plug.
- Plant at the Correct Depth: Drop the plug into the hole. Critical Rule: The top of the plug's soil surface must be exactly flush with the surrounding ground. If you bury the crown (the base of the grass blades) under loose soil, the plant will suffocate and rot. If the root ball sits above the soil line, it will desiccate in hours.
- Step to Firm the Soil: Gently step on the soil immediately adjacent to the plug to collapse air pockets and ensure intimate root-to-soil contact.
The Critical First 30 Days: Watering and Fertilization
Plugs have a severely restricted root mass compared to sod. They cannot access deep soil moisture and will die within 48 hours if the top inch of soil dries out during the initial establishment phase. The NC State TurfFiles database emphasizes that shallow, frequent irrigation is mandatory for the first three weeks.
⚠️ Warning: Avoid Night Watering
Always water your new plugs in the early morning (between 5:00 AM and 8:00 AM). Watering in the evening leaves the St. Augustine foliage wet overnight, creating the perfect microclimate for Brown Patch (Rhizoctonia solani) and Gray Leaf Spot, which can decimate young plugs in days.
Always water your new plugs in the early morning (between 5:00 AM and 8:00 AM). Watering in the evening leaves the St. Augustine foliage wet overnight, creating the perfect microclimate for Brown Patch (Rhizoctonia solani) and Gray Leaf Spot, which can decimate young plugs in days.
30-Day Watering Matrix
- Days 1–10: Water 2 times per day (morning and early afternoon) for 10 minutes per zone. The goal is to keep the top 2 inches of soil consistently moist, not muddy.
- Days 11–20: Reduce to 1 time per day in the morning for 15 minutes. You should see stolons beginning to "peg" (send small white roots into the native soil).
- Days 21–30: Transition to every other day for 20–25 minutes. This forces the roots to stretch downward, building drought tolerance.
Fertilization Protocol
Do not use standard lawn fertilizer on day one. Apply a starter fertilizer high in phosphorus (such as an 18-24-12 or 10-18-10 N-P-K ratio) at the time of planting to stimulate rapid root growth. Wait exactly 4 weeks after planting to apply a standard 3-1-2 ratio maintenance fertilizer (like 15-5-10) at a rate of 1 lb of nitrogen per 1,000 sq. ft.
Troubleshooting Common Plug Establishment Failures
Even with meticulous prep, environmental factors can stall plug growth. Use this diagnostic matrix to correct issues before they become fatal.
| Symptom | Probable Cause | Corrective Action |
|---|---|---|
| Plugs turning yellow/brown from the center outward | Take-All Root Rot (TARR) or overwatering in heavy clay | Reduce watering frequency. Apply a fungicide containing Azoxystrobin. Top-dress with acidic peat moss to lower pH. |
| Plugs easily pull up; no root attachment after 3 weeks | Poor soil contact or grub damage | Firm soil around plugs. Inspect roots for white grubs; treat with Imidacloprid if present. |
| Yellowing halos around grass blades, stunted stolons | Southern Chinch Bug infestation | Part the grass at the soil line to spot tiny black/white insects. Apply Bifenthrin granular insecticide immediately. |
Frequently Asked Questions
What is the best mowing height during plug establishment?
Set your mower deck to the highest possible setting—typically 3.5 to 4 inches for St. Augustine. You must allow the grass blades to maximize photosynthesis to fuel stolon expansion. Do not mow until the plugs have firmly rooted and the stolons have begun to run horizontally across the soil surface, usually around week 4 or 5.
Can I plant St. Augustine plugs in existing thin turf?
Yes, plugging is an excellent method for overseeding thin or damaged areas of an existing St. Augustine lawn. However, you must scalp or mow the existing surrounding grass very low (down to 2 inches) to prevent it from shading out the new, smaller plugs. Sunlight is required for the new plugs to trigger horizontal stolon growth.
How do I protect new plugs from foot traffic?
New plugs are highly vulnerable to physical displacement. Keep all pets and foot traffic off the lawn for at least 21 days. If you must access the area, lay down temporary plywood walkways to distribute weight and prevent soil compaction around the delicate new root zones.

