
Grass Types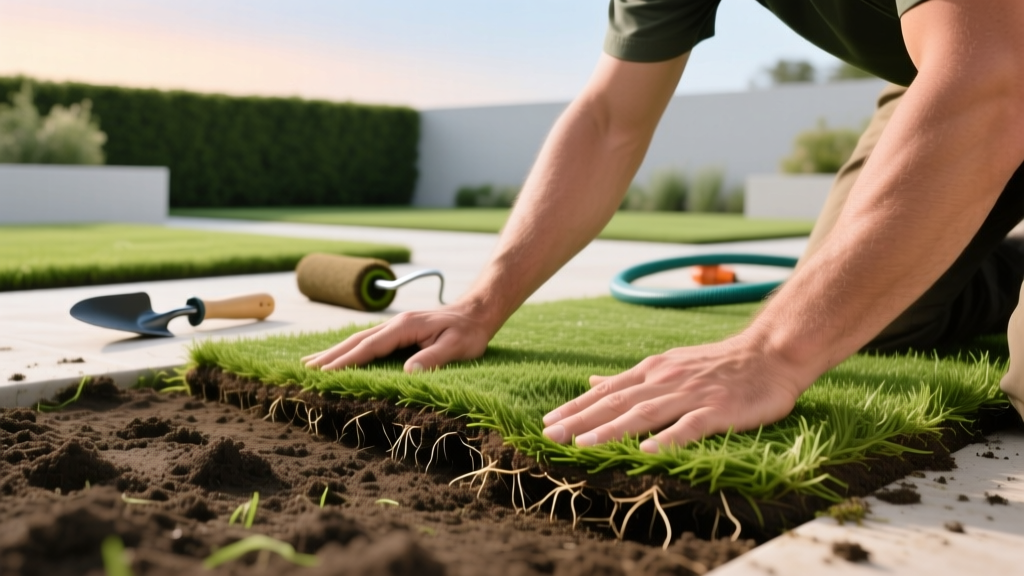
Putting in Sod: A Step-by-Step Rooting and Establishment Guide
The True Cost and Timeline of Putting in Sod
When homeowners consider putting in sod, the immediate appeal is an instant, lush lawn. However, the success of this investment hinges entirely on the first 14 days of establishment and the soil preparation that precedes it. Unlike seeding, which costs roughly $0.05 to $0.10 per square foot, sodding is a premium investment. Expect to pay between $0.35 and $0.85 per square foot for the turf itself, depending on the grass species and your region. For a standard 1,000-square-foot front yard, material costs alone will range from $350 to $850.
Beyond the turf, you must budget for soil amendments and tool rentals. A core aerator or rototiller rental typically costs $70 to $100 per day, while a water-filled lawn roller (essential for eliminating air pockets) rents for about $25 per day. Factoring in high-phosphorus starter fertilizer, compost, and topsoil, the total DIY cost for putting in sod usually lands between $600 and $1,200 per 1,000 square feet. The physical installation takes one to two days for a 1,000-square-foot area with a two-person crew, but the rooting establishment phase requires strict daily monitoring for two to four weeks.
Phase 1: Subgrade Preparation (The Make-or-Break Step)
The most common reason new sod fails to root is poor subgrade preparation. Sod roots will not penetrate compacted clay or existing dead grass. According to turfgrass specialists at the University of Minnesota Extension, the soil bed must be cultivated to a depth of 4 to 6 inches to ensure adequate root penetration and drainage.
Soil Testing and Amendment Protocol
Before tilling, conduct a soil test to determine your pH and nutrient deficiencies. Ideal turfgrass pH sits between 6.0 and 7.0. If your soil is highly acidic (below 6.0), apply pelletized limestone at the rate specified by your test results. If it is alkaline (above 7.5), incorporate elemental sulfur.
- Tilling: Use a rear-tine rototiller to break up the top 6 inches of soil. Remove all rocks larger than a golf ball, debris, and existing weed roots.
- Organic Matter: Spread a 1-to-2-inch layer of screened compost over the tilled area and mix it into the top 4 inches. This improves the Cation Exchange Capacity (CEC) of sandy soils and breaks up heavy clay.
- Grading: Rake the surface smooth, ensuring a 1% to 2% slope away from your home's foundation to prevent water pooling.
- Starter Fertilizer: Apply a high-phosphorus starter fertilizer (such as a 10-18-10 N-P-K ratio) at a rate of 1 pound of nitrogen per 1,000 square feet. Phosphorus is critical for stimulating rapid root development in new sod.
Phase 2: Laying the Turf in a Staggered Brick Pattern
Sod must be installed within 24 to 48 hours of delivery. If left on the pallet in direct sunlight, the center of the rolls will begin to compost and yellow due to trapped heat and lack of oxygen. Always start laying sod along the longest straight edge, such as a driveway, sidewalk, or property line.
Installation Steps for Optimal Seam Integration
- Butt the Seams Tightly: Push the edges of the sod rolls firmly against each other. Do not overlap them, and do not leave gaps. Overlapping causes uneven mowing later, while gaps lead to severe shrinkage and weed invasion.
- Stagger the Joints: Lay the sod in a staggered brick pattern. This ensures that the end joints of one row do not align with the next, which prevents water from channeling through the seams and washing away the subgrade soil.
- Use a Sod Knife for Curves: When fitting sod around garden beds or trees, use a sharp, serrated sod knife or a heavy-duty utility knife to cut the pieces. Avoid pulling or stretching the turf to make it fit, as this creates tension that will cause the sod to shrink back once it dries.
- Roll the Lawn: Once a section is laid, use a 150- to 200-pound water-filled lawn roller to press the sod firmly into the soil. This step is non-negotiable; it eliminates air pockets beneath the turf that would otherwise cause the roots to dry out and die.
Phase 3: The 14-Day Rooting Water Matrix
Watering is the most critical variable when putting in sod. The goal is to keep the soil beneath the sod consistently moist without drowning the roots, which invites Pythium blight and root rot. The Clemson University Home and Garden Information Center emphasizes that new sod requires frequent, light waterings initially, transitioning to deeper, less frequent waterings as roots establish.
| Timeframe | Watering Frequency | Duration per Zone | Objective |
|---|---|---|---|
| Day 1 (Installation) | Immediately after laying | Until runoff begins (approx. 1 inch) | Settle soil, hydrate root zone |
| Days 2 to 9 | 2 to 3 times daily | 10 to 15 minutes per cycle | Keep top 2 inches of soil moist |
| Days 10 to 14 | 1 time daily | 20 to 30 minutes per cycle | Encourage deeper root penetration |
| Weeks 3 to 4 | Every 2 to 3 days | 45 to 60 minutes per cycle | Transition to standard deep watering |
Warning: If the edges of the sod rolls begin to turn brown or curl upward during the first week, you are underwatering. Increase the duration of your midday watering cycle immediately. Conversely, if the sod feels spongy or smells sour, you are overwatering; scale back to allow the soil to breathe.
Troubleshooting Common Sod Failure Modes
Even with meticulous preparation, environmental factors and execution errors can cause establishment issues. Recognizing these failure modes early allows for course correction before the turf dies.
1. Shrinkage Gaps at the Seams
Cause: This occurs when sod is stretched during installation or when the soil beneath dries out too quickly, causing the turf to contract. It is also common if the sod was left on the pallet too long and lost moisture before laying.
Fix: If gaps are smaller than half an inch, they will typically close as the grass tillers and spreads laterally. For gaps larger than an inch, fill them with a mixture of topsoil and grass seed to prevent weeds from taking over the bare dirt.
2. Air Pockets and Root Desiccation
Cause: Failing to roll the sod after installation leaves voids between the sod roots and the subgrade soil. Roots growing into these air pockets will desiccate and die, creating localized brown, dead patches that pull up easily.
Fix: Lift the affected piece of sod, add a thin layer of fine topsoil to fill the void, replace the sod, and press it down firmly with your foot or a hand tamper. Water immediately.
3. Yellowing in the Center of Pallets
Cause: 'Pallet burn' happens when sod sits stacked for more than 24 hours. The grass in the center of the rolls undergoes anaerobic respiration, generating heat and turning yellow or black.
Fix: Lay the sod immediately upon delivery. If pallet burn has already occurred, the yellow grass will usually recover and turn green within 10 to 14 days once exposed to sunlight and water, provided the crown of the plant is still firm and white. If the crown is mushy, the sod is dead and must be replaced.
Frequently Asked Questions
When can I mow new sod for the first time?
Wait until the sod has firmly rooted into the soil, which typically takes 10 to 14 days. Perform the 'tug test': grasp a handful of grass and pull gently. If it resists and feels anchored, it is ready to mow. Set your mower deck to the highest setting (usually 3 to 3.5 inches) for the first cut, and never remove more than one-third of the grass blade height at a single time. Ensure your mower blades are freshly sharpened to avoid tearing the tender new grass.
How long should I stay off the new lawn?
Minimize foot traffic for at least three weeks. Heavy walking or pet traffic on unrooted sod can shift the pieces, break the fragile new root hairs, and compact the wet soil beneath. If you must walk on it to adjust sprinkler heads, wear flat-soled shoes and step lightly.
Can I put in sod over an existing weedy lawn?
No. Laying sod directly over existing vegetation will result in uneven settling, poor root-to-soil contact, and aggressive weeds eventually pushing through the new turf. You must kill the existing vegetation with a non-selective herbicide like glyphosate, wait 7 to 10 days for it to die, and then scalp and rototill the area before putting in sod.

