
Grass Types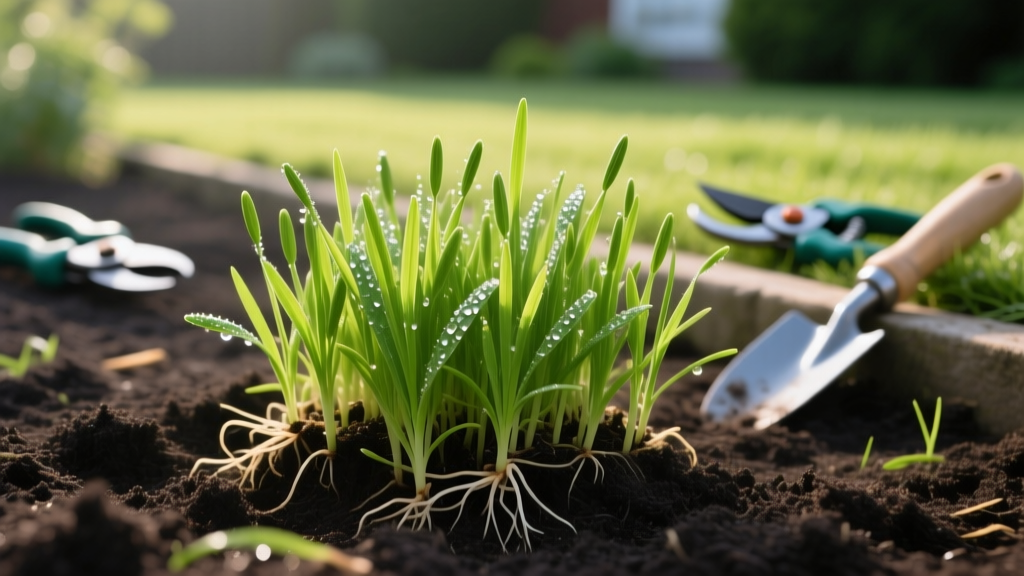
Ryegrass Seedling Care: The Critical 30-Day Establishment Guide
Establishing a new lawn or overseeding an existing one with ryegrass (*Lolium perenne* or *Lolium multiflorum*) is a race against time, weather, and weeds. While ryegrass is famous for its rapid germination—often sprouting within 5 to 10 days—the ryegrass seedling stage (the first 30 days post-germination) is where 80% of establishment failures occur. During this window, the plant transitions from relying on the seed's endosperm for energy to developing a complex, self-sustaining fibrous root system.
This guide provides a precise, day-by-day framework for nurturing your ryegrass seedlings through their most vulnerable growth phase, ensuring deep root establishment and high turf density.
Identifying a Healthy Ryegrass Seedling vs. Weeds
Before you can manage your turf, you must accurately identify it. In the first 7 to 14 days, it is common to mistake aggressive broadleaf weeds or annual grassy weeds like crabgrass for your newly sown ryegrass. Understanding the specific morphological traits of a ryegrass seedling prevents accidental herbicide application or improper mowing.
Key Morphological Traits
- The Coleoptile: The very first shoot to break the soil surface is the coleoptile, a protective sheath. In ryegrass, the base of the coleoptile often exhibits a distinct reddish-purple pigmentation before the first true leaf emerges.
- Folded Vernation: Unlike Kentucky bluegrass, which has rolled vernation (leaves emerge rolled like a tube), ryegrass leaves emerge folded. If you unroll the youngest leaf and it lays flat without a circular tube shape, it is likely ryegrass.
- Leaf Surface: The adaxial (upper) surface of a young ryegrass leaf is distinctly ribbed and glossy, while the abaxial (lower) surface is smooth and matte.
- Root Structure: A healthy 14-day ryegrass seedling will feature a dense, bright white fibrous root mass extending 1 to 2 inches into the soil profile, lacking the thick taproot seen in broadleaf weeds like dandelions.
Soil Temperature and Germination Triggers
Ryegrass is a cool-season grass, and its seedlings are highly sensitive to thermal stress. According to NC State Extension TurfFiles, the optimal soil temperature range for perennial ryegrass germination and early seedling growth is between 50°F and 65°F (10°C to 18°C).
If soil temperatures exceed 75°F during the seedling stage, the young plants will experience severe metabolic stress, leading to shallow rooting and increased susceptibility to heat-induced desiccation. Conversely, soil temperatures below 45°F will stall cellular division, leaving the seedling dormant and vulnerable to seed rot pathogens. Always use a soil probe thermometer at a 2-inch depth rather than relying on ambient air temperature readings.
The 30-Day Ryegrass Seedling Watering Matrix
Water management is the single most critical variable in ryegrass seedling survival. The goal is to keep the top 1/2 inch of soil consistently moist without creating anaerobic, waterlogged conditions that invite disease. The watering schedule must evolve as the root system deepens.
| Days Post-Germination | Watering Frequency | Duration per Zone | Soil Moisture Target | Root Development Stage |
|---|---|---|---|---|
| Days 1 - 10 | 3 to 4 times daily | 5 to 8 minutes | Top 1/4 inch constantly moist | Radicle emergence and coleoptile growth |
| Days 11 - 20 | 2 times daily | 10 to 12 minutes | Top 1/2 inch moist, slight surface drying | First true leaves and secondary root initiation |
| Days 21 - 30 | 1 time daily | 15 to 20 minutes | Top 1 inch moist, deeper percolation | Active tillering and deep fibrous root expansion |
| Days 31 - 45 | Every 2 to 3 days | 30 to 40 minutes | Deep soil wetting to 3-4 inches | Maturation and transition to standard turf care |
Pro Tip: If you are establishing ryegrass in heavy clay soil, reduce the duration per cycle by 30% and add an extra cycle to prevent surface runoff. Clay soils have a slow infiltration rate, and pooling water will drown the shallow seedling roots.
Fertilization Strategy for Young Roots
Ryegrass seedlings exhaust the energy reserves stored in the seed endosperm approximately 14 to 21 days after germination. At this critical juncture, they must transition to absorbing nutrients from the soil. A lack of available nitrogen and phosphorus during this window results in stunted, pale-green seedlings that fail to tiller.
The Starter Fertilizer Application
Apply a high-phosphorus starter fertilizer (e.g., an N-P-K ratio of 18-24-12 or 10-18-10) on the day of seeding or immediately after germination. Phosphorus is immobile in the soil and is strictly required for early ATP (energy) production and root cell division. Apply at a rate that delivers 0.5 to 1.0 lbs of actual Nitrogen per 1,000 square feet.
The 30-Day Follow-Up
Around day 30, once the seedlings have been mowed at least twice, transition to a balanced or nitrogen-heavy fertilizer (such as 24-0-6 or 29-0-4) to fuel rapid vertical growth and canopy density. Apply at 0.75 lbs of Nitrogen per 1,000 square feet.
Warning: Nitrogen Burn Risk
Never apply quick-release synthetic nitrogen (like uncoated urea) to ryegrass seedlings younger than 21 days. The high salt index of quick-release nitrogen will draw moisture out of the tender seedling tissues via osmosis, causing irreversible 'fertilizer burn' characterized by crisp, brown leaf tips. Use methylene urea or sulfur-coated urea for slow, safe nutrient release.
Never apply quick-release synthetic nitrogen (like uncoated urea) to ryegrass seedlings younger than 21 days. The high salt index of quick-release nitrogen will draw moisture out of the tender seedling tissues via osmosis, causing irreversible 'fertilizer burn' characterized by crisp, brown leaf tips. Use methylene urea or sulfur-coated urea for slow, safe nutrient release.
Troubleshooting Common Seedling Failures
Even with perfect seeding techniques, environmental variables can trigger establishment issues. Use this diagnostic framework to identify and correct problems before they destroy the stand.
Symptom: Seedlings Collapse with Dark, Water-Soaked Stems
Cause: Pythium damping-off. This soil-borne oomycete thrives in warm, wet conditions and attacks the tender tissue at the soil line, causing the seedling to pinch off and die.
Action Plan: Immediately reduce watering frequency and eliminate evening irrigation so the canopy dries before nightfall. If the outbreak is severe (affecting >10% of the area), apply a preventative fungicide containing the active ingredient Azoxystrobin (e.g., Heritage SC) or Mefenoxam at the labeled curative rate. The University of California IPM program emphasizes that improving soil drainage and avoiding over-seeding rates are the best long-term cultural controls.
Symptom: Seedlings are Pale Green or Yellowing Uniformly
Cause: Nitrogen deficiency or high soil pH locking out micronutrients (specifically iron).
Action Plan: Perform a soil pH test. If pH is above 7.2, iron becomes unavailable to the young roots. Apply a foliar spray of chelated iron (Fe-EDTA) at 2 oz per 1,000 sq ft to provide immediate greening, followed by a granular application of ammonium sulfate to gently lower the rhizosphere pH and supply nitrogen.
Symptom: Patches of Seedlings Easily Pull Out of the Soil
Cause: Frost heave, bird foraging, or cutworm damage.
Action Plan: Inspect the soil surface at dawn. If you see severed stems, treat with a targeted insecticide containing Bifenthrin. If the roots are intact but shallow, the soil likely underwent freeze-thaw cycles (frost heave). Gently roll the affected areas with a lightweight, water-filled lawn roller to re-establish seed-to-soil contact.
Mowing the First Cut: Timing and Blade Height
Mowing a ryegrass seedling too early will rip the immature root system directly out of the soil. The industry standard is to wait until the turf reaches 3.0 to 3.5 inches in height before executing the first mow.
The Tug Test
Before mowing, perform the 'tug test.' Grasp a handful of ryegrass seedlings and pull gently upward. If the seedlings snap or resist, the roots are anchored, and it is safe to mow. If the entire plant, roots included, pulls out of the ground, delay mowing for another 5 to 7 days and continue your watering schedule.
Blade Calibration and Technique
For the first cut, set your mower deck to remove no more than 1/3 of the leaf blade, bringing the height down to exactly 2.5 inches. Ensure your mower blade is freshly sharpened; a dull blade will tear the soft, un-lignified tissue of a young ryegrass seedling, leaving a frayed, white tip that serves as an entry point for *Dollar Spot* and *Leaf Spot* pathogens. Bag the clippings on the first two mows to prevent smothering any late-germinating seeds beneath the canopy.

