
Grass Types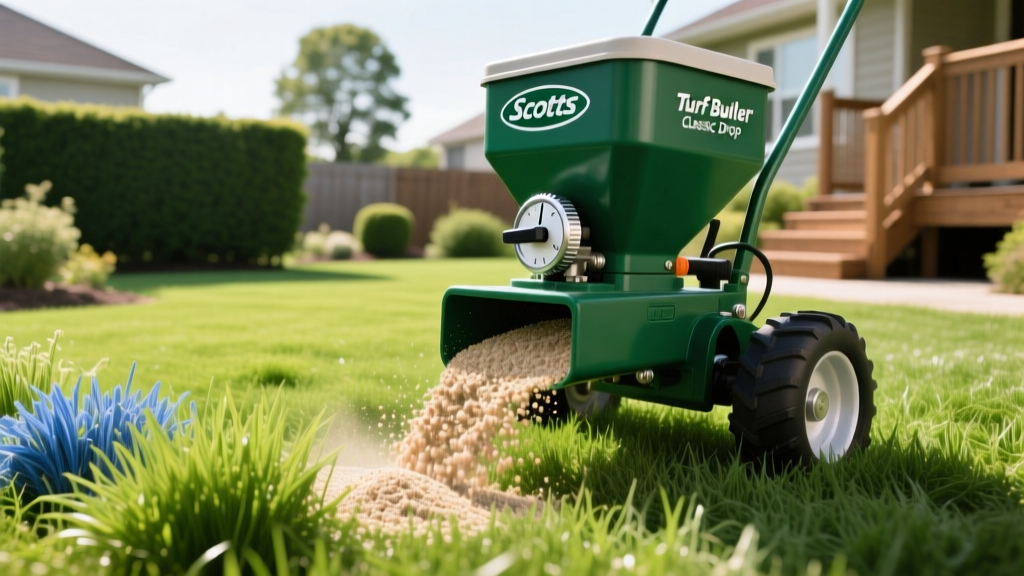
Scotts Turf Builder Classic Drop Spreader Calibration Guide
Why Precision Matters for Cool-Season Grass Establishment
Establishing cool-season grasses like Kentucky Bluegrass (KBG) and Fine Fescue requires meticulous nutrient delivery, particularly during the seeding phase. Starter fertilizers high in phosphorus (such as a 10-18-10 NPK ratio) are critical for early root development, but misapplication carries severe environmental and aesthetic consequences. Broadcast spreaders, while efficient for open spaces, routinely throw granular fertilizer onto adjacent hardscapes, driveways, and storm drains. According to the Environmental Protection Agency (EPA), nutrient runoff from residential lawns is a primary driver of localized waterway eutrophication. Many municipalities now strictly regulate or ban phosphorus applications near impermeable surfaces.
The Scotts Turf Builder Classic Drop Spreader solves this edge-case dilemma. By dropping granules directly downward in a precise 22-inch swath, it ensures that starter fertilizer and grass seed remain strictly within the turf boundary. However, this precision demands rigorous calibration. A miscalibrated drop spreader will result in severe striping, localized fertilizer burn, or patchy seed germination.
Critical Warning: Never use a drop spreader on sloped terrain exceeding a 15% grade. The granular product will pool on the lower side of the hopper, causing uneven distribution and severe striping on the downhill pass.
Scotts Turf Builder Classic Drop Spreader Specifications
Understanding the mechanical limitations and capabilities of your equipment is the first step toward professional-grade turf management. The Classic Drop Spreader relies on an axle-driven gear system that turns an internal agitator bar, preventing granular bridging and ensuring a steady flow rate.
| Feature | Specification | Operational Impact |
|---|---|---|
| Spread Width | 22 Inches | Requires exact 2-inch overlap to prevent striping. |
| Hopper Capacity | 50 lbs (Approx. 5,000 sq ft) | Reduces refill frequency on medium-sized urban lots. |
| Rate Dial Settings | 5 Positions (1 through 5) | Coarse adjustments; requires walking speed consistency. |
| Tire Type | 10-inch Pneumatic | Maintains gear ratio stability over uneven soil. |
| Agitator Mechanism | Helical Gear-Driven Bar | Prevents clumping of hygroscopic fertilizers. |
Step-by-Step Calibration for Starter Fertilizer
Relying solely on the manufacturer's bag settings is a common failure point. Bag settings assume a perfectly flat surface and a walking speed of exactly 3.0 miles per hour. Humidity, granule size variations, and individual walking paces necessitate a physical calibration test. The Scotts official spreader guidelines recommend the 100-square-foot test method for precise tuning.
The 100-Square-Foot Calibration Protocol
- Measure the Test Zone: Mark off a 10-foot by 10-foot (100 sq ft) area on a clean, dry driveway or tarp. Do not test on existing grass, as visual assessment of granule density is highly unreliable.
- Weigh the Product: Fill the hopper with your specific starter fertilizer. Weigh the entire spreader on a digital scale, or weigh a separate bucket of product before and after the test run.
- Set the Dial: Start with the manufacturer's recommended setting for your specific product (usually between 3 and 4 for standard granular fertilizers).
- Execute the Pass: Engage the control lever and walk at your normal, comfortable application pace across the 10-foot line. Disengage the lever exactly at the end of the line.
- Calculate the Output: Collect and weigh the granules dropped on the tarp. Multiply this weight by 10 to determine your actual application rate per 1,000 square feet.
Adjusting for Walking Speed Variables
If your test yields 5.2 lbs per 1,000 sq ft, but your target is 4.0 lbs per 1,000 sq ft, you have two mechanical levers to pull: close the rate dial by one half-setting, or increase your walking speed by approximately 15%. Never alter both variables simultaneously, as this compounds the margin of error.
Seed vs. Fertilizer: Mechanical Adjustments
Applying grass seed through a drop spreader introduces a unique mechanical challenge. Kentucky Bluegrass seed is exceptionally small and lightweight, while Tall Fescue seed is larger and more oblong. The helical agitator bar inside the Scotts Classic Drop Spreader is designed primarily for dense, heavy fertilizer granules.
When dispensing KBG seed, the aggressive agitator can occasionally crack the seed coat if the hopper is entirely full and the granular weight is pressing down on the bottom layer. According to turfgrass establishment research from the University of Minnesota Extension, damaged seed coats drastically reduce germination viability and increase susceptibility to damping-off diseases. To mitigate this, keep the hopper only one-quarter full when dropping pure grass seed, and set the dial to a wider opening (typically setting 4 or 5) to allow the seed to flow freely without being crushed against the baffle plate.
Application Patterns: Avoiding the Striping Effect
The most frequent complaint regarding drop spreaders is the "striping" or "zebra" effect visible three weeks after fertilization. This occurs when the 22-inch drop swath is not properly overlapped, leaving 2-inch gaps of unfertilized soil between passes.
Pro Tip: The Wheel-Track Alignment Method
Align the left wheel of your current pass directly over the right wheel track of your previous pass. Because the wheels sit just inside the outer edge of the 22-inch drop zone, this physical alignment guarantees a perfect 2-inch overlap, ensuring uniform nitrogen delivery without double-applying the center of the swath.
Align the left wheel of your current pass directly over the right wheel track of your previous pass. Because the wheels sit just inside the outer edge of the 22-inch drop zone, this physical alignment guarantees a perfect 2-inch overlap, ensuring uniform nitrogen delivery without double-applying the center of the swath.
Troubleshooting Matrix: Common Failure Modes
Even with meticulous calibration, mechanical and environmental factors can disrupt application. Use this decision matrix to diagnose and resolve issues in the field.
| Symptom | Root Cause | Corrective Action |
|---|---|---|
| Product stops flowing mid-pass | Granular bridging or caked fertilizer blocking the baffle. | Tap the side of the hopper. Ensure fertilizer is stored in a climate-controlled, low-humidity environment. |
| Severe lawn burn in straight lines | Stopping while the control lever is still engaged. | Always disengage the lever before halting your walking momentum. Never start the spreader from a standstill. |
| Uneven distribution (left vs. right) | Tire pressure imbalance or bent axle. | Check pneumatic tire PSI. Ensure both tires are inflated equally to maintain a level hopper plane. |
| Agitator bar fails to spin | Stripped internal plastic gear or debris jam. | Remove the hopper, clear the axle housing of soil/granules, and replace the drive gear if teeth are worn. |
Post-Application Maintenance and Winterization
Fertilizer salts are highly corrosive to the metal components and linkages of the Scotts Turf Builder Classic Drop Spreader. Failing to clean the unit after application will result in a seized agitator bar and rusted baffle springs within a single season.
Immediately after emptying the hopper, use a stiff-bristled nylon brush to sweep out residual granules. Follow this with a low-pressure water rinse, specifically targeting the underside of the hopper and the axle housing. Crucially, you must dry the unit completely. Tip the spreader on its side in direct sunlight for two hours, or use a leaf blower to force air through the baffle openings. Once dry, apply a light coating of silicone-based lubricant to the control lever linkage and the axle bearings. Avoid petroleum-based greases like WD-40, as they attract dust and granular debris, creating a hardened paste that impedes the gear drive. Store the unit indoors, elevated off concrete floors, to prevent moisture wicking during the winter months.

