
Grass Types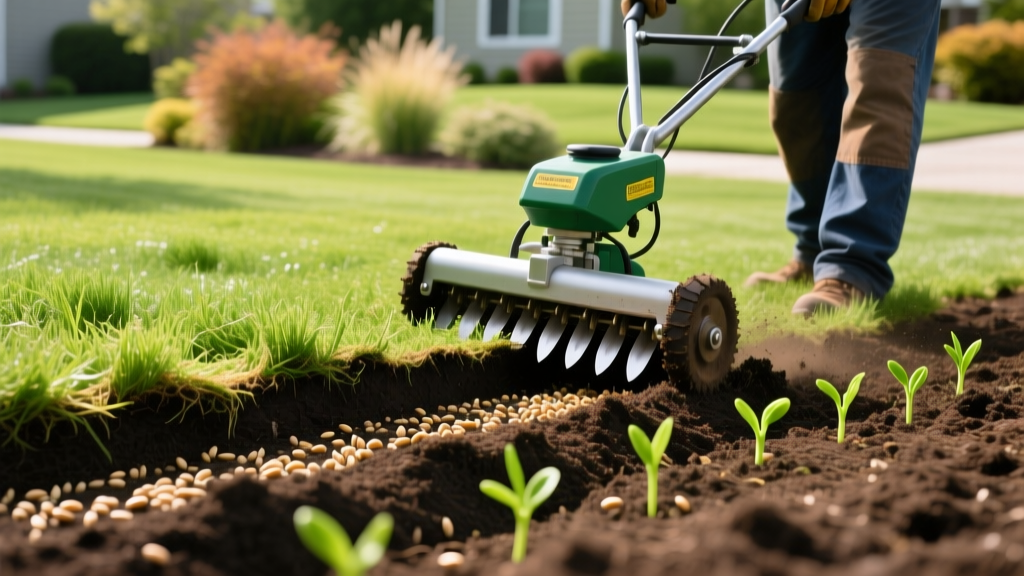
Slit Seeding for Lawn Renovation: Step-by-Step Establishment Guide
The Mechanics of Slit Seeding vs. Broadcast Overseeding
When a cool-season lawn thins out due to summer heat stress, disease, or heavy foot traffic, homeowners typically reach for a broadcast spreader to overseed. However, broadcast seeding yields a germination rate of only 30% to 40% because seeds remain exposed on the surface, vulnerable to wind, birds, and drying out. Slit seeding fundamentally changes this dynamic by achieving an 80% to 90% germination rate.
A walk-behind slit seeder (often referred to by the popular brand name Ryan Ren-O-Thin) features a series of rotating steel slicer blades that cut precise grooves into the soil. A seed hopper mounted above the blades drops seed directly down a tube into the freshly opened slit. This guarantees optimal seed-to-soil contact, protects the seed from environmental displacement, and creates a micro-environment that retains moisture. According to Penn State Extension, mechanical seeding methods like slit seeding are the most reliable way to introduce new turfgrass cultivars into an existing canopy without completely tearing up the sod.
Equipment Rental and Calibration Matrix
Renting a commercial-grade slit seeder from equipment yards like Sunbelt Rentals or United Rentals typically costs between $95 and $120 for a four-hour block in 2026. This is slightly more expensive than a standard core aerator, but it eliminates the need for a separate dethatching and seeding step. Proper calibration is the single most critical factor in your success.
| Calibration Setting | Target Measurement | Consequence of Error |
|---|---|---|
| Blade Depth | 1/8 to 1/4 inch | Deeper than 1/2 inch buries the seed, preventing emergence. Shallower than 1/8 inch leaves seed exposed on the surface. |
| Blade Spacing | 2 to 3 inches apart | Wider spacing leaves massive gaps of unseeded soil, resulting in a striped, uneven lawn appearance. |
| Seed Drop Rate | 5 to 8 lbs per 1,000 sq ft | Over-seeding causes intense seedling competition for nutrients; under-seeding fails to outcompete existing weeds. |
The 5-Step Execution Protocol
Timing is everything. For cool-season grasses like Tall Fescue, Kentucky Bluegrass, and Perennial Ryegrass, execute this protocol between late August and mid-September when soil temperatures hover between 60°F and 75°F.
Step 1: Aggressive Canopy Reduction
Mow your existing lawn down to 1.5 inches. This is significantly lower than your standard maintenance height. Bag the clippings to remove the thatch layer and expose the soil surface. If your thatch layer exceeds 0.5 inches, you must run a dedicated dethatcher first; slit seeder blades will clog and bounce off thick thatch mats.
Step 2: Soil Moisture Check
The soil must be moist but not saturated. If the ground is muddy, the slicer blades will smear the sides of the slit, creating a waterproof clay barrier that prevents water from reaching the seed. Water the lawn lightly two days before your planned seeding date to achieve a friable, crumbly soil texture.
Step 3: The Crisscross Passes
Run the slit seeder in a North-South pattern, overlapping each pass by about two inches to ensure no strips of bare soil are missed. Once the first pass is complete, refill the hopper and make a second pass in an East-West direction. This diagonal crisscross pattern ensures uniform distribution and eliminates the 'row' effect that happens with single-direction seeding.
Step 4: Dragging and Rolling
After both passes are complete, use a piece of chain-link fence or a heavy drag mat to pull across the lawn. This knocks soil back into the slits, covering the seed. Follow up with a hollow lawn roller filled halfway with water to press the soil firmly against the seed.
Step 5: Starter Fertilizer Application
Apply a high-phosphorus starter fertilizer (e.g., a 10-18-10 NPK ratio) immediately after seeding. Phosphorus is critical for rapid root development in newly germinated seedlings. Do not use standard weed-and-feed products, as the herbicides will kill your new grass.
Cultivar Selection and Seeding Rates
Slit seeding requires different application rates than broadcast seeding because the germination efficiency is so much higher. Using standard broadcast rates in a slit seeder will result in severe overcrowding.
- Tall Fescue: Apply 5 to 6 lbs per 1,000 sq ft. Look for modern endophyte-enhanced cultivars like Titan Ultra or Mustang IV, which offer superior brown patch resistance.
- Kentucky Bluegrass: Apply 1.5 to 2 lbs per 1,000 sq ft. KBG seed is much smaller and lighter; adjust the hopper gate to the lowest setting to prevent dumping the seed too quickly.
- Perennial Ryegrass: Apply 4 to 5 lbs per 1,000 sq ft. Ideal for quick erosion control and rapid germination (5-7 days) while slower grasses establish.
⚠️ Pre-Emergent Herbicide Warning
If you applied a pre-emergent crabgrass preventer (like Dimension/dithiopyr or Prodiamine) in the spring, you cannot slit seed in the fall. Pre-emergents create a chemical barrier in the top 1/2 inch of soil that stops all seeds from germinating, including your expensive turfgrass seed. You must wait at least 12 to 16 weeks after application, or until the chemical barrier has naturally broken down, before attempting slit seeding.
The 14-Day Germination Watering Schedule
The Michigan State University Extension emphasizes that the primary cause of slit seeding failure is improper irrigation during the first two weeks. The seed inside the slit must never dry out, but the soil must not become waterlogged.
- Days 1 to 10 (Pre-Germination): Water 3 to 4 times a day for 5 to 10 minutes per zone. The goal is to keep the top 1/4 inch of soil consistently damp. Use an automated timer to ensure midday watering occurs, especially on hot, windy days.
- Days 11 to 21 (Seedling Emergence): Once you see green fuzz across the lawn, reduce watering frequency to once a day, but increase the duration to 15 minutes. This encourages the new roots to stretch deeper into the soil profile.
- Day 22 and Beyond (Establishment): Transition to a standard deep-and-infrequent watering schedule (1 to 1.5 inches of water per week, split across two sessions).
Troubleshooting Common Failure Modes
Even with perfect technique, environmental variables can disrupt establishment. Use this diagnostic framework if your results fall short.
Symptom: Seeds Sprout, Then Turn Brown and Die
Cause: Damping-off disease (Pythium blight). This fungus thrives in hot, humid, and constantly wet environments. If you slit seed in late summer when nighttime temperatures remain above 70°F and humidity is high, the constant surface watering will trigger Pythium.
Fix: Apply a preventative fungicide containing Azoxystrobin or Propiconazole immediately after seeding if weather forecasts predict prolonged heat and humidity.
Symptom: Grass Grows in Perfectly Straight, Spaced Lines
Cause: Blade spacing was too wide, or the second crisscross pass was skipped. The seed only germinated where the blades physically cut the soil.
Fix: Wait 6 weeks for the initial grass to establish, then run a broadcast spreader over the lawn with half the normal seed rate to fill in the gaps between the rows.
Symptom: Bare Patches Where the Machine Turned
Cause: The operator stopped walking while the seeder was engaged. Slit seeders dump seed continuously when the lever is pulled. Stopping or turning sharply while engaged dumps a massive pile of seed into one spot, causing localized suffocation and nutrient burn.
Fix: Always disengage the seed drop lever before slowing down or turning at the end of a pass. Rake out the clumped seed and re-spread it manually.

