
Grass Types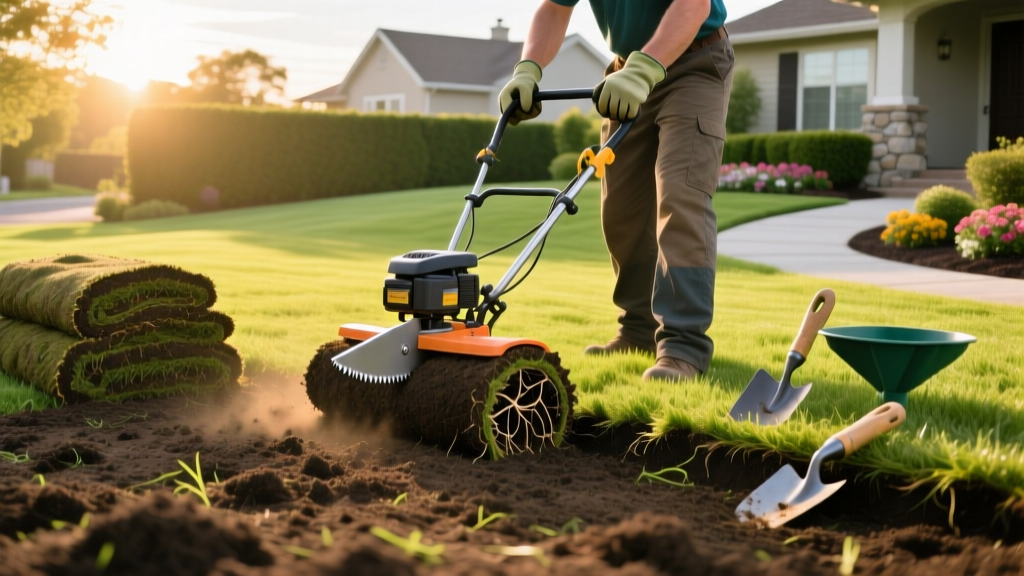
Using a Sod Cutter to Prepare Soil for Grass Seed Establishment
Establishing a new lawn from seed over an existing, failing turf requires complete removal of the old grass. While many homeowners default to renting a rototiller, professional turfgrass managers overwhelmingly rely on a sod cutter for lawn renovation. Tilling destroys soil structure, creates a fluffy seed bed that settles unevenly, and brings dormant weed seeds to the surface. A sod cutter, by contrast, slices horizontally beneath the thatch and root zone, removing the biological mat while leaving the underlying soil profile intact and ready for precise grading.
This guide details the exact equipment specifications, soil preparation techniques, and operational parameters required to use a sod cutter for grass seed establishment in 2026.
The Soil Profile Argument: Sod Cutter vs. Rototiller
When preparing a seed bed, the physical structure of the topsoil dictates germination success and long-term drainage. According to turfgrass extension specialists at the University of Nebraska-Lincoln, preserving the natural soil horizons is critical for preventing future compaction and water pooling.
| Parameter | Walk-Behind Sod Cutter | Front-Tine Rototiller |
|---|---|---|
| Weed Seed Bank Impact | Removes weed seeds contained in the top 2 inches of thatch/soil. | Inverts soil, bringing dormant crabgrass and Poa annua seeds to the surface. |
| Soil Structure | Leaves subsoil firm; prevents post-seeding sinking and puddling. | Pulverizes soil aggregates; creates a fluffy bed that compacts heavily after first rain. |
| Thatch Removal | 100% removal of hydrophobic thatch layers. | Mixes thatch into the soil profile, temporarily tying up soil nitrogen as it decays. |
| Grading Precision | Exposes a flat, uniform plane for laser-leveling or manual grading. | Leaves deep furrows and uneven clods that require extensive raking. |
| Average Rental Cost (2026) | $95 - $145 per day | $60 - $85 per day |
Equipment Selection and Blade Specifications
For residential lawn renovations under 10,000 square feet, a self-propelled walk-behind sod cutter is the standard. The two most common rental models are the Classen CP-18 and the Ryan Renovation Pro. Both utilize a vibrating, oscillating blade mechanism rather than a spinning reel, which reduces operator fatigue and provides a cleaner cut through dense rhizomatous grasses like Bermuda or Kentucky Bluegrass.
Critical Spec Check: Ensure the rental unit includes a 12-inch or 18-inch blade. An 18-inch blade cuts 50% more square footage per pass but requires significantly more upper body strength to maneuver on slopes. For lawns with tight gate access (under 36 inches), you must request a 12-inch blade or a mini-trencher attachment.
Understanding Shear Pins
The blade assembly is connected to the drive shaft via brass or steel shear pins. These are designed to snap if the blade strikes an immovable object (like a buried landscaping timber or large river rock), protecting the machine's transmission. Always purchase three spare shear pins from the rental desk before leaving the lot; they cost roughly $2 each and will save you a wasted rental day if one breaks in the field.
Step-by-Step Execution for Seed Bed Preparation
Operating a sod cutter requires specific soil moisture conditions. Attempting to cut dry, compacted clay will cause the blade to bounce, resulting in a jagged, uneven subgrade.
- Pre-Watering (24-48 Hours Prior): Apply 0.5 inches of water to the existing lawn two days before cutting. The goal is moist soil, not saturated mud. The blade needs moisture to glide through the root zone without tearing.
- Set the Blade Depth: Adjust the depth lever to 1.5 to 2.0 inches. You want to capture the thatch layer, the crown of the grass, and the top inch of soil where the majority of weed seeds reside. Cutting deeper than 2.5 inches unnecessarily removes valuable topsoil and drastically increases the weight of the sod rolls.
- Establish a Perimeter Pass: Use a motorized edger or a flat spade to cut a clean trench along all hardscapes, garden beds, and property lines. The sod cutter cannot flush-cut against concrete; leaving a 2-inch buffer prevents the machine's wheels from dropping off the edge and scalping the soil.
- Cut in Continuous Strips: Engage the blade and drive in straight, continuous lines. Overlap each pass by exactly 1 inch to ensure no thin strips of grass (windrows) are left behind.
- Roll and Remove: As the machine extrudes the cut turf, use a flat shovel to slice the strips into manageable 4-foot lengths. Roll them up and remove them from the site immediately to prevent the soil underneath from drying out and baking in the sun.
Post-Removal Soil Amendment and Grading
Once the biological mat is removed, you are left with bare, compacted subsoil. According to soil management guidelines from the University of Minnesota Extension, this exposed layer must be amended before broadcasting grass seed to ensure proper seed-to-soil contact and moisture retention.
The 1/4-Inch Compost Topdressing Rule
Do not attempt to deeply amend the soil with a tiller at this stage. Instead, apply a high-quality, screened yard-waste compost (particle size under 3/8 inch) at a rate that yields a 1/4-inch layer across the entire bare soil surface. This requires approximately 0.75 cubic yards of compost per 1,000 square feet. Rake the compost lightly into the top 1/2 inch of the exposed soil using a steel landscape rake. This provides the ideal micro-environment for seed germination while maintaining the firm subgrade created by the sod cutter.
Final Grading for Drainage
Use a heavy drag mat or a wide landscaping rake to establish a final grade that slopes away from the home's foundation at a minimum 2% grade (a 2-inch drop over 8 feet). Because the sod cutter left the soil firm, you can trust this grade; if you had tilled, the soil would settle by up to 30% after the first heavy rain, creating depressions that drown newly germinated seedlings.
Common Sod Cutting Mistakes That Ruin Seed Beds
- Cutting Too Deep: Setting the blade below 2.5 inches exposes nutrient-poor subsoil (often heavy clay) and makes the sod strips too heavy to lift, often tearing them and leaving chunks of soil behind.
- Ignoring Irrigation Heads: Failing to flag pop-up sprinkler heads before cutting will result in the steel blade shearing off the PVC risers. Always hand-cut within a 12-inch radius of all irrigation components.
- Leaving the Soil Exposed: If you cannot seed within 48 hours of cutting, you must lightly water the bare soil every evening. Exposed clay will sun-bake and form a hydrophobic crust that prevents grass seed roots from penetrating.
Warning on Buried Utilities: Even at a 2-inch cutting depth, a sod cutter blade can sever shallow-buried fiber optic lines, low-voltage landscape lighting wires, or dog fence cables. Always call 811 to have public utilities marked, and manually probe for private low-voltage lines using a trenching shovel before making your first pass.
Frequently Asked Questions
Can I use a sod cutter on highly rocky soil?
Sod cutters are designed for soil and roots, not rocks. If your lawn is heavily populated with river rock or buried construction debris, the blade will constantly trip the shear pins. In highly rocky scenarios, it is more efficient to scalp the lawn with a mower, apply a non-selective herbicide, wait 14 days, and heavily core-aerate before seeding, rather than attempting to mechanically remove the turf.
How soon can I seed after using a sod cutter?
You can seed immediately after the sod is removed, the soil is amended with a 1/4-inch compost layer, and the final grade is established. In fact, seeding the same day prevents weed seeds from blowing onto the bare, prepared seed bed. For detailed species selection, consult regional turfgrass data from Michigan State University Turfgrass to match your cultivar to the newly exposed soil type.
Do I need to dispose of the old sod?
The removed sod strips are highly valuable. You can stack them in a secluded corner of your property, cover them with a dark tarp, and let them decompose for 6 to 8 months to create premium loam. Alternatively, many local landscaping supply yards will accept clean, soil-heavy sod strips for free to use in their commercial composting operations.

