
Grass Types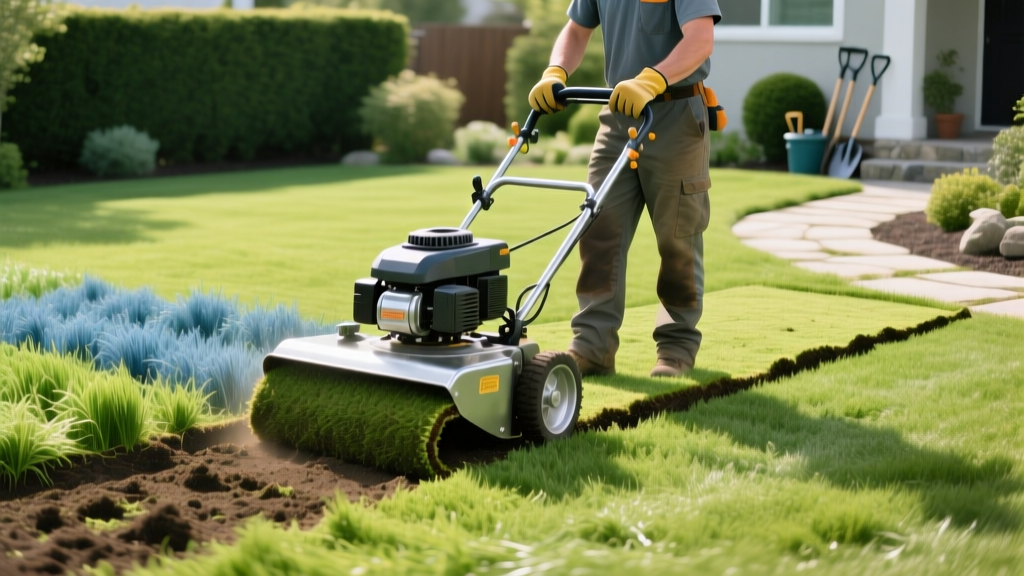
How to Rent and Use a Sod Cutter Machine for Lawn Reseeding
The Agronomic Case for Sod Cutting Over Tilling
When establishing a new lawn from seed, the most critical factor for high germination rates is pristine seed-to-soil contact. Many homeowners attempt to achieve this by rototilling their existing, failing lawn. This is a catastrophic mistake for seed establishment. Tilling old turf—especially lawns infested with creeping bentgrass, bermudagrass, or quackgrass—chops the rhizomes and stolons into thousands of viable pieces, guaranteeing a massive weed outbreak that will choke out your new cool-season grass seedlings. Furthermore, tilling mixes thatch into the soil profile, creating hydrophobic pockets that desiccate delicate new roots.
Using a sod cutter machine solves this problem entirely. By slicing horizontally beneath the root zone, a sod cutter extracts the entire weed seed bank, thatch layer, and rhizome mat in intact, manageable rolls. What remains is a clean slate of bare mineral subsoil—the absolute ideal seedbed for premium tall fescue or Kentucky bluegrass cultivars. According to turfgrass researchers at the University of Minnesota Extension, complete removal of the existing turf canopy prior to seeding significantly reduces post-germination weed competition and improves long-term turf density.
Selecting and Sourcing the Right Equipment
For residential lawn renovations ranging from 1,000 to 5,000 square feet, a self-propelled, walk-behind sod cutter is the standard choice. In 2026, daily rental rates for these machines typically range from $95 to $140, depending on your region and the equipment dealer.
Top Rental Models to Request
- Billy Goat SC182H: Features an 18-inch cutting width and a Honda GX390 engine. The 18-inch blade is the sweet spot for residential gates and backyard access, while the Honda engine provides the low-end torque required to shear through compacted clay without stalling.
- Classen SC-18: Known for its heavy-duty, notched blade design which excels at gripping and cutting through dense, matted thatch layers that flat blades tend to glide over.
- Ryan SC-12: A 12-inch model ideal for tight side yards or narrow pathways where an 18-inch deck cannot maneuver.
Step-by-Step Operation and Depth Calibration
Operating a sod cutter machine requires precise calibration. If set too shallow, the blade will ride the thatch and tear the grass. If set too deep, the machine will dig into the subsoil, creating massive resistance and potentially snapping the drive belt.
Step 1: The 48-Hour Hydration Rule
Never attempt to cut dry soil. Dry clay and compacted loam will cause the blade to chatter, bounce, and tear the turf into unmanageable chunks. Water the lawn deeply 48 hours before your scheduled rental. Your goal is to achieve 2 to 3 inches of soil moisture. The soil should feel like a wrung-out sponge—damp enough to hold together, but not so wet that it turns to mud and clogs the blade deck.
Step 2: Utility Clearance and Perimeter Trenching
Before starting the engine, call 811 to have underground utilities marked. Additionally, use a manual half-moon edger or a flat spade to trench a 2-inch deep perimeter around the entire cutting area. This severs the lateral roots connecting your lawn to adjacent garden beds or sidewalks, preventing the sod cutter from dragging and tearing neighboring landscaping.
Step 3: Depth Setting and Cutting Pattern
Set the blade depth lever to 1.5 inches for standard turf, or 2.0 inches if the lawn has a severe thatch buildup. Engage the blade clutch and lower the deck. Always cut in long, continuous passes parallel to the longest dimension of your yard. Overlap each pass by exactly 1 inch to ensure no thin strips of grass are left behind. Roll the extracted sod strips up immediately to keep your workspace clear and prevent tripping hazards.
CRITICAL WARNING: Never replace a broken shear pin with a Grade 5 or Grade 8 hardened steel bolt from a hardware store. Rental machines use soft Grade 2 steel pins designed to snap when the blade hits a buried rock or tree root. A hardened bolt will transfer the shock load directly into the transmission, destroying the $800 gearbox and leaving you liable for the repair.
Renovation Method Comparison Matrix
Understanding how sod cutting compares to other lawn prep methods helps justify the rental cost and physical labor involved.
| Method | Time Required (2,000 sq ft) | Estimated Cost | Weed Seed Bank Impact | Soil Structure Impact |
|---|---|---|---|---|
| Sod Cutter Machine | 3-4 Hours | $120 (Rental) | 100% Removed | Preserves Subsoil Horizons |
| Rototilling | 4-6 Hours | $75 (Rental) | Mixed & Multiplied | Destroys Soil Aggregates |
| Glyphosate Kill | 1 Hour (Plus 14 days wait) | $45 (Chemicals) | Left in Soil Profile | Leaves Dead Root Mass |
| Manual Spading | 15-20 Hours | $0 (Labor) | Partially Removed | Highly Disruptive |
Troubleshooting Common Field Failures
Even with proper preparation, you may encounter mechanical or environmental hurdles in the field.
- Belt Slippage and Squealing: If the drive belt squeals and the blade stops spinning while the engine revs, the belt is slipping due to moisture or debris. Turn off the engine, disconnect the spark plug wire, and clear any packed mud from the pulley grooves using a wire brush.
- Blade Chatter on Slopes: When cutting on an incline, gravity pulls the machine laterally, causing the blade to skip. Always cut up and down the slope, never across it. If the slope exceeds a 15-degree grade, switch to a manual flat spade to avoid rollover injuries.
- Hitting Buried Irrigation Lines: If the blade snags on PVC or polyethylene irrigation pipes, stop immediately. Do not attempt to force the machine forward. Back the machine up, manually excavate the pipe with a hand trowel, and lower the blade depth by 0.5 inches to pass safely underneath.
Transitioning to Seed Establishment
Once the old turf is removed, you are left with bare, highly compacted subsoil. Grass seed will not germinate effectively on hardpan clay. To prepare the seedbed, rent a power rake (dethatcher) and set the tines to scarify the top 0.5 inches of the exposed soil. This creates thousands of micro-grooves for the seed to fall into, protecting them from wind and birds while ensuring direct mineral contact.
Following scarification, apply a high-phosphorus starter fertilizer, such as a 18-24-12 NPK blend, to promote rapid root development. The Environmental Protection Agency recommends testing your soil pH before seeding; aim for a pH between 6.2 and 6.8 for optimal nutrient uptake in cool-season grasses. Broadcast your seed at the manufacturer's recommended overseeding rate (typically 6-8 lbs per 1,000 sq ft for tall fescue), and lightly drag a piece of chain-link fence over the area to cover the seed with 1/4 inch of soil. Keep the top inch of soil continuously moist for the next 14 to 21 days until germination is complete.
Frequently Asked Questions
Can I reuse the sod I cut out?
Yes, if kept moist and rolled up in the shade, you can transplant the sod to another area of your property or give it away to neighbors. However, if the sod was removed due to severe disease or heavy weed infestation, it should be composted or discarded.
How heavy is a walk-behind sod cutter machine?
Most 18-inch rental models weigh between 250 and 300 pounds. You will need a truck or a trailer to transport it, and at least two people to safely load and unload it using heavy-duty steel ramps.
Do I need to remove the sod before laying new sod instead of seed?
Absolutely. Laying new sod directly on top of old, dead grass creates a hydrophobic barrier. The new sod's roots will fail to penetrate the old thatch layer, leading to shallow rooting and severe drought stress within the first summer.

