
Grass Types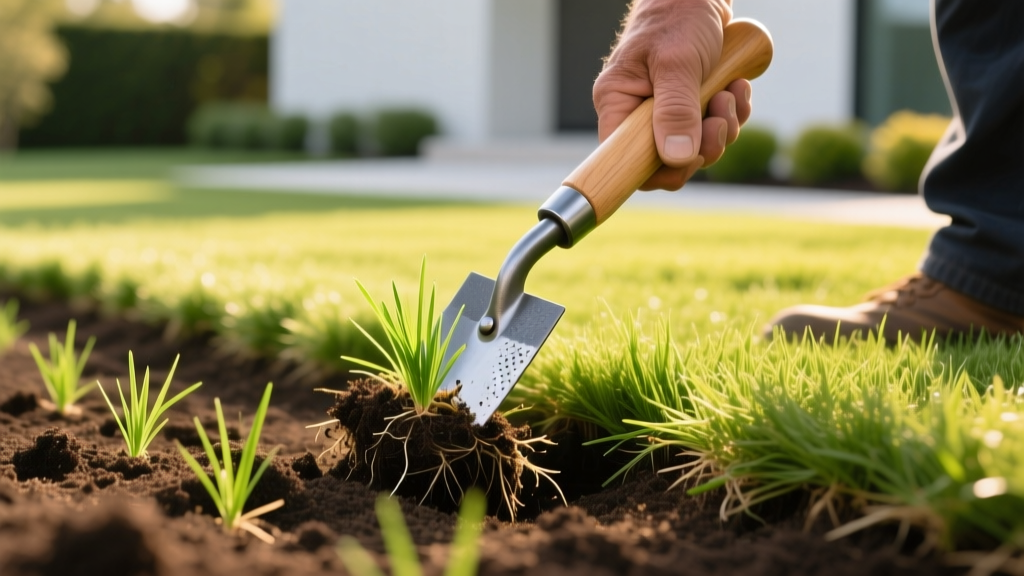
How to Use a Sod Plugger Tool for Warm-Season Grass Establishment
Vegetative propagation is mandatory for establishing sterile warm-season turfgrass cultivars like Tifway 419 Bermuda, Meyer Zoysia, and Palmetto St. Augustine. Because these grasses do not produce viable seed, homeowners and turf managers must rely on sod, sprigs, or plugs. A heavy-duty sod plugger tool bridges the gap between the high cost of full sod and the slow, unreliable nature of sprigging, allowing you to extract and plant 2-to-3-inch cylindrical cores of established turf directly into your prepared soil bed.
According to turfgrass specialists at NC State University TurfFiles, proper plug spacing and soil-to-root contact are the primary determinants of establishment speed. This guide details the exact mechanics, spacing matrices, and soil preparation protocols required to successfully establish a warm-season lawn using a manual coring plugger.
The Economics of Plugging vs. Seeding vs. Full Sod
Before deploying a sod plugger tool, it is critical to understand where plugging fits into the broader establishment spectrum. While cool-season grasses can be seeded cheaply, warm-season establishment requires a different financial and labor calculus.
| Establishment Method | Cost per 1,000 sq ft (Approx.) | Time to Full Coverage | Labor Intensity |
|---|---|---|---|
| Full Sod (Rolls) | $350 - $600 | Instant (2-3 weeks to root) | High (Heavy lifting, rapid install) |
| Sod Plugs (via Plugger) | $80 - $180 | 8 - 16 weeks | Moderate (Repetitive coring) |
| Sprigging | $40 - $90 | 12 - 24 weeks | High (Trenching, stolon planting) |
Plugging reduces material costs by 60% to 75% compared to full sod, making it the optimal choice for budget-conscious homeowners who still want the genetic certainty of a named vegetative cultivar.
Selecting the Right Sod Plugger Tool
Not all coring tools are engineered for the dense, fibrous root matrices of warm-season grasses. Using a flimsy bulb planter will result in bent shafts and incomplete soil cores. You need a tool specifically rated for turf extraction.
Step-On Coring Pluggers vs. Handheld Extractors
Step-On Pluggers (e.g., Yard Butler STEP-1, ~$48): These feature a 30-inch steel shaft, a T-bar handle, and a perpendicular foot peg. The user steps on the peg to drive the 3-inch cylinder into the soil, then uses a manual push-rod to eject the plug. Ideal for breaking through compacted clay and dense thatch layers.
Spring-Loaded Extractors (e.g., Pro Plugger 5-IN-1, ~$55): These utilize a slightly narrower 2.25-inch cylinder with an internal spring mechanism that automatically ejects the soil core when the tool is lifted. Better for sandy loam soils and users with lower back mobility issues, but prone to jamming in heavy clay.
Clay Soil Friction Warning: If your soil contains more than 35% clay, the fibrous rhizomes of Zoysia and Bermuda will bind tightly to the inside of the steel cylinder. To prevent jamming, keep a bucket of water mixed with two tablespoons of dish soap nearby. Dip the plugger cylinder into the soapy water every 5 to 10 cores to lubricate the extraction chamber.
Step-by-Step Establishment Protocol
Successful plug establishment relies on minimizing transplant shock and maximizing stolon-to-soil contact. Follow this precise sequence.
- Moisture Calibration (24 Hours Prior): Apply exactly 1 inch of water to the planting zone 24 hours before coring. The soil must be moist enough to hold a cylindrical shape but dry enough that it does not turn to mud inside the plugger tool. Target a soil moisture tension of roughly 30 to 50 centibars.
- Grid Marking: Use a string line and marking paint to lay out your planting grid. Staggering the rows in a diamond pattern (rather than a square grid) accelerates lateral fill by reducing the maximum distance between adjacent plugs.
- Coring and Extraction: Drive the sod plugger tool straight down to a depth of 3 to 4 inches. Twist the handle 15 degrees to shear the deep taproots, then pull straight up. Eject the soil core into a wheelbarrow (this native soil can be repurposed for topdressing later).
- Plug Insertion: Take your pre-purchased tray of sod plugs. Using a trowel or the plugger tool itself (if it features a dual-purpose cutting edge), slice the 3-inch plug to match the depth of your hole. The crown of the plug must sit exactly flush with the surrounding soil grade. Planting too deep will smother the stolons; planting too high will desiccate the roots.
- Topdressing and Rolling: Fill any lateral gaps around the plug with a 50/50 mix of masonry sand and compost. Run a lightweight water-filled lawn roller (approx. 150 lbs) over the area to eliminate air pockets and ensure intimate root-to-soil contact.
Spacing Matrices for Warm-Season Cultivars
The distance between plugs dictates both your upfront material cost and the time required for the lawn to achieve 100% canopy closure. According to research from Texas A&M AgriLife Extension, aggressive stolons like Bermuda will fill gaps rapidly, while bunch-type Zoysias require tighter spacing.
| Grass Species | Common Cultivars | 6-Inch Spacing (High Density) | 12-Inch Spacing (Standard) | 18-Inch Spacing (Budget) |
|---|---|---|---|---|
| Hybrid Bermuda | Tifway 419, Celebration | 6 - 8 weeks | 10 - 12 weeks | 14 - 16 weeks |
| Zoysia (Fine/Medium) | Meyer, El Toro, Emerald | 10 - 12 weeks | 16 - 20 weeks | Not Recommended |
| St. Augustine | Palmetto, Floratam | 8 - 10 weeks | 12 - 14 weeks | 18 - 22 weeks |
| Centipedegrass | TifBlair, Common | 10 - 12 weeks | 14 - 18 weeks | 20+ weeks |
Note: Timelines assume optimal summer temperatures (80°F - 95°F daytime), adequate irrigation, and a rigorous fertilization schedule. Planting in early spring when soil temperatures are below 65°F will delay establishment by 4 to 6 weeks.
Troubleshooting Tool Failure Modes
Even high-end sod plugger tools encounter mechanical and environmental resistance. Here is how to diagnose and resolve common field issues:
- Symptom: The soil core crumbles upon ejection instead of holding a cylinder.
Cause: Soil is too dry; sand content exceeds 70%.
Fix: Increase irrigation to 1.5 inches 48 hours prior to planting. Switch to a plugger with a narrower 2-inch diameter to increase the structural integrity of the sand-based core. - Symptom: The foot peg bends or welds crack after 50+ plugs.
Cause: Hitting subsurface caliche, shale, or compacted builder's clay.
Fix: Pre-aerate the lawn using a gas-powered core aerator before using the manual plugger. This fractures the hardpan layer, allowing the plugger to glide through the top 4 inches without requiring excessive downward force. - Symptom: Plugs shrink and pull away from the hole edges within 48 hours.
Cause: Peat-based plug trays dry out faster than native mineral soils, creating a hydrophobic effect.
Fix: Soak the plug trays in a shallow basin of water mixed with a non-ionic surfactant (like Aqua-Aid) for 20 minutes immediately before planting to ensure the root zone is fully saturated and hydrophilic.
Post-Planting Fertilization & Irrigation Schedule
The first 30 days post-planting are critical for stolon extension. The University of California Agriculture and Natural Resources turf management guidelines emphasize frequent, shallow watering to keep the plug crowns moist without waterlogging the subsoil.
Irrigation Protocol (Days 1-14): Water 3 times daily for 8-10 minutes per zone. The goal is to prevent the top 1 inch of soil from drying out.
Irrigation Protocol (Days 15-30): Reduce to once daily for 15 minutes, encouraging roots to chase moisture deeper into the soil profile.
Irrigation Protocol (Days 15-30): Reduce to once daily for 15 minutes, encouraging roots to chase moisture deeper into the soil profile.
Fertilization: Apply a starter fertilizer high in phosphorus (e.g., a 10-18-10 N-P-K ratio) at a rate of 0.5 lbs of Nitrogen per 1,000 sq ft on the day of planting. Phosphorus is immobile in the soil and is strictly required for rapid root hair development in transplanted vegetative cores. Follow up with a balanced 20-0-10 slow-release granular fertilizer at week 4 to fuel lateral stolon growth across the bare soil gaps.
Frequently Asked Questions
Can I use a sod plugger tool to extract plugs from my existing lawn to patch bare spots?
Yes. A 3-inch step-on plugger is the most effective tool for harvesting "donor plugs" from an established, healthy area of your lawn. Ensure the donor area is heavily fertilized two weeks prior to harvesting to stimulate rapid recovery of the extraction holes.
How do I clean and maintain the plugger tool to prevent rust?
Warm-season grasses exude mildly acidic sap from their cut rhizomes, which accelerates oxidation on carbon steel. After every use, wire-brush the interior cylinder, wipe it down with a rag soaked in WD-40 or a silicone-based lubricant, and store it indoors. Never leave the tool exposed to morning dew or rain.

