
Grass Types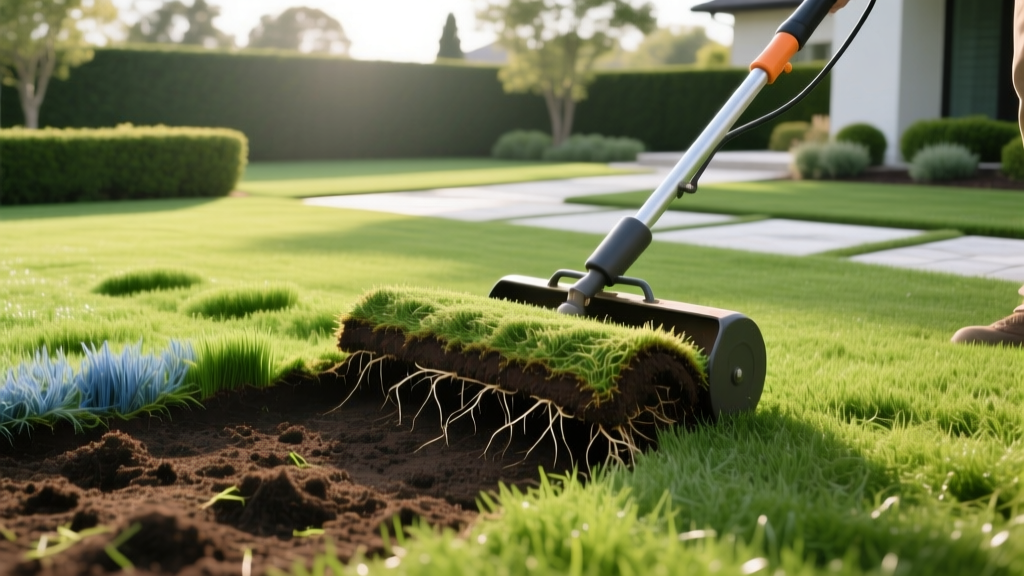
How to Use a Sod Remover for Perfect Seedbed Prep
Seeding directly over existing, failing, or weed-choked turf is a primary cause of lawn establishment failure. Grass seed requires direct, uninterrupted contact with loose soil to germinate, draw moisture, and anchor roots. When you broadcast seed over old sod, the thatch layer acts as a barrier, wicking moisture away from the seed and creating a microenvironment prone to fungal damping-off. Using a sod remover to strip the existing turf down to bare soil is the most reliable method to guarantee a high-germination seedbed.
Why Strip Existing Turf Before Seeding?
While core aeration and slit-seeding are viable for overseeding thin lawns, completely renovating a lawn or transitioning to a new grass species requires a blank slate. According to Penn State Extension, proper seedbed preparation is the single most critical factor in long-term turfgrass survival. Removing the old sod eliminates competing weed seeds, eradicates existing thatch, and exposes the mineral soil necessary for delicate new root hairs to penetrate.
This is especially critical when establishing rhizomatous grasses like Kentucky Bluegrass, which rely on shallow lateral root spread, or when planting fine fescues that are highly sensitive to soil compaction and thatch interference.
Manual vs. Motorized Sod Removers: Which Do You Need?
The term 'sod remover' encompasses both manual hand tools and heavy motorized machinery. Your choice depends entirely on the square footage of your renovation area and the depth of the existing root system.
| Feature | Manual Sod Kicker (Kick-Plow) | Motorized Walk-Behind Sod Cutter |
|---|---|---|
| Best For | Patch repairs, edges, areas under 500 sq ft | Full lawn renovations, areas over 1,000 sq ft |
| Cut Depth | Fixed or manually adjustable (1-3 inches) | Micro-adjustable lever (0.5 to 3 inches) |
| Physical Effort | Extreme (requires forceful kicking) | Low (self-propelled, walk-behind) |
| Cost (2026) | $45 - $85 (Purchase) | $115 - $145 (4-hour Rental) |
| Soil Disruption | High (tends to chunk and tear) | Low (slices clean, uniform ribbons) |
The Manual Sod Kicker
A manual sod kicker features a horizontal, sharpened blade attached to a long shaft with a kicking pad at the rear. You drive it forward by striking the pad with your foot. While inexpensive, it is highly inefficient for large areas. The blade tends to dive or rise depending on soil density, resulting in uneven soil removal. If you are only removing a 200-square-foot patch of invasive creeping bentgrass to seed with Tall Fescue, a manual kicker is sufficient.
The Walk-Behind Sod Cutter
For full-yard renovations, a motorized sod cutter (commonly rented from equipment centers under brands like Ryan or Billy Goat) is mandatory. These machines use a heavy, vibrating horizontal blade that slices cleanly beneath the root zone. The vibration reduces soil friction, allowing the machine to glide forward while leaving behind perfectly uniform rolls of turf and a flat, exposed subgrade.
Pro Tip: Moisture is the Secret to Clean Cuts
Never attempt to use a sod remover on bone-dry soil. The blade will snag, tear the turf, and stall the engine. Water the lawn deeply 48 hours before cutting. The soil should be moist to a depth of 3 inches, allowing the blade to slice through roots like butter. Conversely, do not cut immediately after a heavy rain; muddy soil will clump on the blade and ruin the machine's drive belt.
Never attempt to use a sod remover on bone-dry soil. The blade will snag, tear the turf, and stall the engine. Water the lawn deeply 48 hours before cutting. The soil should be moist to a depth of 3 inches, allowing the blade to slice through roots like butter. Conversely, do not cut immediately after a heavy rain; muddy soil will clump on the blade and ruin the machine's drive belt.
Step-by-Step: Operating a Motorized Sod Remover
Rental center staff rarely provide in-depth operational training. Follow these precise steps to protect your topsoil and ensure a level seedbed.
- Set the Blade Depth Conservatively: Start with the blade set to 1.5 inches. Your goal is to remove the grass and the immediate root mat, not to excavate your valuable topsoil. If the roots are deeper (common in older, drought-adapted lawns), drop the blade to 2 inches. Going deeper than 2.5 inches unnecessarily removes nutrient-rich topsoil and exposes compacted clay subsoil.
- Adjust the Blade Pitch: Most sod cutters allow you to tilt the blade angle. Set the front of the blade slightly lower than the rear (about a 2-degree downward pitch). This prevents the blade from riding up and out of the soil mid-pass.
- Make Your First Pass: Engage the blade and drive in a straight line. Do not turn the machine while the blade is engaged; you will tear a massive divot into the soil. Lift the blade, turn, lower it, and begin the next pass.
- Overlap Slightly: Overlap your previous cut by about 1 inch to ensure no thin strips of grass are left behind. Leftover strips will dry out and create uneven bumps in your final seedbed.
- Roll and Remove Immediately: As the machine cuts, it leaves long ribbons of sod. Roll these up and remove them from the site on the same day. If left on the bare soil for more than 48 hours, the exposed roots will re-knit into the earth, forcing you to cut the area a second time.
Breaking the Glaze: Post-Removal Seedbed Prep
This is the most overlooked step in the sod removal process. The heavy, vibrating steel blade of a motorized sod remover compresses the exposed soil, creating a hard, impermeable layer known as a 'glaze' or 'hardpan.' If you broadcast seed directly onto this glazed surface, water will pool, and the delicate radicle (first root) of the germinating seed will fail to penetrate the soil.
According to turfgrass establishment guidelines from the University of California IPM, breaking up compacted soil layers is essential for deep root anchoring. After removing the sod rolls, you must scarify the surface.
Scarification Techniques
- Power Raking / Dethatching: Run a power dethatcher over the bare soil with the blades set to barely scratch the surface (1/4 inch deep). This fractures the glaze without bringing dormant weed seeds up from the deep subsoil.
- Shallow Tilling: If the soil is heavily compacted clay, use a rear-tine tiller set to a maximum depth of 2 inches. Warning: Do not rototill deeply. Deep tilling destroys soil structure, creates air pockets that will settle unevenly later, and brings thousands of dormant weed seeds to the surface to compete with your new grass.
- Topdressing: After scarifying, spread a 1/4-inch layer of screened compost or topsoil over the bare ground. This provides a loose, organic-rich medium for the seed to rest in, dramatically improving moisture retention during the 14-to-21-day germination window.
Critical Mistakes That Ruin Germination
Warning: The Subsoil Trap
Homeowners frequently set the sod remover blade to 3 or 4 inches, believing they are 'getting all the roots.' In many regions, topsoil is only 3 to 4 inches deep. By cutting this deep, you strip away the organic topsoil entirely and leave behind sterile, compacted clay or rocky subsoil. Grass seed planted on raw subsoil will germinate but will stunt and die within the first summer heatwave due to a lack of nutrients and moisture retention. Always measure your topsoil depth with a probe before setting your blade.
Homeowners frequently set the sod remover blade to 3 or 4 inches, believing they are 'getting all the roots.' In many regions, topsoil is only 3 to 4 inches deep. By cutting this deep, you strip away the organic topsoil entirely and leave behind sterile, compacted clay or rocky subsoil. Grass seed planted on raw subsoil will germinate but will stunt and die within the first summer heatwave due to a lack of nutrients and moisture retention. Always measure your topsoil depth with a probe before setting your blade.
Another common error is failing to level the grade before seeding. A sod remover follows the exact contours of the existing lawn. If the old lawn had dips, puddles, or mounds, the bare soil will retain those exact same flaws. After breaking the glaze, use a heavy steel landscape rake to grade the soil, ensuring a 1% to 2% slope away from your home's foundation to prevent water intrusion.
For comprehensive soil testing and amendment rates prior to seeding, consult local resources such as the University of Minnesota Extension, which recommends conducting a soil test at least three weeks before operating any heavy machinery on the site. This allows you to incorporate necessary phosphorus and potassium amendments into the top inch of soil during the scarification phase, placing them exactly where the new seedling roots will first search for nutrition.
Frequently Asked Questions
Can I just rototill the old sod into the ground instead of removing it?
No. Tilling live or dead sod into the soil creates massive air pockets as the buried organic matter decomposes. Your newly seeded lawn will sink unevenly within six months, creating a bumpy surface that is prone to scalping when mowed. Furthermore, buried grass rhizomes (especially in species like Bermudagrass or Quackgrass) will survive the tilling process and sprout as aggressive weeds in your new lawn.
How soon can I seed after using a sod remover?
You can seed immediately after removing the sod, breaking the soil glaze, and grading the surface. In fact, seeding immediately takes advantage of the disrupted soil structure before rain and foot traffic can re-compact the bare earth.

