
Grass Types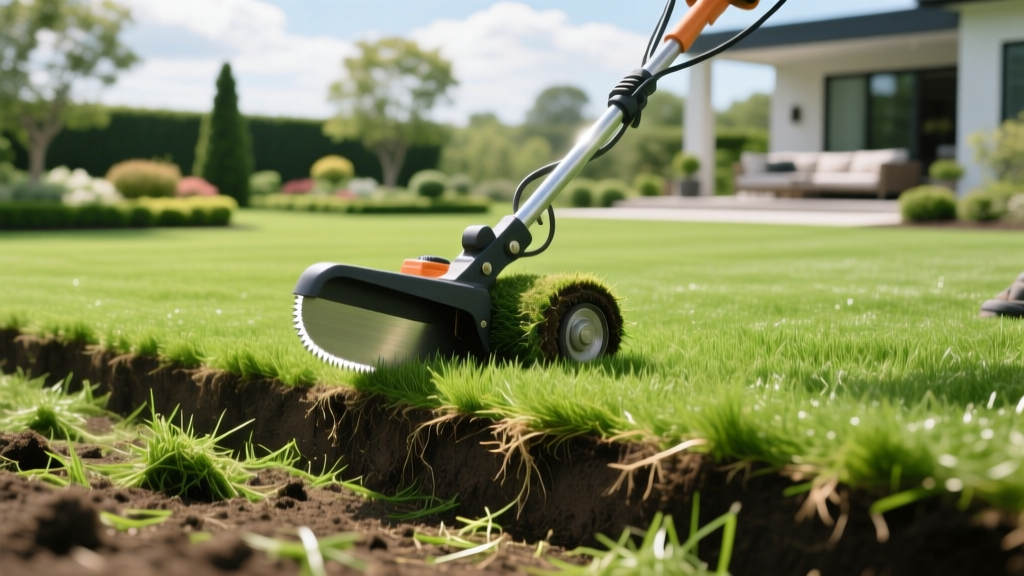
Using a Sod Turf Cutter for Perfect Grass Seed Site Preparation
Establishing a premium lawn from seed requires more than just broadcasting grass seed over existing dirt. When replacing a failing, diseased, or weed-choked lawn, the method you use to remove the old turf dictates the success of your new seedbed. While many homeowners default to rototilling, professional turf managers rely on a sod turf cutter to strip away old grass without destroying the soil architecture. This guide details the exact science, equipment specifications, and step-by-step methodology for using a sod cutter to prepare a flawless seedbed for cool-season and warm-season grass establishment.
The Seedbed Secret: Why Sod Cutting Beats Tilling
The most common mistake in lawn renovation is using a rototiller to break up old grass. Tilling inverts the top 6 to 8 inches of soil, which triggers a biological chain reaction that ruins new seedings. According to University of Minnesota Extension turf specialists, deep soil inversion brings dormant weed seeds to the surface.
WARNING: The Weed Seed Bank Effect
Soil contains millions of dormant weed seeds (crabgrass, Poa annua, nutsedge tubers). These seeds require light and oxygen to germinate. Tilling exposes them, guaranteeing a massive weed flush that will outcompete your slow-germinating grass seed (like Kentucky Bluegrass). A sod turf cutter slices horizontally at just 1.5 inches, removing the root matrix while leaving the underlying soil profile and weed seed bank completely undisturbed and buried.
Soil contains millions of dormant weed seeds (crabgrass, Poa annua, nutsedge tubers). These seeds require light and oxygen to germinate. Tilling exposes them, guaranteeing a massive weed flush that will outcompete your slow-germinating grass seed (like Kentucky Bluegrass). A sod turf cutter slices horizontally at just 1.5 inches, removing the root matrix while leaving the underlying soil profile and weed seed bank completely undisturbed and buried.
Furthermore, tilling destroys soil structure, creating a fluffy, uncompacted seedbed that will inevitably sink and become uneven after the first heavy rain. A sod cutter leaves the subgrade firm and level, providing the dense, stable foundation required for uniform seed-to-soil contact.
Equipment Selection: Walk-Behind Sod Turf Cutters
For residential lawns under 10,000 square feet, a walk-behind sod turf cutter is the standard. Tractor-mounted PTO cutters are reserved for commercial acreage. When renting or purchasing, you need a machine with sufficient weight to maintain blade depth without bouncing off compacted soil or hidden rocks.
| Feature | Rental Grade (e.g., Classen SC-18) | Pro Grade (e.g., Ryan Renovation) |
|---|---|---|
| Cutting Width | 18 inches | 24 - 32 inches |
| Machine Weight | ~350 lbs | ~600+ lbs |
| Depth Control | Manual lever (0-3 inches) | Hydraulic / Dial adjustable |
| 2026 Avg. Rental Cost | $115 - $145 / day | $180 - $250 / day |
For most home seedbed preparations, an 18-inch walk-behind cutter powered by a Honda GX160 or equivalent 5.5 HP engine provides the optimal balance of maneuverability and cutting force. Ensure the rental yard provides a freshly sharpened, heavy-duty steel blade; a dull blade will tear rhizomes rather than slice them, leaving behind invasive stolons that will regrow and infiltrate your new grass.
Execution: Step-by-Step Turf Removal for Seeding
Proper execution requires managing soil moisture and blade geometry. Follow this precise sequence to prepare your seedbed.
1. Achieve Field Capacity Moisture
Water the existing lawn deeply 48 hours before cutting. The goal is 'field capacity'—the soil should hold together in a tight ball when squeezed in your fist, but no water should drip out. If the soil is too dry, the cutter blade will chatter, bounce, and fail to sever deep taproots. If it is saturated, the heavy machine tires will rut the subgrade and cause severe soil compaction, destroying the seedbed.
2. Calibrate the Blade Depth
Set the sod turf cutter to a depth of exactly 1.5 inches. This depth severs the primary root zone and rhizomes of almost all turfgrasses (including aggressive varieties like Zoysia and Bermuda) while minimizing the amount of heavy topsoil you have to haul away. Test the depth on a 5-foot strip, adjust the lever, and verify that the cut sod rolls peel back cleanly without dragging thick clods of dirt.
3. Execute the Cutting Pattern
- Perimeter Cut: Run the cutter along all hardscape edges (driveways, sidewalks) to create a clean boundary.
- Parallel Passes: Cut the main lawn in long, straight, overlapping passes. Overlap each pass by 1 inch to ensure no strips of living grass are left behind.
- Cross-Cut for Removal: Once the lawn is sliced into long ribbons, adjust the blade to a shallow 0.5-inch depth and make perpendicular passes every 4 feet. This scores the sod into manageable 18x48-inch rolls that can be easily lifted and discarded or composted.
Post-Removal Soil Prep and Seeding Timeline
Once the old turf is removed, you are left with bare, firm soil. Do not immediately dump seed on this surface. The exposed soil needs micro-preparation to ensure high germination rates.
According to UMass Amherst Extension guidelines, bare soil left exposed will quickly develop a hydrophobic crust if baked by the sun. Within 24 hours of cutting, lightly drag a metal landscaping rake or a drag mat over the bare soil to a depth of just 1/4 inch. This breaks the surface tension and creates microscopic grooves for the seed to settle into.
Optimal Seedbed Amendment Protocol:
1. Apply a 1/4-inch layer of screened compost or peat moss over the raked soil.
2. Broadcast a high-phosphorus starter fertilizer (e.g., 18-24-6 NPK) at a rate of 4 lbs per 1,000 sq ft.
3. Sow your grass seed using a rotary spreader in two perpendicular directions.
4. Roll the entire seedbed with a 250-lb water-filled lawn roller to press the seed into the compost and soil grooves.
1. Apply a 1/4-inch layer of screened compost or peat moss over the raked soil.
2. Broadcast a high-phosphorus starter fertilizer (e.g., 18-24-6 NPK) at a rate of 4 lbs per 1,000 sq ft.
3. Sow your grass seed using a rotary spreader in two perpendicular directions.
4. Roll the entire seedbed with a 250-lb water-filled lawn roller to press the seed into the compost and soil grooves.
Establishment Timelines by Grass Species
- Perennial Ryegrass: Germinates in 5-7 days. Can be seeded immediately after rolling.
- Tall Fescue: Germinates in 10-14 days. Requires consistent top 1-inch moisture.
- Kentucky Bluegrass: Germinates in 21-28 days. Highly susceptible to drying out; consider applying a hydromulch layer over the seedbed to retain moisture.
- Bermuda (Seed): Requires soil temperatures above 65°F. Germinates in 14-21 days.
Troubleshooting Common Sod Cutter Failures
Even with perfect soil moisture, field conditions can cause equipment issues. Here is how to diagnose and fix them on the fly:
- Blade Chattering or Bouncing: The soil is too dry, or you have hit a compacted clay layer. Increase the depth by 0.25 inches and reduce your walking speed to let the engine torque push through the hardpan.
- Engine Bogging Down: You are cutting too deep or the blade is dull. Raise the depth lever to 1 inch, clear the soil buildup from the blade housing, and check the cutting edge. If it is rounded, swap the blade.
- Sod Tearing Instead of Rolling: The soil is too wet, causing the grass roots to stretch rather than snap. Wait 24 hours for the sun to dry the top layer of the root zone before resuming.
- Drive Belt Slipping: Common on older rental units when the machine is forced through thick, matted thatch. Stop the machine, engage the parking brake, and use a wire brush to clean thatch debris from the drive pulleys.
By utilizing a sod turf cutter instead of traditional tilling methods, you preserve the soil structure, eliminate the weed seed bank, and create a firm, level foundation. This mechanical advantage translates directly into faster germination, deeper root establishment, and a dramatically higher success rate for your new grass seed.

