
Home & Garden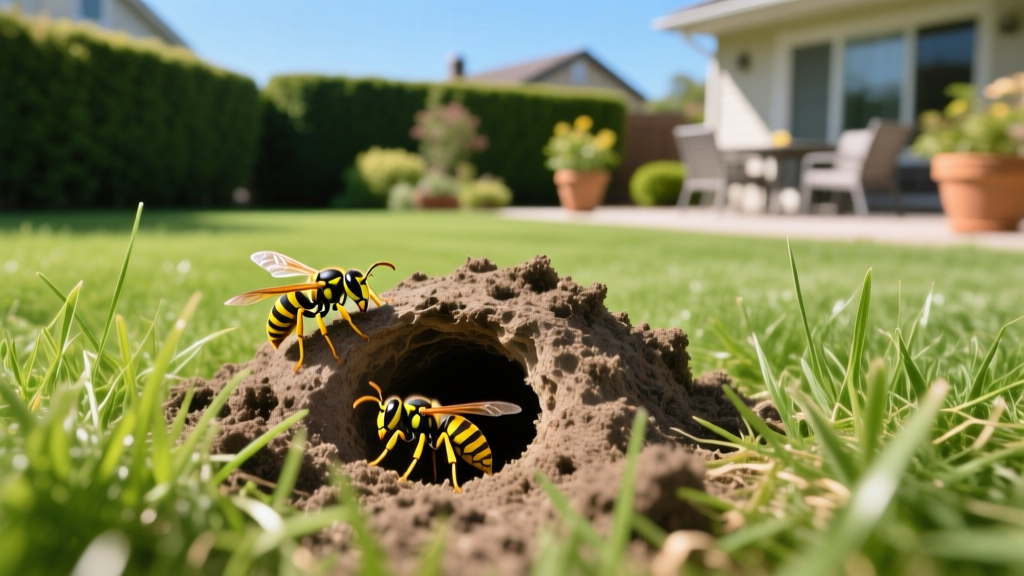
Ground Nesting Yellow Jackets: Symptom Diagnosis & Rescue Fixes
The Diagnostic Phase: Confirming the Culprit
Before deploying any eradication protocol, you must definitively identify the insect utilizing the soil cavity. Ground nesting yellow jackets (Vespula spp.) are frequently misidentified as solitary cicada killers or benign bumblebees, leading to ineffective treatment choices. Yellow jacket colonies excavate or repurpose abandoned rodent burrows, creating a subterranean paper nest that can house 1,000 to 5,000 workers by late summer.
The primary symptom of a yellow jacket ground nest is a clean, 1 to 2-inch diameter entrance hole in the soil, often surrounded by a small, fan-shaped mound of freshly excavated dirt. Unlike earthworm castings, which are granular and scattered, or ant mounds, which are finely textured and domed, yellow jacket mounds consist of coarse soil pellets. The most definitive diagnostic marker is traffic volume: a mature colony will exhibit 10 to 20 insects entering and exiting the hole per minute during peak daytime foraging hours.
⚠️ CRITICAL SAFETY WARNING: Ground nesting yellow jackets are hyper-aggressive when their nest entrance is disturbed. Unlike honeybees, they possess smooth stingers and can sting repeatedly. If you or a family member has a known Hymenoptera venom allergy, do not attempt DIY rescue fixes. The agitation radius of a disturbed ground nest can exceed 15 feet within seconds.
Symptom-to-Cause Decision Matrix
Use this diagnostic table to verify the exact species occupying your lawn before purchasing treatment products. Misidentification wastes time and allows the colony to expand deeper into the turf root zone.
| Insect Type | Hole Diameter | Mound Characteristics | Flight Pattern & Behavior | Sting Risk Level |
|---|---|---|---|---|
| Yellow Jackets | 1 - 2 inches | Coarse dirt fan, clean hole | Rapid, erratic, high traffic volume | Extreme (Multiple stings) |
| Cicada Killers | 0.5 - 1 inch | Loose, U-shaped dirt pile | Heavy, slow, solitary (one per hole) | Low (Females rarely sting) |
| Bumblebees | 0.5 - 1 inch | Minimal dirt, often under debris | Fuzzy, slow, gentle hovering | Moderate (Defensive only) |
| Digger Wasps | 0.25 - 0.5 inches | Multiple small turrets in bare soil | Patrol low over grass, solitary | Very Low |
The Rescue Protocol: Eradicating the Colony
A common, fatal mistake made by homeowners is spraying standard aerosol wasp foam or liquid insecticides directly into a ground hole. This approach fails because the nest cavity is typically located 12 to 36 inches below the surface. Liquids pool in the topsoil, failing to reach the queen, while the moisture and chemical irritants cause the colony to rapidly dig secondary exit holes several feet away, effectively multiplying your problem.
Step 1: Timing and Environmental Controls
Eradication must occur when the entire colony is inside the nest and foraging has ceased. Treat the nest exactly two hours after sunset or just before dawn. Yellow jackets rely heavily on visual cues to attack; working in darkness drastically reduces their defensive accuracy. Furthermore, as of 2026, entomological data confirms that soil temperatures below 65°F significantly slow their reaction times. Wrap your flashlight lens in red cellophane—insects cannot perceive the red light spectrum well, allowing you to illuminate the hole without triggering a swarm response.
Step 2: Selecting the Right Active Ingredient
Insecticidal dust is the only reliable delivery method for subterranean nests. Dust particles cling to the insects' exoskeletons and are carried deep into the nest cavity. Through grooming and trophallaxis (the sharing of food and fluids), the workers inadvertently feed the toxic dust to the larvae and the queen, collapsing the colony from the inside out.
- Syngenta Tempo 1% Dust (Cyfluthrin): Priced between $28 and $32 per 1lb bottle. This is the industry gold standard for rapid knockdown and excellent soil adhesion.
- BASF Delta Dust (Deltamethrin): Priced around $30 to $35. Highly effective and uniquely waterproof, making it the mandatory choice if rain is in the forecast or if the soil is already damp from irrigation.
Step 3: Application Mechanics and Transfer Effect
Do not pour the dust directly from the bottle, which will clog the entrance and halt the transfer effect. Instead, use a dedicated tool like the JT Eaton Bellow Bulb Hand Duster (approximately $15). Fill the duster only one-third full to allow air space for proper agitation. Insert the metal extension tube just inside the lip of the hole—do not jam it deep into the soil, which will collapse the tunnel. Squeeze the bulb gently 3 to 4 times to create a light, powdery cloud inside the entrance. The goal is to coat the runway, not fill the hole. Leave the hole completely unobstructed so returning foragers track the dust inside.
Failure Modes: Why Your First Attempt Might Fail
Even with perfect execution, environmental variables can compromise the treatment. Be prepared to troubleshoot these specific edge cases:
- The Drought Foraging Gap: During severe mid-summer droughts, workers spend less time foraging and more time deep inside the nest fanning their wings to cool the colony. Surface dust isn't tracked inside efficiently. Fix: Place a small piece of raw meat or a drop of sugar water near the dusted entrance to force foraging activity.
- Secondary Exit Excavation: If you inadvertently blocked the main hole with too much dust or soil, the colony will chew through root systems to open a new vent. Fix: Monitor a 10-foot radius for new, smaller holes over the next 48 hours and re-apply dust immediately.
- Moisture Degradation: Standard cyfluthrin dust loses efficacy when saturated. If an unexpected thunderstorm occurs within 12 hours of application, the treatment is voided. Fix: Reapply using a waterproof deltamethrin formulation once the surface soil dries.
Post-Eradication Lawn Recovery
Once 72 hours have passed and zero activity is observed at the entrance, the colony is dead. The subterranean paper nest will naturally decompose, acting as a localized organic amendment. However, the excavated void and surface mound will leave an unsightly dead patch in your turf.
Break up the coarse dirt mound with a steel garden rake, dispersing it evenly into the surrounding grass canopy. Fill the primary entrance hole with an 80/20 mix of screened topsoil and fine compost. For cool-season lawns, overseed the bare patch with a turf-type tall fescue blend (such as Jonathan Green Black Beauty Ultra) at a rate of 6 pounds per 1,000 square feet. Water the repaired zone with a light misting three times daily for 10 days to ensure seed germination, avoiding heavy soaking which could wash away the newly placed topsoil.
Authoritative Sources
For ongoing regional guidance on Hymenoptera behavior and localized pesticide regulations, consult the following university extension resources:
- Penn State Extension: Yellowjackets and Hornets - Comprehensive biological breakdown and structural identification.
- University of Minnesota Extension: Yellowjackets - Seasonal colony growth data and late-summer management protocols.

