
Home & Garden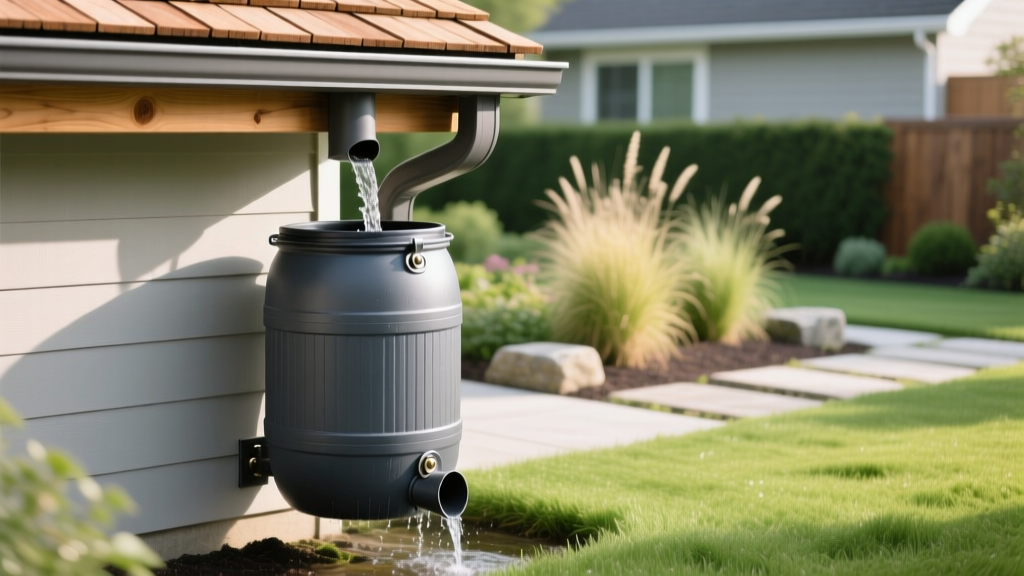
Installing a Rain Barrel: The Complete DIY Downspout Guide
Municipal water rates have climbed steadily, making landscape irrigation one of the most expensive line items in home maintenance. Harvesting rainwater offsets these costs while providing chlorine-free, slightly acidic water that is biologically superior for garden beds and container plants. However, the structural and hydraulic realities of capturing roof runoff are frequently underestimated by homeowners. A poorly executed setup leads to foundation flooding, mosquito breeding, or catastrophic barrel failure under dynamic loads.
This guide details the exact engineering, hardware selection, and installation protocols required for installing a rain barrel system that operates flawlessly year-round. According to the EPA WaterSense program, outdoor water use accounts for nearly 30% of total household consumption, making rainwater harvesting one of the highest-impact conservation upgrades you can make.
Calculating Catchment Yield and Barrel Sizing
Before purchasing hardware, you must calculate your roof's catchment potential to avoid undersizing your storage. The mathematical constant for roof runoff is 0.623 gallons per square foot of catchment area per inch of rainfall.
The Catchment Formula:
Roof Area (sq ft) × Rainfall (inches) × 0.623 = Gallons Captured
Example: A 500 sq ft roof section receiving 1 inch of rain yields 311.5 gallons of water.
Roof Area (sq ft) × Rainfall (inches) × 0.623 = Gallons Captured
Example: A 500 sq ft roof section receiving 1 inch of rain yields 311.5 gallons of water.
Because a standard residential downspout drains a specific roof quadrant, measure only the footprint that feeds your target downspout. If your roof section yields 300 gallons per inch of rain, a single 50-gallon barrel will overflow during any moderate storm. Plan to daisy-chain multiple barrels or install a high-capacity 100-gallon cistern if your catchment area exceeds 800 square feet.
| Catchment Area (sq ft) | Yield per 1 Inch of Rain | Recommended Minimum Storage |
|---|---|---|
| 400 sq ft | 249 Gallons | 50-Gallon Barrel |
| 800 sq ft | 498 Gallons | Dual 50-Gallon Barrels |
| 1,200 sq ft | 747 Gallons | 100+ Gallon Cistern |
Selecting Leak-Proof Hardware
The longevity of your system depends entirely on material selection. Avoid opaque, thin-walled plastic barrels that degrade under UV exposure and promote algae growth. Instead, source UV-stabilized, food-grade High-Density Polyethylene (HDPE) barrels. Models like the Good Ideas Rain Wizard 50-Gallon feature thick, opaque walls and flat backs for flush wall mounting.
Upgrading the Spigot and Diverter
Factory-installed plastic spigots are the primary failure point in commercial rain barrels. They crack under minor torque and leak at the threads. Replace the PVC spigot with a 3/4-inch solid brass hose bibb. Apply PTFE (Teflon) thread seal tape and use rubber gaskets on both the interior and exterior lock nuts to ensure a watertight seal against the HDPE wall.
For the downspout connection, avoid open-top diversion methods that allow leaves and debris to clog the system. Use a closed-loop downspout diverter kit, such as the Oatey 2-inch Downspout Diverter. These kits utilize a flexible hose and an internal baffle that automatically routes excess water back down the downspout once the barrel reaches capacity, eliminating the need for manual overflow valves.
Step-by-Step Installation Protocol
Follow these exact construction steps to ensure structural integrity and optimal hydraulic flow.
Step 1: Engineering the Load-Bearing Base
Water weighs 8.34 pounds per gallon. A full 50-gallon barrel, plus the weight of the plastic vessel itself, exceeds 450 pounds. Placing this directly on soil or standard mulch will result in severe settling, causing the barrel to lean, stress the diverter hose, and eventually rupture.
- Excavate a 3-foot by 3-foot square area directly beneath the downspout to a depth of 4 inches.
- Fill the excavated area with 3/4-inch crushed angular gravel (do not use pea gravel, as it rolls and fails to compact).
- Compact the gravel thoroughly using a hand tamper until the surface is perfectly level.
- Place four 12x12-inch concrete pavers on top of the gravel to create a flat, elevated platform. Elevating the barrel provides the necessary vertical clearance to place a standard watering can beneath the brass spigot.
Step 2: Modifying the Downspout
Measure the height of the barrel's diverter input port. Transfer this measurement to your aluminum or vinyl downspout, marking the center point for the cut.
- For aluminum downspouts: Use a 2-inch bi-metal hole saw attached to a cordless drill. Apply steady pressure to prevent the metal from tearing.
- For vinyl downspouts: A standard spade bit or hole saw works, but ensure the drill is set to a low torque setting to prevent cracking the PVC.
- Insert the diverter's interior baffle into the hole and secure it according to the manufacturer's tension specifications.
Step 3: Routing the Diverter Hose
Connect the flexible corrugated hose from the downspout diverter to the barrel's input port. The hose must maintain a continuous downward slope from the downspout to the barrel. Any upward dips in the hose will create a vapor lock or debris trap, halting water flow entirely. Trim the hose to the exact length needed; excess hose length invites sagging and kinking.
Critical Maintenance: Winterization and Pest Control
According to research from the University of Minnesota Extension, failing to winterize rain barrels is the leading cause of system failure in freezing climates. Water expands by approximately 9% when it freezes. If trapped inside the barrel, this expansion will easily crack HDPE walls and shatter brass spigots.
Warning: Winter Freeze Protocol
Before the first hard freeze, completely drain the barrel. Disconnect the diverter hose from the downspout and install the solid downspout cap provided in your diverter kit to restore normal winter drainage. Leave the barrel's spigot in the open position and store the barrel upside down or in a garage to prevent snowmelt accumulation.
Before the first hard freeze, completely drain the barrel. Disconnect the diverter hose from the downspout and install the solid downspout cap provided in your diverter kit to restore normal winter drainage. Leave the barrel's spigot in the open position and store the barrel upside down or in a garage to prevent snowmelt accumulation.
Biological Pest Management
Standing water is a primary breeding ground for mosquitoes. Never use bleach or chemical pesticides in your rain barrel, as these will destroy your soil's microbiome when used for irrigation. Instead, use BTI (Bacillus thuringiensis israelensis) dunks. BTI is a naturally occurring bacterium that targets mosquito and fungus gnat larvae exclusively. Break a single dunk into quarters; one quarter treats up to 25 square feet of surface area and remains biologically active for 30 days without harming pets, wildlife, or beneficial soil nematodes.
Troubleshooting Common Rain Barrel Failures
| Symptom | Probable Cause | Corrective Action |
|---|---|---|
| Barrel overflows during light rain | Diverter hose has an upward dip (vapor lock) or is clogged with shingle grit. | Trim hose to remove sagging; flush hose with a garden hose on high pressure. |
| Low water pressure at the spigot | Insufficient vertical head pressure; debris clogging the spigot screen. | Raise the barrel base by adding another layer of concrete pavers; clean spigot filter. |
| Foul, anaerobic odor from water | Organic matter (leaves, pollen) decomposing at the bottom of the barrel. | Install a fine mesh screen on the barrel input; drain and scrub barrel annually. |
| Water leaking from spigot threads | Missing interior gasket or insufficient PTFE tape on plastic threads. | Drain barrel, remove spigot, apply 4 wraps of PTFE tape, and install rubber gaskets on both sides. |
By adhering to strict load-bearing base preparation, upgrading to closed-loop diverters, and implementing seasonal winterization, your rainwater harvesting system will provide thousands of gallons of free, high-quality irrigation water annually while protecting your home's foundation from runoff damage.

