
Home & Garden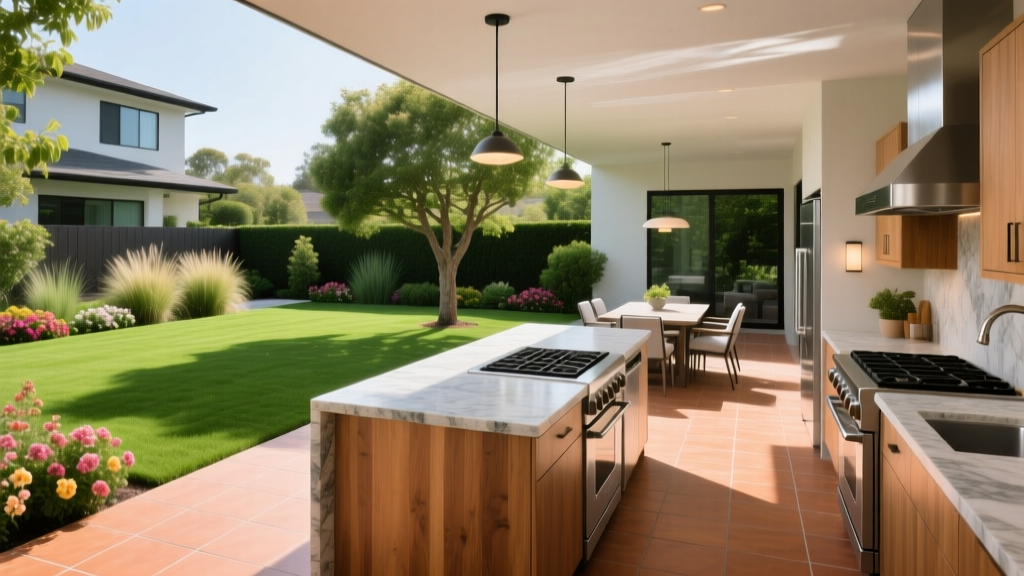
How to Plan the Best Outdoor Kitchen Configurations for Your Patio
The Architecture of Al Fresco Cooking
Designing an outdoor cooking space requires a fundamentally different approach than planning an indoor kitchen. You are battling weather exposure, managing extended utility trenching, and accommodating high-traffic entertainment zones. Selecting the right outdoor kitchen configurations is the single most critical decision in this process, dictating everything from your plumbing costs to your workflow efficiency. This guide breaks down the exact spatial requirements, material specifications, and layout geometries required to build a functional, high-end exterior culinary space.
The Four Mandatory Work Zones
Before selecting a physical shape, you must allocate space for the four core operational zones. The National Kitchen and Bath Association (NKBA) recommends treating these as distinct modules to prevent cross-traffic collisions during active cooking.
Zone Allocation Framework
- The Hot Zone (Cooking): Houses the primary grill, pizza oven, or side burners. Requires 12 inches of non-combustible landing space on both sides of the primary cooking appliance.
- The Cold Zone (Storage & Prep): Centers around the under-counter refrigerator and primary prep sink. Requires a minimum of 36 inches of continuous, uninterrupted counter space.
- The Wet Zone (Cleaning): Contains the main cleanup sink and waste pull-out. Must be positioned downwind from the dining area to manage odors and plumbing venting.
- The Dry Zone (Serving & Bar): The transition area between the chef and guests. Typically incorporates a raised bar (42 inches high) or a dedicated beverage station to keep guests out of the primary work triangle.
Comparing Primary Outdoor Kitchen Configurations
The physical footprint of your patio or deck will largely dictate your layout. Below is a comparative matrix of the four standard configurations, including 2026 average build costs for mid-to-high-end finishes (excluding heavy masonry structural work).
| Configuration | Minimum Footprint | Avg. Cost Range | Ideal Use Case |
|---|---|---|---|
| Straight Line (Galley) | 8 ft x 3 ft | $8,000 - $15,000 | Narrow patios, single-cook households, budget-conscious builds. |
| L-Shape | 10 ft x 8 ft | $15,000 - $30,000 | Corner spaces, separating hot and cold zones, moderate entertaining. |
| U-Shape | 12 ft x 10 ft | $30,000 - $60,000+ | Large decks, multi-cook environments, high-volume entertaining. |
| Island (Freestanding) | 8 ft x 4 ft | $12,000 - $25,000 | Central yard focal points, 360-degree access, requires overhead pergola. |
For a comprehensive visual breakdown of these layouts and real-world inspiration, reviewing curated outdoor kitchen design galleries can help you visualize how these configurations adapt to specific architectural styles.
Critical Dimensional Standards and Clearances
Guessing dimensions is the most common cause of ergonomic failure in exterior builds. Adhere strictly to these industry-standard measurements to ensure the space is usable for adults of varying heights and mobility levels.
Counter and Aisle Specifications
- Standard Prep Counter Height: 36 inches from the finished floor. Do not compromise on this; lower counters cause severe back strain during extended prep work.
- Bar/Serving Height: 42 inches. This creates a natural physical barrier that prevents guests from leaning over the active prep zone.
- Single-Cook Aisle Width: 48 inches minimum between parallel counters. This allows one person to open an under-counter refrigerator or dishwasher without blocking the walkway.
- Multi-Cook Aisle Width: 54 to 60 inches. If you plan to have two people cooking simultaneously, the extra 6 to 12 inches prevents dangerous collisions when carrying hot pots or grill grates.
Appliance Clearances
Every heat-generating appliance requires specific landing zones. A primary gas grill requires a minimum of 12 inches of heat-resistant counter space on the left and 12 inches on the right. If you are installing a kamado-style ceramic cooker (like a Big Green Egg or Kamado Joe), you must account for the dome swing radius and leave at least 18 inches of clearance behind the hinge to prevent the lid from striking a wall or privacy screen.
Utility Routing: Trenching and Material Selection
The hidden infrastructure of your outdoor kitchen configurations will dictate your long-term maintenance costs. Above-ground shortcuts lead to catastrophic winter failures.
WARNING: Frost Heave and Water Line Failures
Never run water lines through shallow trenches or above-ground conduit in freeze-thaw climates. Water supply lines must be trenched below your local frost line (typically 18 to 36 inches deep, depending on your USDA hardiness zone). Always install a dedicated shut-off valve inside the conditioned space of your home, and incorporate a blow-out port at the lowest elevation of the exterior line to winterize the system with compressed air.
Material Grade Requirements
When selecting cabinetry and countertops, standard indoor materials will degrade rapidly under UV exposure and moisture.
- Cabinetry: Specify 304-grade stainless steel (marine-grade). Avoid 201-grade or 430-grade stainless, which will develop surface rust within a single season in humid or coastal environments. Powder-coated aluminum is a viable, lighter-weight alternative.
- Countertops: Avoid porous natural stones like marble or unsealed granite, which absorb grease and stain permanently. Specify sintered stone (such as Dekton or Neolith) or highly dense quartzite. Sintered stone is virtually impervious to UV fading and can withstand direct contact with 500°F grill grates without scorching.
- Gas Lines: Use corrugated stainless steel tubing (CSST) routed through protective PVC conduit, or schedule 40 black iron pipe. All gas connections must be pressure-tested and signed off by a licensed plumber before the masonry veneer is applied.
For detailed safety protocols regarding exterior gas and electrical routing, consult the expert outdoor kitchen guides which frequently update their code-compliance checklists based on local municipal shifts.
Step-by-Step Implementation Flow
Execute your build in this exact sequence to prevent costly rework and demolition.
- Subgrade Preparation: Excavate the footprint to a depth of 12 inches. Compact the soil and lay a 4-inch base of crushed angular gravel (not round pea gravel, which shifts). Pour a 4-inch reinforced concrete slab with a 1/4-inch per foot slope away from the main house foundation.
- Utility Rough-In: Trench and lay all water, gas, and electrical conduits. Pull 20-amp dedicated GFCI circuits for small appliances and a 40-amp circuit if integrating an electric smoker or high-draw refrigerator. Pressure test all gas and water lines before backfilling.
- Framing: Construct the skeletal structure using 16-gauge galvanized steel studs or concrete masonry units (CMU). Never use pressure-treated wood for the primary frame, as it warps under the weight of stone veneers and retains moisture against the cabinetry.
- Cabinetry and Appliance Setting: Slide in the 304-grade stainless steel cabinets and dry-fit all appliances. Verify ventilation requirements for built-in gas grills; if the grill is installed in a combustible enclosure, a manufacturer-approved insulated jacket is legally required.
- Veneer and Countertop Installation: Apply the exterior veneer (stone, stucco, or tile). Template the countertops only after the veneer is complete, as masonry work often shifts dimensions by up to 1/2 inch. Install the sintered stone countertops using a flexible, exterior-rated polyurethane adhesive to allow for thermal expansion.
Expert Insight: The most frequent point of failure in outdoor kitchen configurations is inadequate ventilation for built-in trash pull-outs and refrigerators. Always integrate louvered vent panels at the base of the cabinetry to allow heat from compressor coils to escape and to prevent the buildup of combustible gases in enclosed lower cabinets.
By strictly adhering to these spatial, material, and infrastructural guidelines, your exterior cooking space will transition from a simple patio addition to a highly engineered, durable culinary environment capable of withstanding decades of use and weather exposure.

