
Home & Garden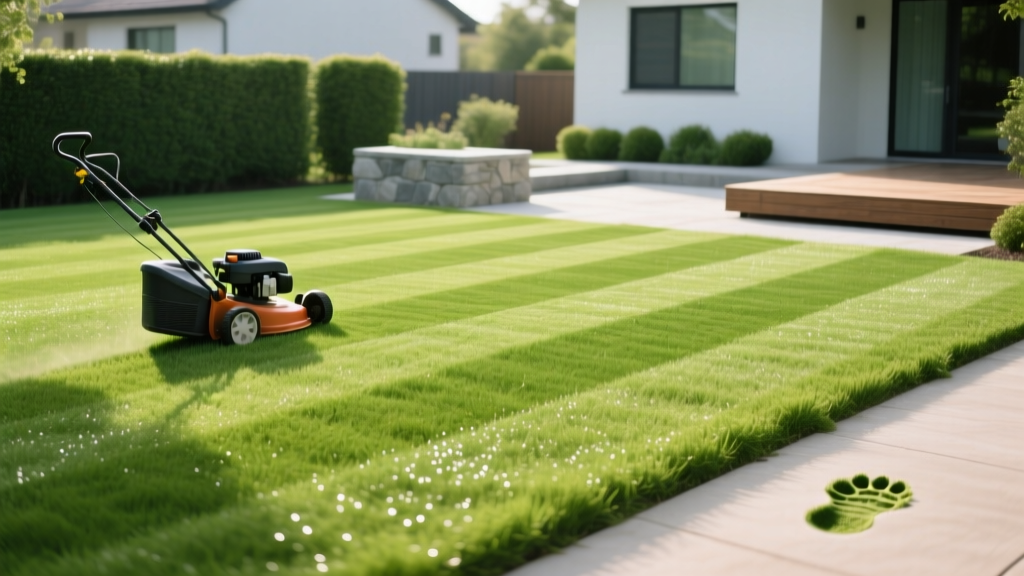
How to Mow a Perfectly Striped Yard: Patterns & Tips
Achieving a professionally striped yard is not about the color of your grass; it is an optical illusion created by bending leaf blades to reflect light at different angles. While commercial groundskeepers use heavy zero-turn mowers and specialized grooming reels, homeowners can replicate stadium-quality striping using standard walk-behind mowers equipped with aftermarket striper kits. This guide details the exact physics, equipment specifications, and mowing geometries required to lay down crisp, high-contrast stripes on a residential lawn.
The Physics of Lawn Striping and Light Reflection
Striping relies entirely on phototropism and the physical flexibility of the grass leaf cuticle. When a mower roller bends grass away from you, the shaded side of the blade faces upward, creating a dark stripe. When the grass is bent toward you, the waxy, reflective top surface catches the sunlight, producing a light stripe.
According to turfgrass research from the University of Minnesota Extension, the intensity of this contrast is dictated by three variables: the weight applied to the grass, the moisture content of the leaf tissue, and the mower deck pitch. Turgid, well-hydrated grass blades bend smoothly and hold their shape longer, whereas drought-stressed grass will snap or rebound immediately after the roller passes.
Optimizing Mower Deck Pitch for Maximum Contrast
Before attaching a roller kit, you must calibrate your mower deck pitch. The front of the mower deck must sit exactly 1/8-inch to 1/4-inch lower than the rear. This aggressive pitch serves two functions:
- Vacuum Effect: It lifts the grass blade vertically before the blade shears it, ensuring a clean cut rather than a fold.
- Deflection Angle: It forces the clippings further back into the deck chamber, allowing the trailing striper roller to press the freshly cut, flexible blades flat against the turf canopy without interference from trapped clippings.
Measure the deck height at the left-front and left-rear tire baffles on a flat concrete surface. Adjust the front linkage until the 1/8-inch drop is achieved. Penn State Extension notes that improper deck leveling is the primary cause of uneven striping and scalped turf crowns.
Striper Kits vs. DIY Rollers: Equipment Breakdown
You do not need a $12,000 commercial mower to stripe a yard. The aftermarket offers precise roller kits that mount directly to the rear axle or deck baffles of standard 21-inch to 22-inch push mowers. Below is a comparison of the most effective solutions available in 2026.
| Equipment Type | Model / Specification | Est. Cost | Weight / Pressure | Best Application |
|---|---|---|---|---|
| OEM Flap Striper | Toro 137-9540 (21" Recycler) | $45 - $60 | 2 lbs (Flex pressure) | Basic light/dark contrast on cool-season grass |
| Weighted Roller Kit | John Deere LP1000 (20"-22") | $160 - $190 | 18 lbs (Sand-filled) | Deep, long-lasting stadium stripes |
| Hitch-Mount Roller | Brinly PRC-24BH (24" Poly) | $120 - $140 | Up to 110 lbs (Water) | Tow-behind striping for riding mowers |
| DIY PVC Roller | 4" Schedule 40 PVC + Sand | $35 - $50 | 25 lbs (Custom) | Budget alternative for custom deck widths |
Expert Recommendation: If you use a standard 21-inch push mower, avoid heavy water-filled tow-behind rollers, as they will cause severe pivot-tearing when you turn at the end of a row. Stick to deck-mounted, sand-filled poly rollers like the John Deere LP1000 or a high-density rubber flap kit. Sand provides dead-weight that presses the grass without the sloshing momentum of water that disrupts the stripe line at the turnaround point.
Step-by-Step Execution: The Classic Checkerboard Pattern
The checkerboard is the gold standard for residential striping. It requires two complete passes over the same lawn area at perpendicular angles. Follow this exact sequence to prevent turf tearing and maintain straight lines.
Step 1: The Perimeter Relief Pass
Mow one complete lap around the outer edge of your lawn with the mower deck raised 1/2-inch higher than your normal cutting height. This creates a wide turning zone. Never turn sharply on the uncut interior grass; the roller will twist and tear the root crown.
Step 2: North-South Parallel Stripes
Drop the deck to your target height (typically 2.5 to 3.5 inches for cool-season grasses). Pick a fixed focal point at the far end of the yard—such as a chimney, a specific tree trunk, or a fence post. Drive straight toward it. When you reach the perimeter relief zone, execute a Y-turn: pull forward, reverse straight back while shifting slightly to the right, and pull forward again into the next row. Never perform a zero-radius pivot turn.
Step 3: East-West Perpendicular Stripes
Once the North-South pass is complete, immediately begin mowing East-West, cutting directly across the lines you just laid down. The roller will bend the already-striped grass in the opposite direction, compounding the optical contrast and creating the checkerboard squares.
Pro Tip: The 10% Overlap Rule
When lining up your next pass, overlap the previous wheel track by exactly 10% (about 2 inches on a 21-inch deck). This prevents uncut 'striping ridges' between passes and ensures the roller applies continuous, even pressure across the entire lawn surface without leaving unpressed gaps.
Grass Species Compatibility Matrix
Not all turfgrass stripes equally. The cellular structure of the leaf blade and the growth habit of the species dictate how well the grass will hold a bend. According to the Royal Horticultural Society (RHS), cool-season bunchgrasses are vastly superior for striping compared to warm-season stoloniferous grasses.
- Kentucky Bluegrass (Poa pratensis): Excellent. High leaf flexibility and dense canopy create sharp, long-lasting stripes. Mow at 2.5 to 3.0 inches.
- Perennial Ryegrass: Excellent. Very fast recovery and highly reflective cuticle. Mow at 2.0 to 2.5 inches.
- Tall Fescue: Good. Wider blades hold stripes well, but requires a heavier roller (15+ lbs) to bend the stiff ribbed leaves. Mow at 3.0 to 4.0 inches.
- Bermudagrass: Poor. Highly rigid, low-growing stems resist bending. Stripes will fade within hours of mowing due to rapid phototropic rebound.
- Zoysiagrass: Poor to Fair. Extremely dense and stiff. Requires specialized heavy-grooming reels found only on commercial triplex mowers to achieve visible striping.
Troubleshooting Faded or Uneven Stripes
If your striped yard looks muddy, blurred, or fades immediately after mowing, diagnose the issue using these specific failure modes:
Diagnostic Troubleshooting Guide
Symptom: Stripes have a 'fuzzy' or shredded appearance on the light bands.
Cause: Dull mower blades are tearing the leaf tip rather than shearing it. The shredded tissue wilts and turns brown, destroying the light reflection.
Fix: Remove the blade and sharpen it to a precise 30-degree bevel. Balance the blade on a magnetic balancer before reinstalling. Sharpen every 25 hours of runtime.
Symptom: Stripes are visible immediately but disappear within 2 hours.
Cause: Mowing height is too low, or the turf is drought-stressed. Short grass lacks the leaf surface area required to bend and hold a shadow.
Fix: Raise the deck by 1/2-inch. Water the lawn deeply (0.5 inches) the evening before your scheduled mowing to maximize leaf turgor pressure.
Symptom: Wavy or crooked lines in the pattern.
Cause: Fixating on the mower deck instead of a distant focal point, or turning too early in the perimeter zone.
Fix: Keep your eyes locked on a stationary object 50+ yards away. Extend your perimeter relief pass to be at least two mower widths deep to allow for gradual Y-turns.
Post-Mowing Roller Maintenance
After completing your striped yard pattern, the maintenance of your equipment is critical. Polyurethane and rubber striper flaps accumulate sap, wet clippings, and soil. If left on the roller, this debris hardens into a concrete-like layer that will cause micro-tears in the grass canopy during your next mow, resulting in a gray, diseased appearance across the light stripes. Scrape the roller with a plastic putty knife and rinse it with a low-pressure hose immediately after mowing. Store the mower out of direct UV light to prevent the rubber flaps from dry-rotting and losing their downward deflection tension.

