
Landscaping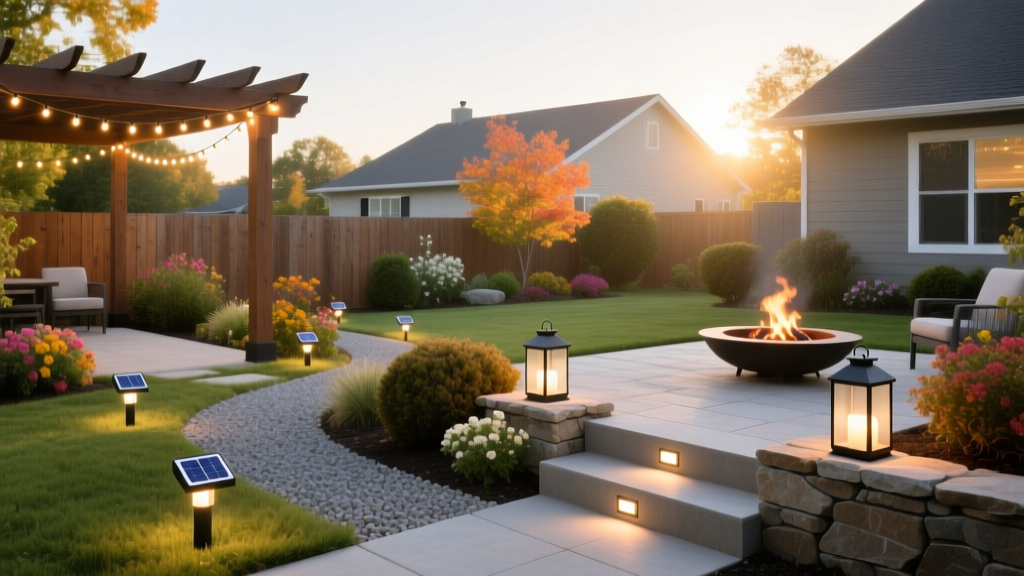
12 Beginner-Friendly Backyard Light Ideas for Any Yard
Most homeowners abandon outdoor lighting projects because they confuse line-voltage electrical work with low-voltage landscaping. For beginners, 12-volt (12V) systems offer professional-grade illumination without the need for a licensed electrician or deep trenching. By focusing on strategic placement and modern LED efficiency, you can transform a dark yard into a functional, layered landscape.
The Core Decision: 12V Low-Voltage vs. Alternatives
Before selecting fixtures, you must choose your power delivery method. While solar lights have improved, they still lack the lumen output and reliability required for cohesive landscape design. Line-voltage (120V) requires buried conduit and professional installation. Low-voltage (12V) remains the undisputed standard for DIY landscaping.
| System Type | Voltage | Installation Depth | DIY Friendly? | Average Fixture Cost |
|---|---|---|---|---|
| Low-Voltage (12V) | 12V AC | 3 to 6 inches | Yes | $40 - $120 |
| Line-Voltage (120V) | 120V AC | 18+ inches (in conduit) | No (Requires Electrician) | $80 - $250 |
| Solar LED | DC (Battery) | Surface / Spike | Yes | $15 - $60 |
5 Strategic Backyard Light Ideas by Zone
1. Pathway Illumination (The Staggered Approach)
Avoid the "runway effect" by placing path lights directly opposite each other. Instead, stagger fixtures 8 to 10 feet apart on alternating sides of the walkway. For durable, beginner-friendly options, the Kichler 15810 (approx. $85 per fixture) offers a solid brass construction that weathers naturally and resists corrosion. Aim for 100 to 150 lumens per fixture to illuminate the walking surface without creating glare.
2. Patio Canopies (Bistro and String Lighting)
Overhead lighting defines outdoor dining spaces. When hanging commercial-grade string lights, look for an IP65 weatherproof rating and shatterproof LED bulbs. The Commercial Electric 48ft LED String Light (approx. $30) features integrated, non-replaceable LEDs that draw minimal wattage, allowing you to daisy-chain up to four strands on a single standard 15-amp outdoor outlet. Hang them in a zig-zag pattern 8 to 10 feet above the patio floor.
3. Tree Uplighting (Architectural Focal Points)
To highlight mature trees or architectural features, place spotlights 2 to 3 feet away from the trunk, angled upward at 60 degrees. Use a narrow beam angle (15° to 24°) for tall, narrow trees, and a wider beam (36° to 60°) for broad canopies. The WAC Lighting InvisiLED series (approx. $60) provides adjustable glare shields, a critical feature for preventing light trespass into neighboring yards.
4. Deck & Step Safety (Recessed Hardscape Lights)
Surface-mounted step lights are prone to being kicked or damaged by snow shovels. Recessed hardscape lights, like the Cast Lighting Miniature Recessed (approx. $45), install directly into the riser of wooden or stone steps. Ensure the fixture has an IP67 rating (submersible) if it will be exposed to heavy rain or snow melt. Space them 4 feet apart along stairways.
5. Smart Perimeter Security (Motion-Activated Accents)
Integrate security with aesthetics using smart low-voltage systems. The Ring Smart Lighting Pathlight (approx. $35 per unit) connects to a central bridge, allowing you to trigger all perimeter lights simultaneously if motion is detected by a Ring camera. Keep the motion sensor range configured to 15 feet to prevent false triggers from passing cars or stray animals.
The Science of Ambience: Lumens and Color Temperature
The biggest mistake beginners make is buying fixtures with the wrong color temperature. Landscape lighting should mimic moonlight or warm firelight, not hospital corridors.
Color Temperature Cheat Sheet
- 2700K (Warm White): Ideal for patios, string lights, and architectural uplighting. Mimics incandescent or firelight.
- 3000K (Crisp White): Best for pathways, steps, and illuminating green foliage. Enhances the natural greens and blues in plants.
- 4000K+ (Daylight/Cool White): Avoid in residential landscapes. Creates a harsh, commercial look and contributes heavily to light pollution.
According to the U.S. Department of Energy, modern LED landscape fixtures consume up to 75% less energy than older halogen equivalents while lasting 25 times longer, making the upfront cost of integrated LED fixtures highly cost-effective over a 10-year period.
DIY Wiring: Avoiding the "Voltage Drop" Trap
When wiring 12V systems, the distance from the transformer to the furthest fixture dictates your wire gauge. If the wire is too thin, the last light in the run will dim significantly—a phenomenon known as voltage drop.
- Calculate Total Wattage: Add the wattage of all fixtures on a single run. (e.g., 10 lights × 3W = 30W).
- Select Wire Gauge: For runs under 100 feet with less than 100W total, 14-gauge (14AWG) wire is sufficient. For runs up to 150 feet or up to 200W, upgrade to 12-gauge (12AWG). For massive runs exceeding 200W, use 10-gauge (10AWG) for the main trunk line.
- Use the Hub Method: Instead of daisy-chaining lights in a single long line (which exacerbates voltage drop), run a main 12AWG trunk line to a central junction box, then use shorter 14AWG pigtails to connect individual fixtures.
- Waterproof Connections: Never use standard electrical tape. Use silicone-filled wire nuts or brass crimp connectors with heat-shrink tubing to prevent ground moisture from corroding the copper.
Dark Sky Compliance and Light Pollution
As suburban light pollution increases, responsible lighting design is critical. DarkSky International advocates for fixtures that are fully shielded, meaning no light escapes above the horizontal plane. When shopping, look for the "Dark Sky Approved" seal. Always aim spotlights downward or use glare shields to ensure light stays on your property and out of the night sky.
"Properly shielded outdoor lighting not only reduces energy waste but protects local wildlife navigation and preserves our view of the stars." — DarkSky International Guidelines
Realistic Budgeting for a 10-Fixture DIY Setup
Bypassing professional installation saves thousands, but you still need commercial-grade components. Here is a realistic cost breakdown for a high-quality, 10-fixture low-voltage system installed in 2026.
| Component | Specification | Estimated Cost |
|---|---|---|
| Transformer | 300W Multi-Tap with Photocell & Timer | $140 - $180 |
| Main Trunk Wire | 100 ft roll of 12AWG Direct Burial | $55 - $75 |
| Path Lights (x5) | Brass, Integrated 3W LED (3000K) | $200 - $250 |
| Spotlights (x3) | Cast Aluminum, Adjustable Glare Shield | $120 - $150 |
| Step Lights (x2) | Recessed Hardscape, IP67 Rated | $80 - $100 |
| Connectors & Misc | Silicone wire nuts, junction boxes, stakes | $40 - $60 |
| Total DIY Cost | $635 - $815 |
By selecting integrated LED fixtures and adhering to proper wire gauge calculations, this system will require virtually zero maintenance beyond occasionally wiping debris off the lenses and adjusting the transformer's photocell sensitivity as the seasons change.

