
Landscaping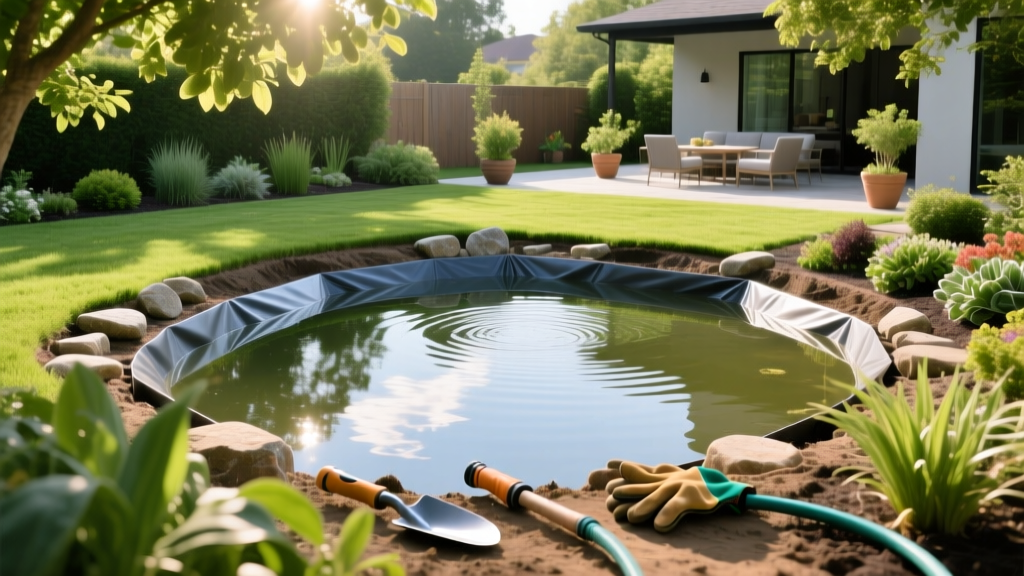
How to Build a Beginner-Friendly Backyard Pond: Step-by-Step
Building a backyard pond is fundamentally a plumbing and excavation project disguised as a landscaping feature. While the end result is a tranquil water garden, the success of your ecosystem relies entirely on the hidden infrastructure beneath the waterline. For beginners, the most common point of failure is underestimating the required volume, filtration, and edge detailing. This guide breaks down the exact specifications, material costs, and construction steps required to build a sustainable 500-gallon backyard pond that maintains itself with minimal intervention.
The "Small Pond Trap": Why Size and Depth Matter
Many first-time builders assume a smaller pond is easier to maintain. The opposite is true. Ponds under 250 gallons lack the thermal mass to buffer against rapid temperature swings, which triggers massive algae blooms and stresses fish. Furthermore, shallow ponds freeze solid in winter and overheat in summer.
Warning: The 500-Gallon Minimum
Aim for a minimum footprint of 7x10 feet and a depth of 18 to 24 inches. This yields roughly 500 to 600 gallons. At 24 inches deep, the water at the bottom remains significantly cooler in July and avoids freezing to the benthic zone in January, providing a safe overwintering habitat for koi and goldfish.
Aim for a minimum footprint of 7x10 feet and a depth of 18 to 24 inches. This yields roughly 500 to 600 gallons. At 24 inches deep, the water at the bottom remains significantly cooler in July and avoids freezing to the benthic zone in January, providing a safe overwintering habitat for koi and goldfish.
Material Breakdown: Choosing Your Pond Shell
You have three primary options for containing the water. While preformed tubs are heavily marketed to beginners, they rarely offer the natural aesthetic or longevity required for a permanent landscape feature.
| Material | Lifespan | Cost (500 Gal) | Pros & Cons |
|---|---|---|---|
| Preformed HDPE | 10-15 Years | $300 - $500 | Easy to install, but rigid shapes look unnatural and limit planting shelves. |
| 45-Mil EPDM Liner | 25-40 Years | $450 - $700 | Industry standard. Highly flexible, puncture-resistant, and allows custom natural shapes. |
| Concrete/Gunite | 50+ Years | $3,000+ | Permanent, but prone to cracking from soil settling and requires professional installation. |
For a beginner-friendly build that balances cost and longevity, Firestone PondGard 45-mil EPDM rubber liner is the undisputed industry standard. It stretches to accommodate soil settling and resists UV degradation when covered by water or rock.
Step-by-Step Excavation and Plumbing
Proper excavation dictates the health of your pond. Do not simply dig a bowl-shaped hole; you must incorporate specific architectural features for plant life and predator protection.
- Outline and Dig the Shelves: Use a garden hose to map the shape. Dig a perimeter shelf that is 12 inches deep and 10 to 14 inches wide. This shelf holds marginal plants and creates a shallow escape route for wildlife. The center basin should drop to 24 inches.
- Remove Debris and Tamp: Remove all sharp rocks, glass, and exposed tree roots. Use a hand tamper to compact the soil. Edge Case: If you are building within 10 feet of large established trees, lay down a copper root barrier, as aggressive roots will eventually seek out the moisture and puncture the liner.
- Install Geotextile Underlayment: Drape a 3.5 oz non-woven geotextile fabric over the entire hole. Never use old carpet as a substitute; carpet retains moisture, rots, and breeds anaerobic bacteria that will degrade the EPDM liner over time.
- Lay the EPDM Liner: Unfold the liner on a warm, sunny day (heat makes the rubber highly pliable). Push it into the shelves and corners, leaving at least 18 inches of excess overlap on all sides.
- Set the Skimmer and BioFalls: Cut an 'X' in the liner where your skimmer faceplate will go. Attach the liner to the skimmer using the manufacturer's silicone sealant and mechanical clamp. Route flexible PVC tubing from the skimmer to the BioFalls filter on the opposite side of the pond.
Sizing Your Pump and Filtration System
A backyard pond requires two types of filtration to maintain clear water: mechanical and biological. The skimmer acts as the mechanical filter, pulling surface debris into a net before it sinks and rots. The BioFalls filter provides biological filtration, offering high-surface-area plastic media where nitrifying bacteria colonize to break down toxic fish waste (ammonia) into harmless nitrates.
The Pump Sizing Formula
Your pump must circulate the total volume of your pond every 1 to 2 hours. For a 600-gallon pond, you need a pump rated for 600 to 1,200 Gallons Per Hour (GPH).
Head Pressure Adjustment: Pump ratings are tested at zero resistance. For every 1 foot of vertical rise from the pond surface to the top of your waterfall, add 1 foot of head pressure. If your waterfall is 3 feet high, a pump rated for 1,000 GPH will only deliver about 700 GPH. Always buy a pump 20% larger than your baseline calculation to account for plumbing friction and vertical lift.
Your pump must circulate the total volume of your pond every 1 to 2 hours. For a 600-gallon pond, you need a pump rated for 600 to 1,200 Gallons Per Hour (GPH).
Head Pressure Adjustment: Pump ratings are tested at zero resistance. For every 1 foot of vertical rise from the pond surface to the top of your waterfall, add 1 foot of head pressure. If your waterfall is 3 feet high, a pump rated for 1,000 GPH will only deliver about 700 GPH. Always buy a pump 20% larger than your baseline calculation to account for plumbing friction and vertical lift.
Ecological Balance: Plants and Algae Control
Beginners often rely on chemical algaecides to maintain water clarity. This is a temporary fix that disrupts the nitrogen cycle. True water clarity comes from ecological competition. According to aquatic plant guidelines from the University of Minnesota Extension, you should aim to cover 40% to 60% of the pond's surface area with vegetation once mature.
- Deep Water Plants: Hardy water lilies (Nymphaea) provide essential surface shade, lowering water temperature and starving string algae of sunlight.
- Marginal Plants: Place Creeping Jenny, Sweet Flag, and Dwarf Rushes on the 12-inch shelf. These are heavy feeders that pull excess nitrates directly from the water column.
- Oxygenators: Submerged plants like Hornwort absorb dissolved nutrients and release oxygen at the benthic level.
Troubleshooting Common Beginner Failures
Problem: Mosquito Breeding
Cause: Stagnant water allows mosquito larvae to attach to the surface tension and breathe.
Fix: Mosquitoes cannot breed in moving water. A properly sized skimmer creates a constant surface draw, pulling larvae into the filter net where they are trapped. The EPA's mosquito control guidelines emphasize that maintaining water circulation in landscape features is one of the most effective non-chemical prevention methods.
Problem: "Pea Soup" Green Water
Cause: Suspended single-cell algae caused by excess nutrients and sunlight, usually occurring in the first 4 weeks after filling the pond before the biological filter has matured.
Fix: Do not drain and refill the pond; this resets the nitrogen cycle. Add a UV clarifier to your plumbing line, which clumps the algae together so the skimmer can catch it. Alternatively, add a heavy dose of beneficial bacteria (like Aquascape Beneficial Bacteria Concentrate) and introduce more floating plants to shade the water.
Problem: Water Loss Exceeding Evaporation
Cause: A punctured liner or a "splash leak" at the waterfall.
Fix: Turn off the pump and let the water drop. The leak will reveal itself exactly at the water line where the drop stops. If the water drops to the bottom of the skimmer opening, the leak is in the skimmer faceplate seal. If it drops below the skimmer, the main basin liner is compromised. Always check waterfall edges first; shifting rocks often cause water to splash outside the liner boundary, which accounts for 80% of perceived "leaks" in new builds.
"The secret to a low-maintenance backyard pond is front-loading the labor. Spend 70% of your budget and time on excavation depth, plumbing sizing, and edge detailing. The remaining 30% should be spent on the aesthetic rockwork and plants. If the bones are built correctly, the ecosystem will balance itself within the first 60 days."
Building your first backyard pond requires patience during the excavation phase, but the reward is a self-sustaining landscape feature that increases property value and local biodiversity. By adhering to the 500-gallon minimum, utilizing 45-mil EPDM, and properly sizing your skimmer and pump, you eliminate the vast majority of maintenance headaches that plague poorly planned water gardens.

