
Landscaping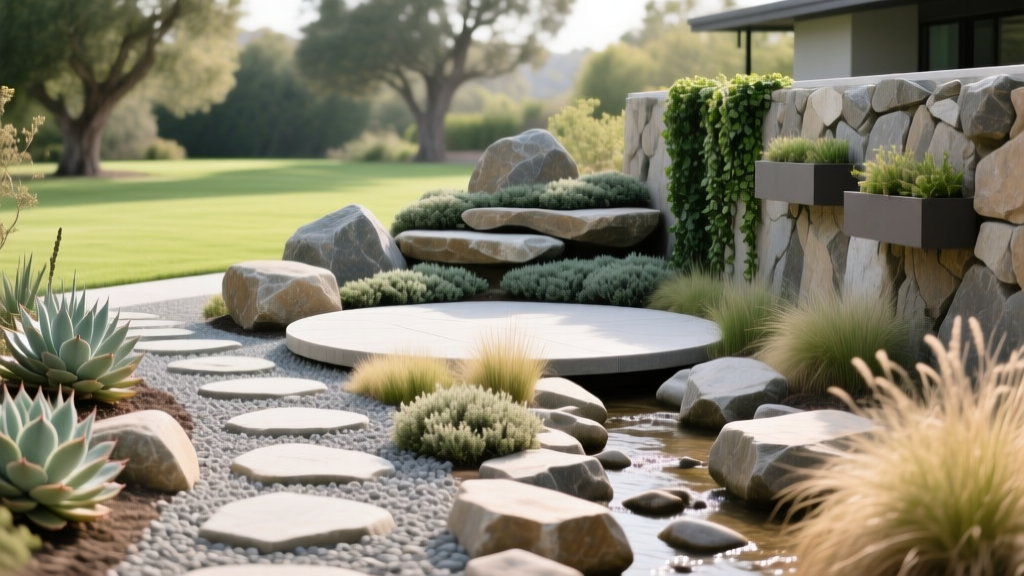
5 Beginner Landscape Ideas With Rocks for Low-Maintenance Yards
Why Rock Landscaping is the Ultimate Beginner Project
Transitioning from high-maintenance turf to hardscaping reduces outdoor water usage by up to 40% while eliminating weekly mowing. For beginners, landscape ideas with rocks offer the highest return on investment because they require minimal specialized tools and forgive minor grading errors. Unlike poured concrete or mortared brickwork, dry-laid rock projects allow you to adjust, reset, and modify your design as you learn. As of 2026, the national average cost for professional rock landscaping installation ranges from $15 to $25 per square foot, but DIY beginners can achieve identical results for $3 to $6 per square foot by sourcing bulk materials locally.
The Golden Rule of Rock Placement: Never place rocks directly on top of bare soil. Without a proper woven geotextile base and edge containment, rocks will sink into the mud within a single freeze-thaw cycle, and weeds will penetrate the gaps in under three months.
5 Beginner-Friendly Landscape Ideas With Rocks
1. The Dry Creek Bed (Rainwater Management)
A dry creek bed solves yard drainage issues while adding dynamic visual flow. According to the EPA's Green Infrastructure guidelines, permeable rock channels slow stormwater runoff, allowing it to percolate into the soil rather than eroding your topsoil. To build one, dig a trench 3 feet wide and 6 inches deep, ensuring a minimum slope of 1/8 inch per foot (a 1% grade) to encourage water movement. Line the trench with 4 oz woven polypropylene landscape fabric. Fill the center channel with 3-to-5-inch rounded cobble, and flank the edges with 1-to-2-inch river rock to create a natural, tapered shoreline effect.
2. River Rock Mulch Beds (Weed Suppression)
Replacing organic wood mulch with 1-to-3-inch river rock eliminates the need for annual replenishment. Wood mulch decomposes, depleting soil nitrogen and harboring fungal spores. River rock reflects sunlight, keeping root zones cooler in summer. For optimal weed suppression, apply the rock at a strict 2-inch depth. Any deeper, and the rocks will trap moisture against plant stems, causing crown rot. Any shallower, and sunlight will penetrate to the soil, germinating weed seeds. According to Penn State Extension, maintaining a 3-inch gap between the rock mulch and the base of tree trunks is critical to prevent bark decay and rodent nesting.
3. Flagstone Stepping Stone Pathways
For a beginner-friendly walkway, skip the mortar and use dry-laid flagstone. Purchase 1.5-inch thick Pennsylvania Bluestone or Arizona Buff flagstone (thinner stones will crack under foot traffic). Space the stones 4 to 6 inches apart to allow for low-growing ground covers like creeping thyme or Irish moss. The secret to a level path is the base: excavate 5 inches of soil, lay your fabric, add 3 inches of compacted crushed limestone, and top it with 1 inch of stone dust. The stone dust acts as a leveling bed that locks the flagstone in place once watered and tamped.
4. Boulder Focal Points with Ornamental Grasses
Large boulders anchor garden beds and provide year-round structure. The most common beginner mistake is the 'dropped marble' effect—placing a boulder directly on the grass surface. To achieve a natural look, you must bury at least one-third of the boulder's height below the soil grade. This mimics natural geological outcroppings. Pair a 2-ton Moss Rock or Granite boulder with drought-tolerant ornamental grasses like Karl Foerster Feather Reed or Blue Fescue. The University of Minnesota Extension recommends planting grasses in odd-numbered clusters (3 or 5) around the boulder's base to soften the hard stone edges.
5. Gabion Wall Raised Planters
Gabion walls—wire mesh cages filled with stone—require zero masonry skills to build. Purchase pre-assembled 9-gauge galvanized steel gabion baskets (typically 3x3x3 feet). The critical engineering detail is the fill material: never use round river rock, as it will shift and bulge the wire mesh outward. Instead, use 4-to-6-inch angular quarry stone or crushed granite. The sharp, fractured edges of angular stone interlock tightly, creating a rigid, self-supporting mass that will not deform the cage. Line the interior soil-facing side with heavy-duty permeable weed barrier before filling with soil to prevent the planting mix from washing out through the rocks.
2026 Material Cost & Coverage Calculator
Budgeting for rock landscaping requires understanding bulk weight versus coverage area. The table below outlines current 2026 average pricing for bulk materials delivered from local quarries.
| Material Type | Avg. Cost per Ton | Coverage (at 2" Depth) | Best Use Case |
|---|---|---|---|
| 1-3" River Rock | $60 - $120 | ~100 sq. ft. | Mulch beds, dry creek edges |
| 3/4" Crushed Granite | $45 - $85 | ~120 sq. ft. | Pathway base, patio sub-base |
| 3-5" Cobblestone | $90 - $160 | ~70 sq. ft. | Dry creek centers, drainage |
| 4-6" Angular Quarry | $55 - $95 | ~65 sq. ft. | Gabion cage fill, retaining |
Critical Installation Mistakes to Avoid
- Using Non-Woven Weed Barrier: Cheap, paper-like non-woven fabrics degrade under UV exposure and tear under the weight of river rock. Always invest in woven polypropylene fabric rated for at least 4 oz per square yard (approx. $0.45 to $0.65 per sq. ft.).
- Skipping Landscape Edging: Without physical containment, 1-inch river rock will migrate into adjacent lawn areas, destroying mower blades. Install heavy-duty aluminum or steel landscape edging, driven 4 inches into the soil, to create a permanent physical barrier between rock beds and turf.
- Ignoring the Frost Line: In USDA Zones 3 through 6, freezing groundwater will heave improperly bedded flagstones and boulders upward. Always excavate below the local frost line for structural elements, or use a 4-inch compacted gravel base that allows water to drain away from the stone.
Step-by-Step Base Preparation Guide
The longevity of any rock landscape depends entirely on the sub-base. Follow this exact sequence for permanent installations:
- Excavate and Grade: Remove topsoil to a depth of 3 to 5 inches. Use a landscaping rake to grade the soil away from your home's foundation at a 2% slope (1/4 inch drop per foot).
- Install Edging: Hammer steel edging stakes into the perimeter trenches, ensuring the top of the edging sits 1/2 inch below the final rock surface grade so it remains hidden.
- Deploy Fabric: Roll out woven geotextile fabric, overlapping seams by a minimum of 6 inches. Secure the fabric every 3 feet using 6-inch galvanized landscape staples.
- Cut Planting Holes: Use a utility knife to cut an 'X' in the fabric where shrubs or ornamental grasses will be planted. Fold the flaps back, dig the planting hole, and fold the fabric back around the plant stem after backfilling.
- Distribute Rock: Dump rock in small piles and spread with a steel landscaping rake. Do not use a plastic leaf rake, as the tines will snap under the weight of the stone.
'The most successful rock gardens mimic natural geological formations. By varying stone sizes, burying a portion of the larger boulders, and utilizing angular gravel to lock materials in place, beginners can achieve a professional, high-end landscape design without heavy machinery.'

