
Landscaping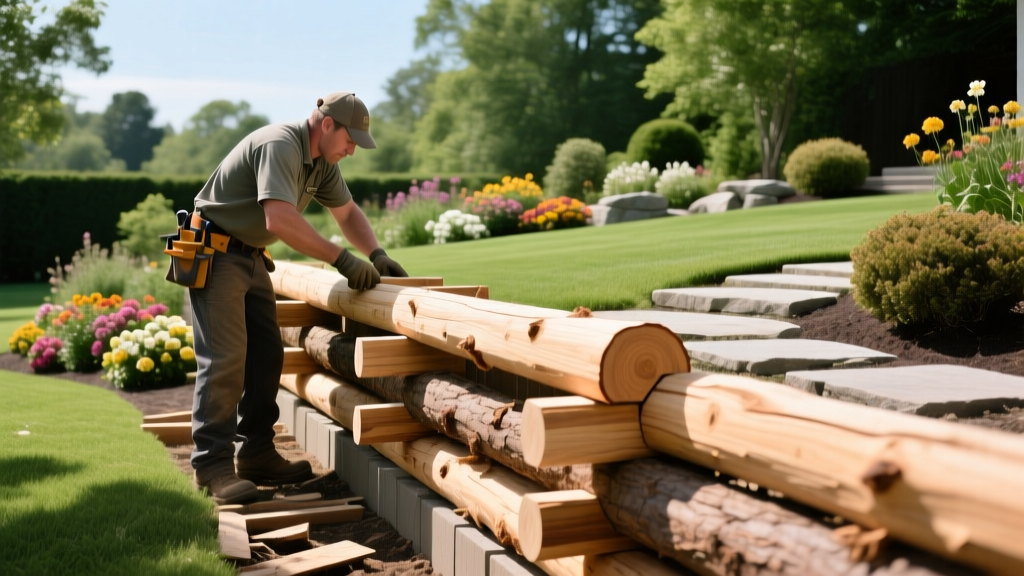
How to Build a Retaining Wall With Treated Landscape Logs
Why Choose Landscape Logs for Retaining Walls?
Landscape logs offer a natural, rustic aesthetic that blends seamlessly with garden beds and wooded properties while providing the structural mass needed to hold back soil. Unlike segmental concrete blocks, which require precise leveling and specialized base materials, timber walls rely on mass, gravity, and mechanical pinning. However, because wood is an organic material, success depends entirely on selecting the correct treatment grade and managing hydrostatic pressure through proper drainage.
According to the EPA guidelines on wood preservatives, residential landscape timbers must be treated with Alkaline Copper Quaternary (ACQ) or Copper Azole (CA) to resist fungal decay and termite damage. Chromated Copper Arsenate (CCA) is largely restricted for residential use. When purchasing landscape logs, verify the end-tag for the AWPA (American Wood Protection Association) use category. You must select UC4A (Ground Contact) or UC4B (Heavy-Duty Ground Contact). Standard above-ground treatments (UC3) will rot within three to five years when buried in a retaining wall trench.
Pros and Cons of Timber Log Walls
- Pros: Lower upfront material cost compared to natural stone or poured concrete; easier to cut and customize on-site; forgiving on minor base imperfections due to the flexible nature of pinned timber.
- Cons: Shorter lifespan (15-25 years vs. 50+ for concrete); limited to walls under 4 feet in height without engineered geogrid reinforcement; heavy logs require manual lifting or machinery.
Material Sizing and Cost Breakdown
The structural integrity of a log wall relies on the diameter of the timber. For walls under 24 inches, 3-inch to 4-inch diameter logs are sufficient. For walls between 24 and 48 inches, you must step up to 6-inch to 8-inch diameter logs to resist the lateral earth pressure. Below is a breakdown of typical 2026 material costs for an 8-foot by 3-foot high retaining wall.
| Material | Specification | Estimated Unit Cost | Quantity Needed (8x3 Wall) |
|---|---|---|---|
| Landscape Logs | 8-ft length, 6-in diameter, UC4A treated | $35 - $45 per log | 16 logs |
| Anchoring Rebar | 1/2-inch (#4) galvanized, 24-in cut | $4 - $6 per piece | 24 pieces |
| Timber Screws | 1/2-in x 10-in galvanized structural | $1.50 per screw | 32 screws |
| Drainage Gravel | 3/4-inch washed crushed stone | $55 - $70 per ton | 1.5 tons |
| Drain Pipe | 4-in perforated PVC, wrapped in fabric | $25 per 10-ft roll | 1 roll |
Essential Tools and Material Checklist
Do not attempt to cut treated landscape logs with a standard woodworking blade. The ACQ and CA preservatives are highly corrosive and will ruin standard steel. Use a carbide-tipped chainsaw bar or a reciprocating saw with a bi-metal demolition blade. Always wear a respirator when cutting treated wood to avoid inhaling copper-based dust, as noted in the AWPA U1 Commodity Standard safety addendums.
- Shovel, trenching spade, and hand tamper
- Rotary hammer drill with a 5/8-inch masonry bit (for pre-drilling logs)
- Chainsaw with carbide chain or heavy-duty reciprocating saw
- 4-foot magnetic spirit level and string line
- Sledgehammer (10 lb) for driving rebar
- Plate compactor (rental) for base and backfill
Step-by-Step Installation Guide
Step 1: Trenching and Base Preparation
The trench dictates the lifespan of your wall. Excavate a trench that is 12 inches wide and deep enough to bury the first course of logs completely, plus a 4-inch base of compacted gravel. For a 6-inch log, your trench depth should be at least 10 inches. Fill the bottom 4 inches with 3/4-inch crushed stone and compact it with a plate compactor. This creates a free-draining base that prevents frost heave from pushing the wall upward in freezing climates. Never use sand or dirt for the base layer, as these retain moisture and shift under load.
Step 2: Laying the First Course and Deadman Anchors
Place the first course of landscape logs directly onto the compacted gravel base. Use a string line to ensure the front face is perfectly straight and level. To anchor this base course, pre-drill 5/8-inch holes vertically through the center of each log, spaced every 24 inches. Drive 24-inch lengths of #4 galvanized rebar through the holes using a sledgehammer until the rebar is flush with or slightly below the top of the log.
Expert Tip: If your wall exceeds 24 inches in height, you must install 'deadman' anchors on the first course. A deadman is a T-shaped assembly where a perpendicular log is buried 4 feet back into the slope, connected to the wall face via galvanized aircraft cable or a perpendicular timber tie-back. This counteracts the lateral overturning force of the soil.
Step 3: Stacking, Pinning, and Backfilling
Stack the second course of logs, staggering the vertical seams by at least 24 inches (similar to bricklaying). Pre-drill and drive 10-inch galvanized timber screws through the top log into the bottom log to lock them together. Repeat this process for subsequent courses.
As you build upward, you must manage hydrostatic pressure. Water trapped behind the wall is the number one cause of timber retaining wall failure. Behind the logs, lay a 4-inch perforated PVC drain pipe at the base of the first course, ensuring it slopes slightly toward a daylight exit point. Backfill the space immediately behind the wall with 3/4-inch washed crushed stone to a depth of 12 inches. The crushed stone acts as a French drain, allowing water to percolate down into the pipe rather than pushing against the wood. Wrap the gravel in landscape fabric before adding native topsoil to prevent silt from clogging the drainage matrix.
'Never backfill a retaining wall with native clay soil directly against the timber. Clay expands when wet, increasing lateral pressure by up to 30%, and it traps moisture against the wood, accelerating decay even on UC4B treated logs.'
Common Mistakes That Cause Wall Failure
Warning: Ignoring Local Building Codes
Many municipalities require a stamped engineering permit for retaining walls over 36 or 48 inches high. Building a 4-foot timber wall without geogrid reinforcement or a permit can result in fines and forced removal. Always check with your local zoning office before excavating.
Warning: Using Pea Gravel for Drainage
Homeowners often mistake smooth pea gravel for drainage stone. Pea gravel lacks angular edges and does not interlock, meaning it can wash away or shift under pressure, leaving voids behind your wall. Always specify 'washed, angular crushed stone' from your supplier.
By adhering to AWPA treatment standards, utilizing mechanical rebar anchoring, and engineering a proper crushed-stone drainage envelope, your landscape log retaining wall will provide decades of structural support and natural curb appeal.

