
Landscaping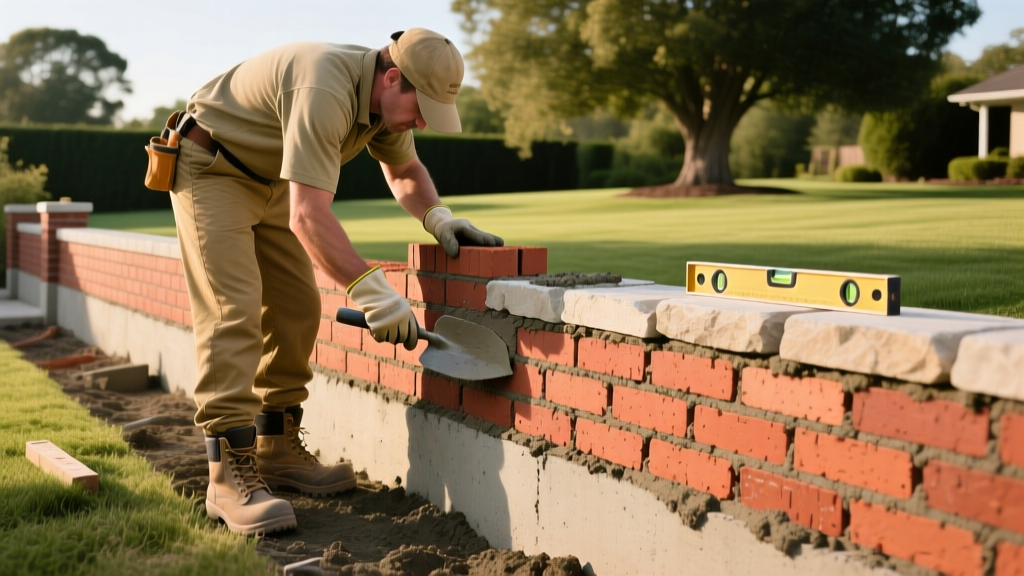
How to Build a Structural Brick Wall Fence: Footing to Coping
Constructing a freestanding brick wall fence is one of the most demanding masonry projects a homeowner or landscape contractor can undertake. Unlike a brick veneer that relies on a wood or steel frame for structural support, a masonry privacy fence must independently resist lateral wind loads, soil hydrostatic pressure, and frost heave. When executed correctly, a double-wythe brick wall fence offers unparalleled longevity, acoustic dampening, and security, easily lasting over a century with minimal maintenance.
This guide details the exact engineering principles, material specifications, and step-by-step construction methods required to build a 6-foot-tall structural brick wall fence that meets modern building codes and withstands severe weather events.
Planning, Permitting, and Soil Analysis
Before purchasing a single pallet of clay brick, you must navigate local zoning ordinances and assess your site's soil bearing capacity. Most municipalities cap freestanding masonry fences at 6 feet in rear yards and 4 feet in front yards. Furthermore, the International Residential Code (IRC) requires that any masonry wall exceeding 4 feet in height be designed to withstand local wind shear forces, which often mandates the inclusion of steel reinforcement or pilasters.
⚠️ Structural Warning: Never build a single-wythe (one-brick thick) freestanding brick wall fence higher than 4 feet. Wind loads exceeding 90 mph can cause catastrophic shear failure without the mass, interlocking strength, and cavity drainage of a double-wythe assembly.
Conduct a percolation test and soil analysis. Expansive clay soils require deeper, wider footings and potentially a structural engineer's stamp to account for soil swelling during wet seasons. According to the Brick Industry Association Technical Notes, foundations must always extend below the local frost line to prevent seasonal freezing from lifting and cracking the masonry.
Material Specifications and 2026 Cost Breakdown
Selecting the correct materials is non-negotiable. You must use SW (Severe Weathering) grade face brick, which is fired to a higher density to resist water absorption and freeze-thaw spalling. For the mortar, Type S is mandatory for below-grade footing courses and highly recommended for the entire wall due to its high tensile bond strength.
| Material | Specification | Estimated 2026 Cost |
|---|---|---|
| Face Brick | SW Grade, Solid or Core (Max 25% voids) | $0.85 - $1.45 per unit |
| Mortar Mix | Type S (Portland cement + Hydrated lime + Sand) | $9.50 per 80-lb bag |
| Concrete Footing | 4,000 PSI air-entrained mix | $175 - $210 per cubic yard |
| Rebar | #4 (1/2-inch) Epoxy-coated steel | $12.00 per 20-ft stick |
| Wall Ties | Corrugated stainless steel (304 grade) | $0.45 per tie |
Note: A standard 6-foot tall, double-wythe brick wall fence requires approximately 14 modular bricks per square foot of wall face. Expect total material and labor costs to range between $65 and $115 per linear foot, depending on regional masonry rates and site accessibility.
Step 1: Excavating and Pouring the Frost-Depth Footing
The footing is the literal foundation of your brick wall fence. It must be poured below the frost line (e.g., 36 inches deep in USDA Hardiness Zone 5) and be at least twice as wide as the wall itself. For a double-wythe wall that is 8 inches thick, the footing must be a minimum of 16 inches wide and 12 inches thick.
- Trenching: Excavate a trench to the required frost depth. Compact the subgrade soil using a mechanical plate compactor to achieve a minimum 95% Proctor density.
- Formwork and Rebar: Build wooden forms. Suspend two continuous runs of #4 epoxy-coated rebar on chairs, keeping them 3 inches above the subgrade and 3 inches inward from the form edges. This prevents moisture from wicking into the steel and causing rust-jacking.
- Pouring: Order 4,000 PSI air-entrained concrete. The air-entrainment (microscopic bubbles) is critical for exterior flatwork, giving water room to expand when it freezes. Pour, screed, and float the concrete perfectly level.
- Curing: Allow the footing to cure for a minimum of 7 days before laying the first course of brick. Keep it damp by misting and covering with burlap to prevent plastic shrinkage cracking.
Step 2: Laying the First Course and Installing Weep Holes
The first course of brick dictates the alignment for the entire wall. Snap a chalk line centered on the footing. Mix your Type S mortar to a consistency that holds its shape when squeezed in a gloved hand but is plastic enough to spread easily.
💡 Pro Tip for Mortar Mixing: A proper Type S mix ratio is 1 part Portland cement, 1/2 part hydrated lime, and 4.5 parts damp, loose masonry sand. Never add dish soap or unapproved plasticizers to increase workability; this compromises the mortar's compressive strength and bond.
If your brick wall fence will have soil graded against the backside (acting as a retaining structure), hydrostatic pressure is your greatest enemy. Water trapped behind the wall will push it over. You must install weep holes in the first course above grade.
- Place 1/2-inch diameter copper or PVC tubes vertically through the head joints of the first course.
- Space weep holes exactly every 32 inches (every 4th standard modular brick).
- Behind the weep holes, backfill with 12 inches of clean, washed 3/4-inch gravel wrapped in geotextile fabric to prevent soil from clogging the drainage path.
Step 3: Double-Wythe Construction and Wall Ties
A double-wythe wall consists of two parallel layers of brick (wythes) separated by a 1-inch to 2-inch air cavity. This cavity allows any water that penetrates the outer wythe to drain down the back of the bricks and exit through the weep holes.
Implementing Corrugated Wall Ties
To lock the two wythes together so they act as a single structural mass, you must use corrugated stainless steel wall ties. According to guidelines published by the Portland Cement Association and masonry best practices, wall ties must be embedded in the mortar joints of both wythes.
- Vertical Spacing: Install ties every 16 inches (every 5th course of standard brick).
- Horizontal Spacing: Install ties every 24 inches along the length of the wall.
- Staggering: Stagger the ties in a diamond pattern to ensure uniform load distribution.
As you build upward, maintain the 1-inch cavity strictly clear of mortar droppings. Masons use a piece of rigid foam or a specialized cavity net to catch 'snots' (mortar droppings) as they work, pulling the foam up as the wall rises. If mortar bridges the cavity, it creates a direct pathway for water to bypass the drainage plane and cause interior efflorescence.
Step 4: Tooling the Joints and Installing Coping
Water management doesn't stop at the weep holes; the exterior joints must be watertight. Wait until the mortar is 'thumbprint hard'—firm enough to resist light pressure but soft enough to compress. Use a convex jointer tool to create a concave joint profile. This compresses the mortar tightly against the brick edges, creating a dense, weather-resistant seal. Raked or flush joints trap water and are strictly prohibited for exterior brick wall fences in freezing climates.
The Critical Role of Coping
The top of a masonry wall is its most vulnerable point. Horizontal mortar joints absorb significantly more water than vertical joints. You must cap the wall with pre-cast concrete, natural stone, or terra-cotta coping.
'Failure to install a proper coping with a drip edge is the number one cause of premature spalling and efflorescence in masonry fences. The coping must overhang the wall face by a minimum of 1.5 inches on all sides and feature a routed drip kerf on the underside to force water to drop to the ground rather than running back down the brick face.'
Set the coping stones in a thick bed of polymer-modified mortar. Seal the coping-to-brick transition with a high-quality polyurethane masonry sealant to prevent wind-driven rain from entering the top of the cavity.
Common Failure Modes and Troubleshooting
Even with meticulous planning, environmental factors can challenge a brick wall fence. Recognizing early warning signs allows for targeted remediation.
- Efflorescence (White Powdery Stains): This indicates water is moving through the wall, dissolving soluble salts in the clay or mortar, and depositing them on the surface. Fix: Ensure weep holes are clear, verify the coping drip edge is functioning, and apply a breathable silane-siloxane penetrating sealer (like Prosoco Siloxane PD) to the exterior face.
- Step-Cracking: Diagonal cracks following the mortar joints usually indicate differential settlement of the footing. Fix: If the crack is wider than 1/4 inch, consult a structural engineer. Minor cracks can be routed and filled with a color-matched elastomeric masonry caulk.
- Spalling (Flaking Brick Faces): Caused by water entering the brick and freezing. This almost always results from using MW (Moderate Weathering) brick instead of SW brick, or from allowing snow to pile up against the wall without a drainage buffer.
Project Summary Checklist
- Verify local zoning height limits and pull necessary permits.
- Excavate footing below the frost line and install #4 rebar.
- Use only SW-grade face brick and Type S mortar.
- Install weep holes every 32 inches if soil is graded against the wall.
- Tie double wythes together with 304-grade stainless steel corrugated ties.
- Tool all joints to a concave profile when thumbprint hard.
- Cap with overhanging coping featuring a drip kerf.

