
Landscaping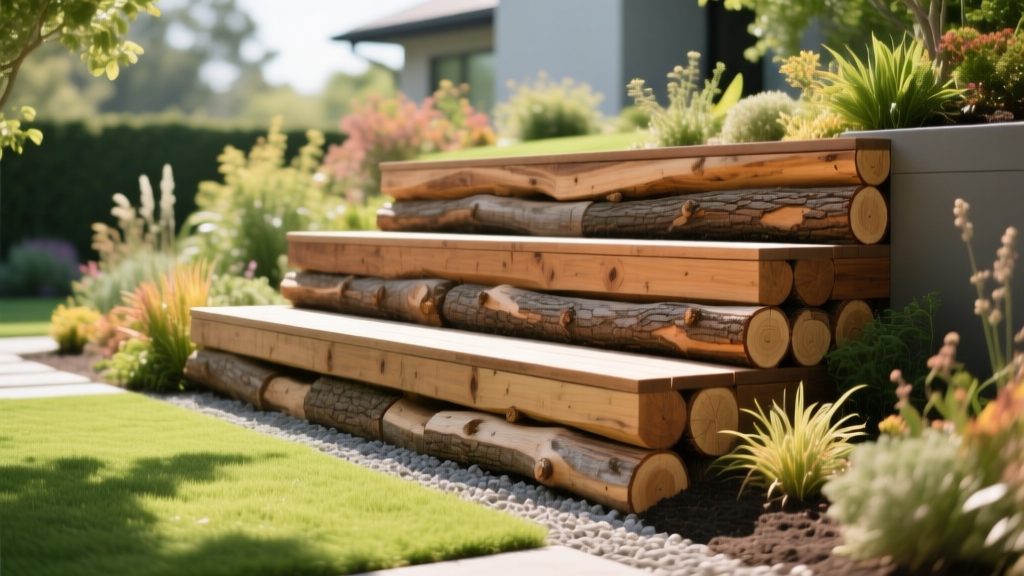
How to Build a Tiered Retaining Wall Using Landscaping Logs
Material Selection: Engineering the Right Landscaping Logs
Not all landscaping logs are engineered for structural retention. When building a tiered retaining wall, the primary enemy is soil-borne moisture and fungal decay. Standard garden border timbers will rot and fail under the lateral earth pressure of a tiered wall within three to five years. You must select logs rated for structural ground contact.
According to the American Wood Protection Association (AWPA), pressure-treated lumber is classified by Use Categories. For a retaining wall holding back soil, you must use UC4B (Structural Ground Contact) rated timber, not the more common UC4A (General Ground Contact). UC4B logs contain a higher retention level of preservatives—typically Micronized Copper Azole (MCA) or Alkaline Copper Quaternary (ACQ)—penetrating deeper into the wood core to resist the constant moisture and microbial activity found in backfilled soil.
Standard landscaping logs measure 3.5 inches by 4.5 inches by 8 feet. For walls exceeding 3 feet in total tiered height, consider upgrading to 6x6 structural timbers, though 4x5 landscape logs are sufficient for terraced garden beds up to 2.5 feet per tier.
2026 Material and Tool Cost Matrix
Accurate budgeting requires current market pricing. Below is the estimated material cost breakdown for a 20-foot long, 2-tier (24-inch total height) retaining wall using UC4B landscaping logs.
| Material / Tool | Specification | Quantity | Est. 2026 Cost |
|---|---|---|---|
| Landscaping Logs | UC4B MCA Treated, 4x5x8ft | 16 logs | $288 ($18 ea) |
| Galvanized Rebar | #4 (1/2-inch) x 24-inch | 20 pins | $120 ($6 ea) |
| Timber Screws | 1/4" x 10" Structural (e.g., Simpson Strong-Tie) | 1 box | $85 |
| Drainage Gravel | 3/4-inch Washed (Clean) Gravel | 1.5 tons | $90 ($60/ton) |
| Perforated Pipe | 4-inch SDR 35 PVC | 20 feet | $45 |
| Geotextile Fabric | Non-woven drainage filter fabric | 1 roll | $55 |
Note: Always use hot-dipped galvanized or polymer-coated structural screws. The copper in MCA and ACQ wood treatments will rapidly corrode standard steel or uncoated zinc fasteners, leading to catastrophic anchor failure.
Site Preparation and the 10% Burial Rule
A retaining wall's stability is dictated by its base. Before cutting any landscaping logs, map the trench. The industry standard for timber retaining walls is the 10% burial rule: the first course of logs must be buried to a depth equal to 10% of the total exposed wall height, plus an additional 4 inches for the gravel base.
For a 24-inch tiered wall, your trench must be excavated to a depth of roughly 6.5 inches. The trench width should be twice the width of the log (approx. 10 inches) to allow for working space and base compaction. If your trench exceeds 5 feet in depth at any point for a multi-tier structural wall, consult OSHA trenching and excavation safety guidelines regarding soil sloping and shoring requirements.
Base Compaction
- Excavate the trench to the calculated depth, ensuring the bottom is level using a 4-foot torpedo level.
- Add a 4-inch layer of 3/4-inch washed gravel. Do not use crushed limestone or pea gravel; washed gravel locks together when compacted and prevents capillary water wicking.
- Compact the gravel base using a manual hand tamper or a mechanical plate compactor until the base is rigid and does not shift underfoot.
Laying the First Course and Pinning
The first course of landscaping logs bears the brunt of the lateral earth pressure and must be perfectly level. Any deviation here will compound as you stack subsequent tiers.
- Lay the first course of logs end-to-end in the trench. Stagger the joints if using multiple 8-foot sections to create a continuous run.
- Pre-drill holes through the top center of each log using a 9/16-inch auger bit. Space holes every 3 feet, and place one hole 12 inches from each end.
- Drive 24-inch #4 galvanized rebar pins through the holes using a 3-pound mini-sledgehammer. The rebar should penetrate 18 to 20 inches into the compacted gravel base below.
- Cut off any exposed rebar flush with the top of the log using an angle grinder with a metal cutoff wheel.
Warning: Hydrostatic Pressure Failure
The most common cause of landscaping log wall failure is not wood rot, but hydrostatic pressure. When rain saturates the backfill soil, water weight pushes against the wall. If you do not install a drainage system, the wall will bow, snap its rebar pins, and collapse outward. Never skip the perforated pipe and gravel backfill.
Installing Deadmen Anchors for Tiered Walls
For walls over 2 feet high, vertical rebar pins are insufficient to resist the overturning moment of saturated soil. You must install "deadmen"—T-shaped anchors that tie the wall back into the undisturbed soil behind it.
- Placement: Install a deadman every 4 to 6 linear feet along the wall.
- Construction: Use a 4-foot length of landscaping log placed perpendicular to the wall, buried in the backfill. Connect it to the wall face using two 10-inch galvanized timber screws driven at opposing 15-degree angles.
- Soil Interaction: The deadman acts as a physical stop. As the wall tries to push forward, the deadman pulls against the compacted backfill soil, neutralizing the lateral force.
Stacking, Backfilling, and Drainage Integration
Once the first course is pinned and deadmen are attached, begin stacking the second tier. Stagger the vertical seams by at least 2 feet (similar to bricklaying). Secure the second tier to the first using 10-inch structural timber screws driven at a slight angle (toe-screwing) through the top log into the bottom log.
The Drainage Envelope
Before final backfilling, you must create a drainage envelope behind the logs to manage groundwater, a critical step noted in environmental guidelines for managing treated wood in wet environments.
- Drape non-woven geotextile fabric over the back of the wall, allowing excess to drape over the ground behind the trench.
- Lay the 4-inch perforated PVC pipe directly behind the first course of logs, ensuring the holes face downward. The pipe must have a minimum 1% slope (1/8-inch drop per foot) to daylight at the end of the wall or a dry well.
- Fill the space immediately behind the logs with 3/4-inch washed gravel up to 4 inches below the final grade.
- Fold the excess geotextile fabric over the top of the gravel to create a "burrito" wrap. This prevents fine topsoil from migrating into the gravel and clogging the drainage pipe.
- Backfill the remaining 4 inches with native topsoil and compact lightly.
Troubleshooting Common Landscaping Log Failures
Even with proper installation, environmental factors can cause issues. Use this diagnostic matrix to identify and correct structural anomalies.
| Symptom | Root Cause | Corrective Action |
|---|---|---|
| Wall bowing outward in the center | Insufficient deadman anchors or hydrostatic pressure buildup. | Excavate backfill, install additional T-anchors at 3-foot intervals, and verify drainage pipe is not clogged with silt. |
| White, chalky residue on log faces | Copper leaching from MCA/ACQ treatment due to highly acidic soil or constant moisture. | Apply a penetrating, oil-based exterior wood sealer rated for pressure-treated lumber to lock in preservatives. |
| Second tier separating from first tier | Timber screws sheared due to soil expansion/contraction freeze-thaw cycles. | Remove sheared screws, drill new pilot holes 2 inches offset from original, and install 12-inch structural lag screws. |
| Water pooling at the base of the wall | Perforated pipe lacks positive drainage or daylight exit is blocked. | Extend the daylight exit pipe using solid PVC to ensure water exits at least 5 feet away from the wall base. |
Pro Tip for Longevity: To extend the lifespan of your landscaping logs from 15 years to 30+ years, brush a coat of liquid rubber foundation coating (such as Henry 107 Asphalt Emulsion) onto the back-facing side of the logs before backfilling. This creates an impermeable moisture barrier between the treated wood and the wet soil, drastically slowing the decay process while allowing the front face to weather naturally.

