
Landscaping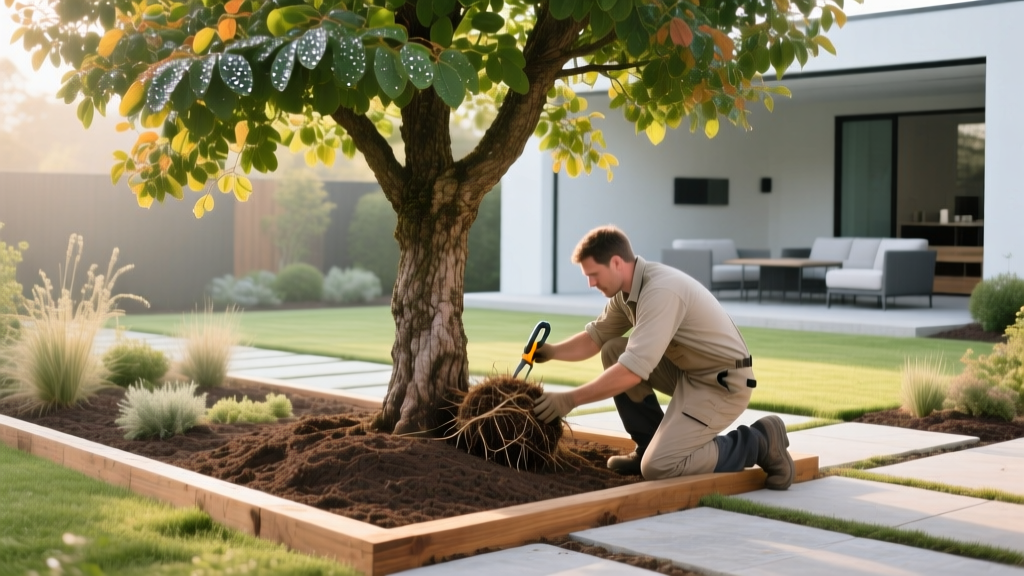
Guide to Landscaping by Butchers Nursery: Premium Tree Installation
Landscaping with mature, premium nursery stock transforms a property instantly, bypassing the decade-long wait required for saplings to establish. When executing landscaping by Butchers Nursery standards, the focus shifts entirely to field-grown, root-balled specimen trees and architectural topiary. These high-caliber plants offer immediate canopy shade and structural maturity, but their sheer size and weight demand rigorous logistical planning and specialized horticultural techniques. This guide details the exact machinery, soil preparation, and installation protocols required to successfully integrate heavy specimen stock into your landscape.
Site Assessment and Machinery Access Logistics
Standard retail nurseries sell 15-gallon container trees weighing roughly 60 lbs. In contrast, premium root-balled (RB) specimens feature 36-to-48-inch clay root balls weighing between 800 and 1,500 lbs. Before selecting your plant material, you must audit your site for heavy machinery access.
- Gate and Pathway Clearances: Measure all access points. A standard mini-excavator (e.g., Kubota U-17) requires a minimum 36-inch clearance, while a compact track loader (e.g., Bobcat T770) requires at least 72 inches. If access is restricted to pedestrian gates, you will need to budget for a mobile crane lift, which adds $1,500 to $3,000 to the installation cost.
- Subterranean Obstructions: Call your local utility marking service (like 811 in the US) to map gas, water, and fiber-optic lines. A 1,000-lb root ball dropped over a shallow irrigation main will crush the PVC.
- Soil Percolation Testing: Dig a test hole 12 inches deep and 12 inches wide. Fill it with water and let it drain completely, then refill it. Measure the drop in water level over one hour. If the water drops less than 1 inch per hour, your soil is heavily compacted clay and will require extensive amendment or the selection of water-tolerant species like Quercus palustris (Pin Oak) or Betula nigra (River Birch).
Specimen Stock Selection and 2026 Pricing Matrix
Understanding the physical footprint and cost of premium nursery stock is critical for budgeting and equipment rental. The table below outlines the standard categories of mature trees and their logistical requirements.
| Specimen Category | Typical Girth (cm) | Root Ball Diameter | Approx. Weight | 2026 Avg. Cost | Machinery Required |
|---|---|---|---|---|---|
| Standard Shade Tree | 14-16 | 70 cm | 450 kg | $850 - $1,400 | Compact Track Loader |
| Pleached Hedge Panel | 12-14 (stem) | 90x90x60 cm | 800 kg | $1,200 - $2,100 | Telehandler / Forklift |
| Mature Conifer Specimen | 20+ | 110 cm | 1,500+ kg | $3,500+ | 3-Ton Mini Excavator |
| Multi-Stem Birch | 8-10 (per stem) | 65 cm | 350 kg | $600 - $950 | Skid Steer with Pallet Forks |
The Installation Protocol: Moving and Setting Root-Balled Trees
Planting a 1,000-lb tree is a construction project as much as a horticultural one. Follow these precise steps to ensure the root system remains intact and the tree establishes correctly.
Step 1: Excavating the Planting Pit
Do not dig a deep, narrow hole. According to the University of Minnesota Extension, roots grow horizontally, not vertically. Excavate a saucer-shaped pit that is exactly the depth of the root ball, but 2.5 times wider than its diameter. This loose outer soil allows new lateral roots to expand rapidly without hitting compacted walls.
Step 2: Rigging and Lifting
Never wrap chains or cables directly around the trunk or the root ball, as this will strip the bark and fracture the clay ball. Use wide, synthetic nylon tree slings. Employ a 'choke hitch' around the base of the trunk just above the root flare. When using an excavator, keep the root ball as close to the ground as possible during transit to maintain a low center of gravity and prevent tipping.
Step 3: Locating the Root Flare
Before lowering the tree into the pit, you must locate the root flare—the exact point where the trunk widens and transitions into the structural roots. Nursery workers often bury the flare during field cultivation. Use a hand trowel to brush away the top 2 to 4 inches of soil from the root ball until the flare is fully exposed. Planting the tree even two inches too deep will suffocate the phloem tissue and lead to trunk girdling roots within five years.
CRITICAL WARNING: The Wire Basket Dilemma
Most premium root-balled trees are secured in heavy galvanized wire baskets. The Royal Horticultural Society (RHS) advises leaving the bottom and sides of the wire basket intact to prevent the root ball from collapsing during the lift. Once the tree is set in the hole, use bolt cutters to remove the top three horizontal rings of the wire basket, and cut away any exposed synthetic burlap. Leave the natural jute burlap on the sides, as it will decompose within a single season.
Step 4: Backfilling and Soil Amendment
Avoid the common mistake of filling the hole entirely with rich potting compost, which creates a 'bathtub effect' where water pools in the loose soil and drowns the roots. Create a backfill mix consisting of 70% native excavated soil, 20% composted pine bark, and 10% horticultural biochar. As you backfill, use a blunt iron rod to probe the soil and eliminate large air pockets without compacting the earth.
Staking and Guying for High-Wind Exposure
Trees with a trunk caliper over 4 inches or a mature height exceeding 15 feet require stabilization until their structural roots anchor into the native soil. Traditional wooden stakes driven into the root ball are insufficient for heavy specimens and often damage the root mass.
Instead, utilize a 3-point underground guying system. Drive three 18-inch galvanized duckbill earth anchors (such as Deadman Earth Anchors) into the undisturbed soil outside the planting pit, spaced exactly 120 degrees apart. Attach UV-resistant aircraft cable to the anchors and run the cables up to the trunk, securing them with wide, flexible rubber trunk guards. The cables should form a 45-degree angle with the ground. Check the tension every three months and loosen the turnbuckles slightly as the trunk expands in girth to prevent the cable from girdling the bark.
12-Month Establishment and Irrigation Schedule
Premium nursery stock experiences significant transplant shock as up to 80% of its fine feeder roots are severed during the harvesting process at the nursery. A rigid irrigation protocol is non-negotiable.
- Volume Calculation: Apply 10 gallons of water per inch of trunk caliper per watering session. A tree with a 4-inch caliper requires 40 gallons per session.
- Frequency: Water twice a week for the first 12 weeks, then once a week for the remainder of the first growing season. Use a slow-release watering bag (e.g., Treegator) placed over the root ball to allow water to percolate deeply over 6 to 8 hours, rather than running off the surface.
- Mycorrhizal Inoculation: During the initial backfilling, apply a granular mycorrhizal fungi treatment (such as Rootgrow or MycoApply) directly to the exposed root edges. These beneficial fungi form a symbiotic relationship with the roots, effectively increasing the root surface area by up to 700% and accelerating drought tolerance.
Frequently Asked Questions
Should I fertilize a newly planted specimen tree?
No. Do not apply high-nitrogen synthetic fertilizers during the first 12 months. Nitrogen forces rapid top-growth (foliage) that the severed root system cannot support, leading to hydraulic failure and dieback. Focus entirely on root development via consistent watering and mycorrhizal fungi. Wait until the second spring to apply a slow-release, low-nitrogen organic fertilizer.
How do I handle heavy clay soil that holds water for days?
If your percolation test reveals severe drainage issues, do not plant the tree at the original grade. Elevate the root ball so that the top 20% of the root ball sits above the surrounding native soil grade. Mound the backfill mix up to the root flare in a gentle slope. This ensures the upper crown roots have access to oxygen, which is critical for survival in poorly drained soils.
When is the best time of year to install heavy root-balled trees?
The optimal window is late autumn after the tree has dropped its leaves and entered dormancy, or early spring just before bud break. Harvesting and moving heavy root-balled trees in the heat of mid-summer results in catastrophic transpiration loss and a mortality rate exceeding 50%, regardless of irrigation efforts.

